

Carry 75–80% on Your Hips: Backpack Fit with a 5 Line Checklist

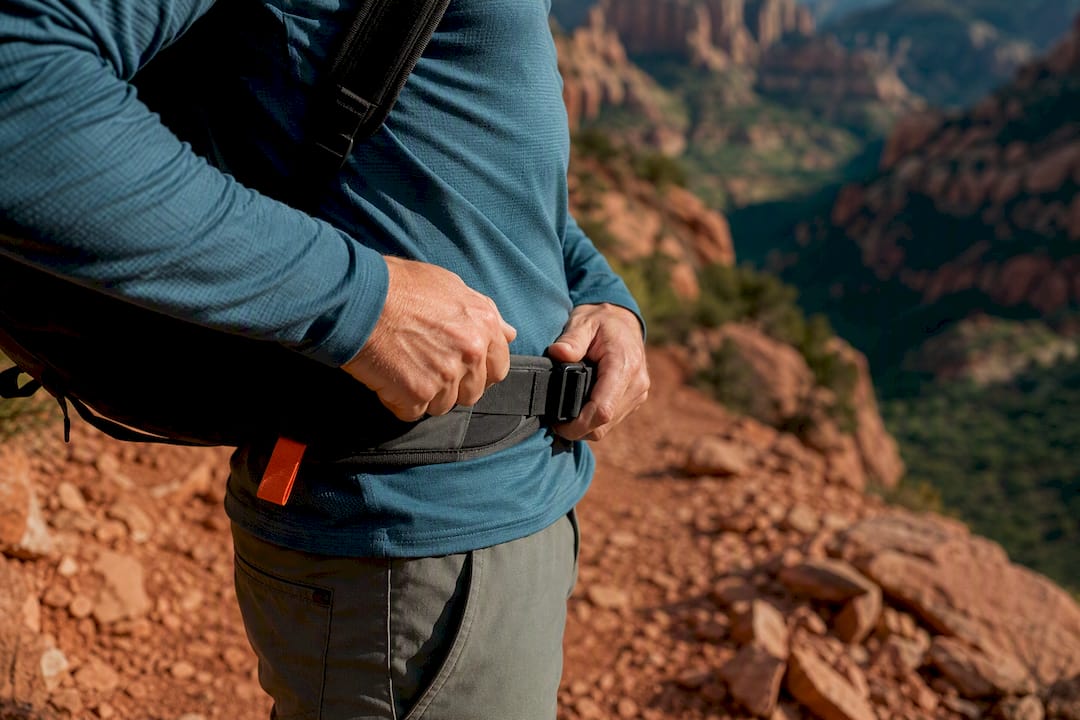
Fix your backpack fit in one sequence: measure your torso from the C7 vertebra to your iliac crest, pick a pack sized to that number, then adjust the hipbelt first so your hips carry roughly 75–80% of the load, before touching the shoulder straps, load lifters, or sternum strap. You need a soft tape measure, a friend to help, and about ten minutes.
TL;DR:
Proper pack fit requires measuring torso length from C7 vertebra to the iliac crest and adjusting the hipbelt to load roughly 75-80% of the weight onto the hips.
Pack volume should match trip duration, with smaller sizes for day and overnight trips, and larger capacities for extended expeditions, avoiding unnecessary bulk.
Fitting steps must be done in sequence: hipbelt first, then shoulder straps, load lifters at 25 to 45 degrees, and finally the sternum strap, with small, incremental adjustments.
Load placement should keep the heaviest gear close to the spine at mid-back height, balanced carefully to prevent shifting and reduce fatigue.
Re-adjust the fit during trips as terrain, weight, and conditions change, prioritizing comfort, safety, and minimizing shoulder load.
Table of Contents
How to Measure Torso Length and Hip Circumference
Pack sizing has nothing to do with your height. Two people who are both 5’10" can need completely different pack sizes because torso length varies independently of overall height, and torso length is the measurement that actually determines fit.
Here’s how to get an accurate number:
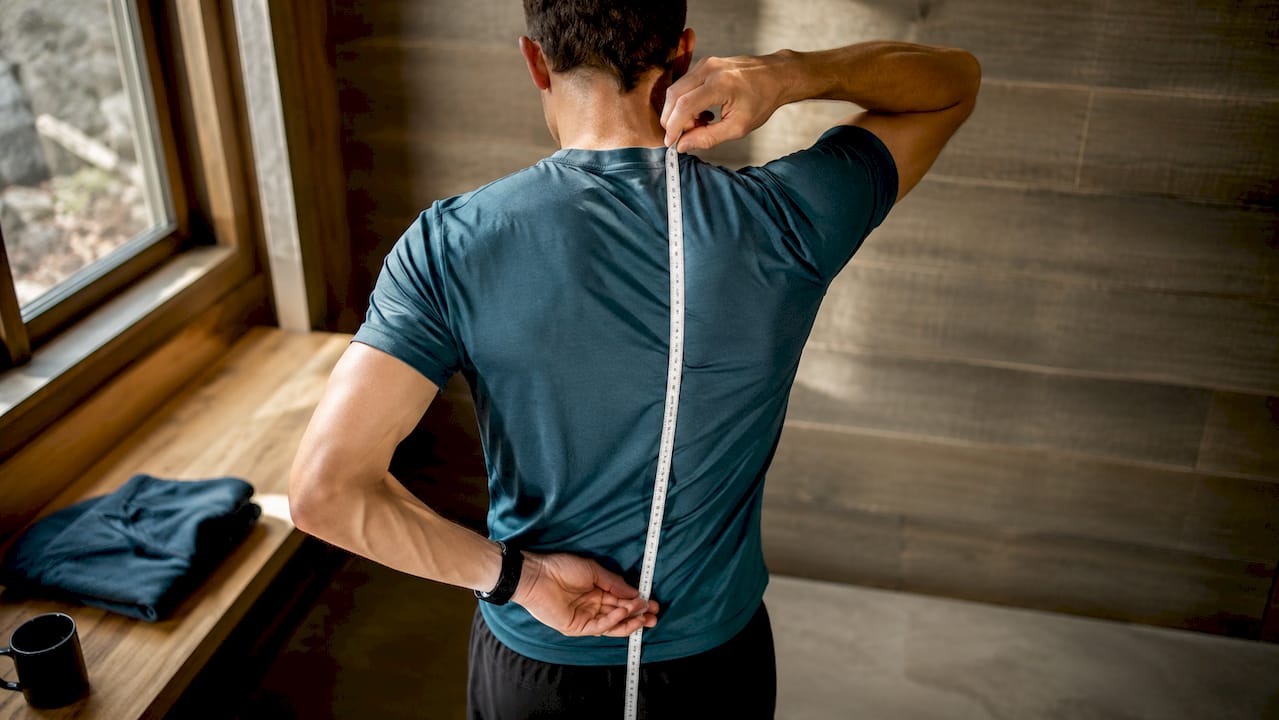
Tilt your head forward and find the bony bump at the base of your neck. That’s your C7 vertebra, and it’s your starting point.
Have a partner place their hands on the top of your hip bones, thumbs pointing back, to locate your iliac crest.
Run a flexible tape measure down your spine from C7 to the midpoint between those thumbs.
Record the number in both inches and centimeters. Most brands list one or the other, sometimes both.
Wrap the tape around your waist at the same iliac crest height, over the clothing you’ll actually hike in, to get hip circumference. Layering changes this number by an inch or two depending on the season, so measure in typical trail clothes rather than a t-shirt if you mostly hike in colder weather.
Hip measurement matters less than torso length because hipbelts flex across a wider range than shoulder harnesses do, but it still confirms you’re not sitting at the extreme edge of a belt’s range. Match both numbers against the manufacturer’s size chart, or, if the pack has an adjustable suspension, set it to your exact torso length rather than rounding up.
Choosing Pack Volume by Trip Duration and Load
Bigger isn’t safer. A larger pack just gives you more room to pack things you didn’t need, and that extra weight ends up on your hips and knees at mile twelve. The smarter move is picking the smallest volume that actually fits your kit for the trip in front of you.
Rough capacity ranges by trip length:
Day hikes: 15 to 30 liters
Overnight trips: 30 to 45 liters
Weekend trips (2 to 3 days): 45 to 60 liters
Extended trips (4 to 7 days): 60 to 75 liters
Multi-week expeditions: 70 liters or more
Pro Tip: Pack volume guidance from Backpacker also points to a useful rule of thumb: roughly 20% of a well-fitted load should register on your shoulders, with the rest riding on your hips and legs. If your shoulders feel like they’re carrying more than a fifth of the weight, that’s a fit problem, not a fitness problem.
Smaller packs also force better packing discipline. When there’s no room for a third fleece, you leave it home.
The Fitting Sequence: Hipbelt, Shoulders, Load Lifters, Sternum
Order matters here. Fit each piece out of sequence and you’ll chase phantom problems that a five-minute reset would have solved.
Start by loading the pack with something in the 10 to 20 pound range, close to what you’d actually carry. Loosen every strap completely before you put it on.
Hipbelt first. Center the belt so it wraps over your iliac crest, not your waist above it, and cinch it until you feel the load settle onto your hip bones rather than pulling on your shoulders. Done right, you should be able to shrug your shoulders and feel the pack barely move.
Shoulder straps second. Pull them snug enough to keep the pack from swaying, but they shouldn’t be bearing weight. If you feel pressure building across your collarbone, that’s the tightness trap: over-tightened shoulder straps pull weight off the hips and back onto the shoulders, which defeats the whole point of the hipbelt.
Load lifters third. These are the small straps running from the top of the shoulder straps to the pack frame. Pull them until they sit at roughly a 25 to 45 degree angle from your shoulder. Flatter than that and they’re doing nothing; steeper and they’re crushing your shoulders instead of stabilizing the load.
Sternum strap last. Position it about an inch below your collarbone and tighten just enough to keep the shoulder straps from sliding outward. If it restricts your breathing, it’s too tight.
Pro Tip: Make small changes, not big ones. Loosen or tighten each strap a half inch at a time and walk a few steps before adjusting again. Check yourself in a mirror or ask your partner if the pack sits level and centered on your spine, not tilted to one side.
Fit Checks and Troubleshooting
Before you leave the house, run through a quick physical test. Walk around, jog in place for ten seconds, and lean forward like you’re picking something off the ground. A properly fitted pack barely moves.
No pressure points digging into your shoulders or collarbone
No bouncing or side-to-side sway when you jog in place
Load lifters sitting at that 25 to 45 degree angle, not flat or vertical
Sternum strap secure without restricting your breathing
Hips, not shoulders, feeling the bulk of the weight
Symptom | Likely Cause | First Fix |
Shoulder pain or numbness | Hipbelt too loose or shoulder straps overtightened | Re-seat hipbelt on iliac crest, loosen shoulders |
Pack bounces when walking | Load lifters too loose, load poorly compressed | Tighten load lifters, cinch compression straps |
Hipbelt won’t stay put | Belt too large or torso length mismatch | Try a smaller size or different suspension setting |
Persistent lower back ache | Weight sitting too low or too far back | Reload with heavy items higher and closer to spine |
If tightening the hipbelt to its last notch still leaves it loose, or your torso length falls outside a pack’s adjustable range even at the extreme setting, that’s not a strap problem. That’s a sizing problem, and it means trying a different size or brand.
Packing for Balance: Where Weight Should Actually Go
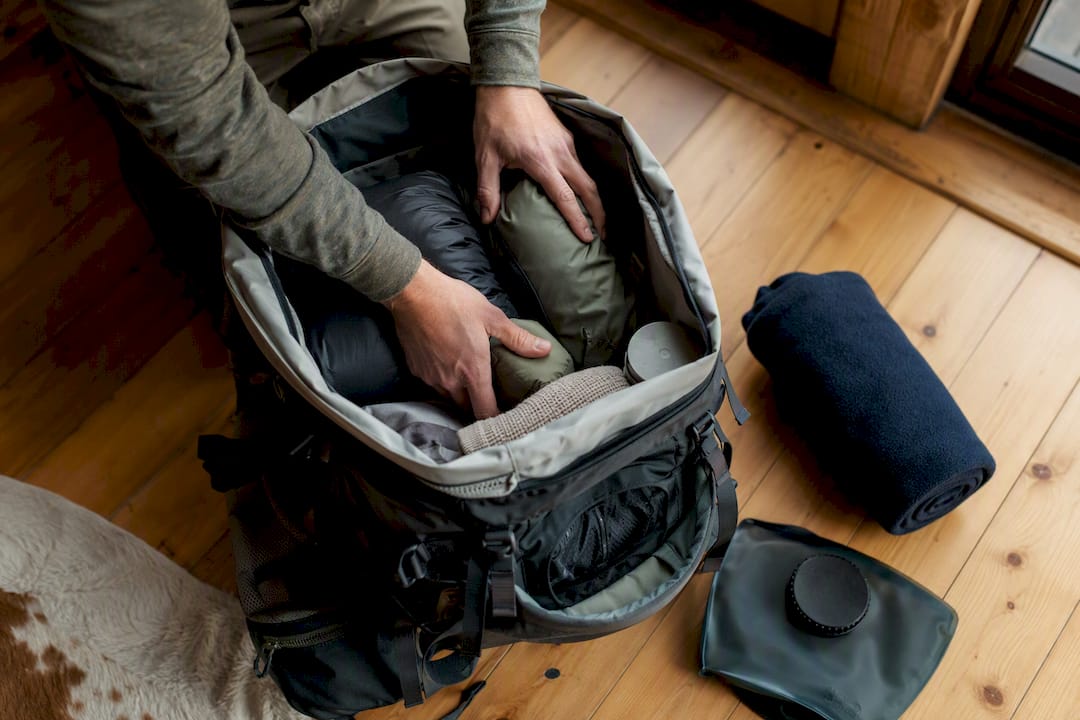
A perfectly adjusted hipbelt won’t save you from a badly loaded pack. Heavy items belong close to your spine and at roughly mid-back height, not down at the bottom or pressed against the outer edge of the pack. That keeps your center of gravity stable instead of pulling you backward or side to side on uneven ground.
A few packing habits that keep the load where it should be:
Put your heaviest gear, like a stove or water reservoir, directly against the frame at shoulder-blade to mid-back height
Use compression straps to cinch the load tight against your back rather than letting it shift inside a half-empty pack
Keep frequently used items in hip-belt pockets or top lids, not buried where you’ll need to unpack to reach them
Rebalance as you go, since a full water supply and several days of food can weigh several pounds that disappear over a trip, shifting your balance as you eat and drink
Thoughtful gear choices, including multi-use items that cut down on total volume, make this whole process easier because there’s simply less to balance.
On-Trail Tweaks and When to Re-Adjust
Your fit isn’t static. Terrain, temperature, and how much food and water you’ve burned through all change how a pack sits, and small tweaks mid-hike beat stopping to redo everything.
Snug the hipbelt slightly after a big water refill or food resupply
Tighten load lifters going uphill, loosen them slightly on descents to keep the pack from pulling you backward
Loosen the sternum strap if you’re breathing hard on a climb
Run the same quick test you did at home: walk, jog a few steps, lean forward. If the pack shifts noticeably more than it did that morning, something’s changed enough to warrant a reset.
Pro Tip: Memorize your home fit settings before you leave, down to which notch the hipbelt sits on. That mental baseline makes a trailside reset take thirty seconds instead of ten minutes of guesswork.
Why Fit Matters: Safety, Fatigue, and Performance
A pack that dumps weight onto your shoulders instead of your hips doesn’t just feel uncomfortable. It drains energy faster, strains your lower back, and raises your risk of the kind of fatigue-driven missteps that cause falls on technical terrain. Getting the fit right is one of the simplest ways to protect both your stamina and your safety on longer trips.
Gear selection compounds this. Choosing lighter, well-matched equipment means less total weight for your hips to manage in the first place, and pairing that with a properly adjusted suspension is what actually gets you to camp without your shoulders screaming.
Internal Frame, External Frame, or Frameless: What Changes
Frame type changes how weight moves through the pack and how forgiving the fit needs to be.
Internal frame packs dominate the market for good reason. Aluminum stays or a plastic frame sheet sit inside the pack body, hugging your back and letting you lean, scramble, and move through brush without a frame catching on branches. They also transfer weight to the hips efficiently, which is why the fitting sequence in this guide applies most directly to them.
External frame packs are less common now but still show up for heavy, bulky loads like multi-week expedition gear. The rigid frame sits outside the pack bag, holding the load away from your back. That improves airflow and can carry heavier weights more rigidly, but it shifts your center of gravity further back, which makes balance trickier on uneven trails and rock scrambles.
Frameless packs, popular in ultralight circles, rely on tight, careful packing (and sometimes a foam pad rolled inside) to create structure instead of an actual frame. They only fit well when the load stays light, generally under 20 to 25 pounds, because without a frame, weight has nowhere to go but straight onto your shoulders. Fit here depends less on strap adjustment and more on how you pack: a poorly packed frameless bag will sag and dig into your back no matter how you cinch the straps.
Match the frame type to your load before worrying about strap position. No amount of adjusting fixes a frameless pack carrying frame-pack weight.
Fitting Different Body Types: Height, Torso, and Gender Differences
Torso length, not height, drives fit, but body proportions still create real differences between hikers.
Many women’s-specific packs use shorter torso ranges, narrower shoulder strap spacing, and hipbelts contoured for a more pronounced hip-to-waist curve. That’s not marketing. A standard unisex hipbelt can sit too high or dig into the hip bone at an awkward angle on a narrower waist-to-hip ratio, which is exactly the kind of fit problem strap adjustments alone can’t fix.
Tall and short torsos face a different issue: falling outside a pack’s adjustable range entirely. Someone with a 21-inch torso trying to squeeze into a suspension built for 16 to 20 inches will hit the frame’s limit before the hipbelt ever sits correctly on the iliac crest. That’s not a tightening problem. It’s the wrong size pack, and the fix is trying a different size, not fighting the straps harder.
If your torso measurement lands between two sizes, try both in person rather than guessing, since brands define their size ranges differently and a “medium” from one company can run shorter than another’s “small.” Broad shoulders, narrow hips, or a longer-than-average torso relative to your height are all reasons to prioritize the measurement over the size label on the shelf.
Why Fit Changes With Load and Trip Conditions
The fit you set at home with a half-empty pack won’t hold once you add four days of food and a full water supply. Weight changes how a suspension behaves, and a hipbelt that felt perfect at 15 pounds can feel completely different at 35.
Heavier loads need more load-lifter angle and a firmer hipbelt to keep weight from sagging away from your spine. Lighter loads, like a summer overnight with minimal gear, need less tension everywhere. Over-tightening a lightly loaded pack creates unnecessary pressure points for no benefit, since there’s not enough weight to justify it.
Terrain matters just as much as pack weight. A steep, technical climb benefits from a slightly tighter load lifter setting that pulls weight closer to your back for better balance. Flat, easy trail lets you loosen everything for more ventilation and freedom of movement. Weather plays a role too. Cold-weather trips mean bulkier layers under the hipbelt and shoulder straps, which often means backing off the tension you’d use in summer clothing.
None of this means refitting your pack every hour. It means treating your initial adjustment as a starting point, not a permanent setting, and expecting to tweak it as your pack gets lighter over the course of a trip or as the trail underfoot changes.
Fitting a Daypack vs. a Multi-Day Pack
The stakes of getting fit wrong scale with how long you’re carrying the weight, and daypacks and multi-day packs need different priorities.
Daypacks rarely carry more than 15 to 20 pounds, so a lot of the hipbelt precision that matters on bigger packs matters less here. Many daypacks skip a substantial hipbelt entirely, relying mostly on shoulder straps and a light waist strap for stability rather than serious weight transfer. Fit still matters for comfort and to stop the pack from bouncing on trail runs or scrambles, but the consequences of a slightly-off fit are minor discomfort, not a wrecked back four hours into a five-day trip.
Multi-day packs carry real weight over real distance, which makes every step in this guide worth the extra five minutes. A hipbelt that’s slightly miscentered on a 20-pound daypack is annoying. The same problem on a 45-pound multi-day load, carried eight hours a day for a week, causes hip bruising, shoulder numbness, and the kind of cumulative fatigue that ends trips early.
The practical takeaway: spend less time obsessing over a daypack’s fit and more time obsessing over a multi-day pack’s, because that’s where a properly seated hipbelt and correctly angled load lifters pay off the most.
Your Five-Line Fit Checklist
Measure torso from C7 to iliac crest. Set the hipbelt first, always. Load lifters at 25 to 45 degrees. Shoulders snug, never bearing weight. Sternum strap comfortable, not restrictive.
Spend 10 to 15 minutes testing fit with a representative load before any trip, not the morning you leave. Write down your torso and hip numbers somewhere you’ll actually find them again. Every future pack purchase gets faster once you already know your numbers instead of guessing in a gear shop aisle.
— S
Sources
Recommended
Comments