

Emergency Signaling Guide for Hikers: Get Found Fast

TL;DR:
Trigger electronic SOS devices first to reach rescuers quickly, then use audible and visual signals to guide them.
Staying in a visible, open location and layering multiple signals increases your chances of being found in the wilderness.
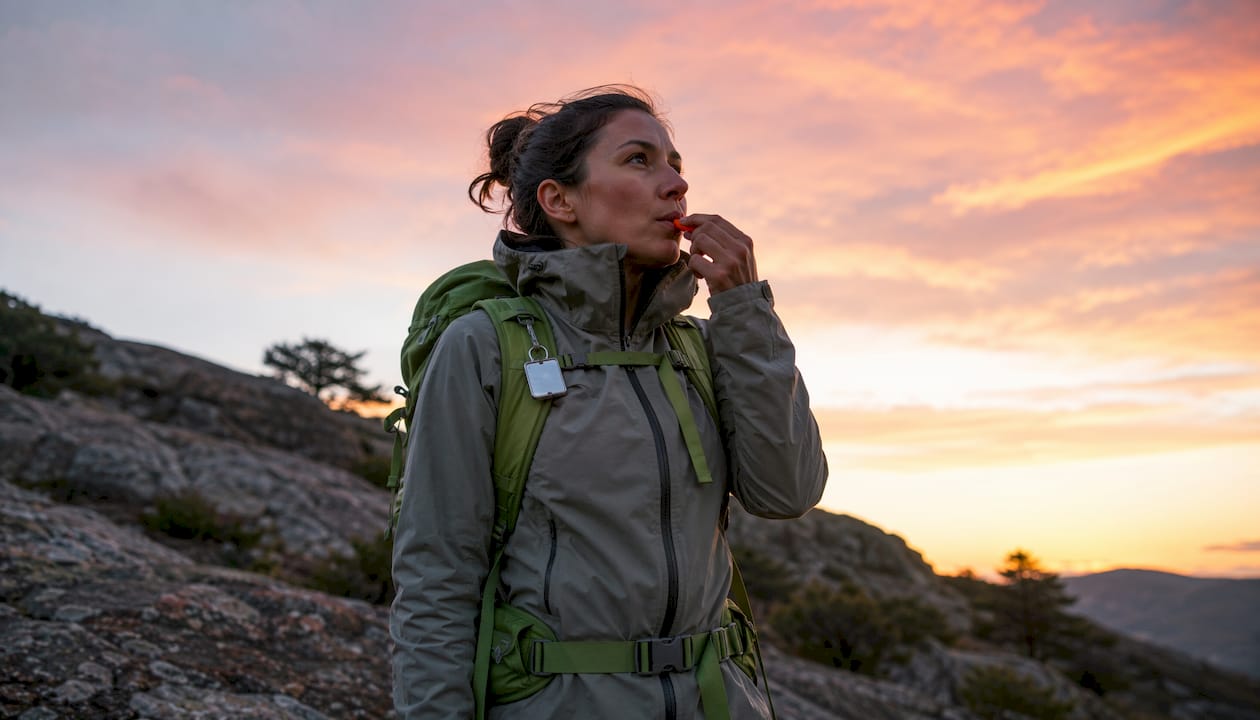
The fastest way to get rescued is to trigger any electronic SOS device you have, then run repeatable three-count audible and visual signals from a safe, open spot. That’s the whole system in one sentence. Everything below makes you better at executing it.
If you’re in trouble right now, do these in order:
Activate your PLB or satellite messenger (or call 911 if you have cell service)
Blow three sharp whistle blasts, pause, repeat
Flash a light or mirror three times toward the sky or any aircraft
Lay your most brightly colored gear flat in an open clearing
Stay put unless moving is clearly safer than waiting
Memorize this: Electronic SOS first, three-count signals second, stay visible and stay put.
Table of Contents
Why signaling works and how to choose the right method first
Day and night visual signals: mirrors, lights, fire, and flares
How to build ground-to-air signals rescuers can read from altitude
PLBs, satellite messengers, cellphones, and radio distress procedures
When to stay put, when to move, and how to pace your signaling
Why signaling works and how to choose the right method first
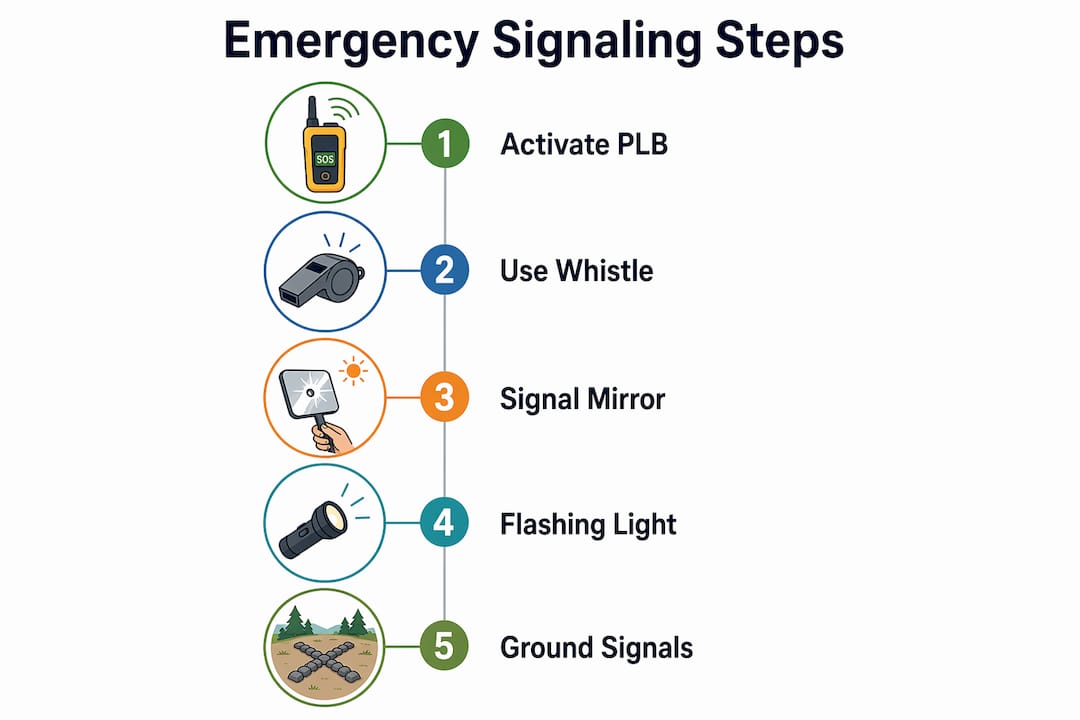
Treat signaling as a system: electronic activation reaches farther than any sound or light you can produce by hand, so it goes first. Audible signals come next because they work in dense forest and low visibility. Visual signals cover open terrain and daylight. Ground signals communicate to aircraft when you can’t do anything else.
Priority order in the field:
Electronic SOS (PLB, satellite messenger, cell call to 911)
Audible (whistle, gunshot, banging metal)
Visual (mirror, flashlight, flares, fire)
Ground signals (X, V, SOS laid with rocks or logs)
Stay put unless you’re injured and need to reach water, nightfall is imminent and you lack shelter, or you’re certain of your route and can move without additional risk. Moving without leaving clues makes SAR’s job dramatically harder. If you do move, mark your last position with a ground arrow and drop intentional clues along your route.
Layering signals multiplies your detectability. A PLB transmits your coordinates; a whistle guides a ground team to your exact tree line; a mirror flash catches a pilot’s eye from miles away. No single method covers every scenario, so run as many simultaneously as your energy and resources allow.
How to use audible signals so they actually carry
The universal distress pattern is three signals in a row: three blasts, three shouts, or three bangs, followed by a pause, then repeated. SOS in Morse is three short, three long, three short. Both patterns are internationally recognized and unlikely to be confused with random noise.
Whistle technique:
Use a pealess whistle (Fox 40, Storm, or similar) — they work wet and at altitude.
Blow three short, hard blasts. Hard and short carries farther than one long blow.
Pause 60 seconds, then repeat. A sample schedule: signal for one minute, rest for two.
Face different directions on alternating sets to cover more terrain.
Cup your hands around your mouth when shouting to project sound forward.
Voice is a last resort. Shouting drains energy fast, strains your airway, and carries poorly in wind. Use it only when you hear rescuers nearby. Banging a metal pot or rock against a tree trunk works well in dense forest where whistles may be muffled by foliage.
Pro Tip: Clip your whistle to your chest strap or zipper pull before every hike, not buried in your pack. After a fall or injury, you may only have one functional hand — practice reaching it that way.
Day and night visual signals: mirrors, lights, fire, and flares
Daytime signals
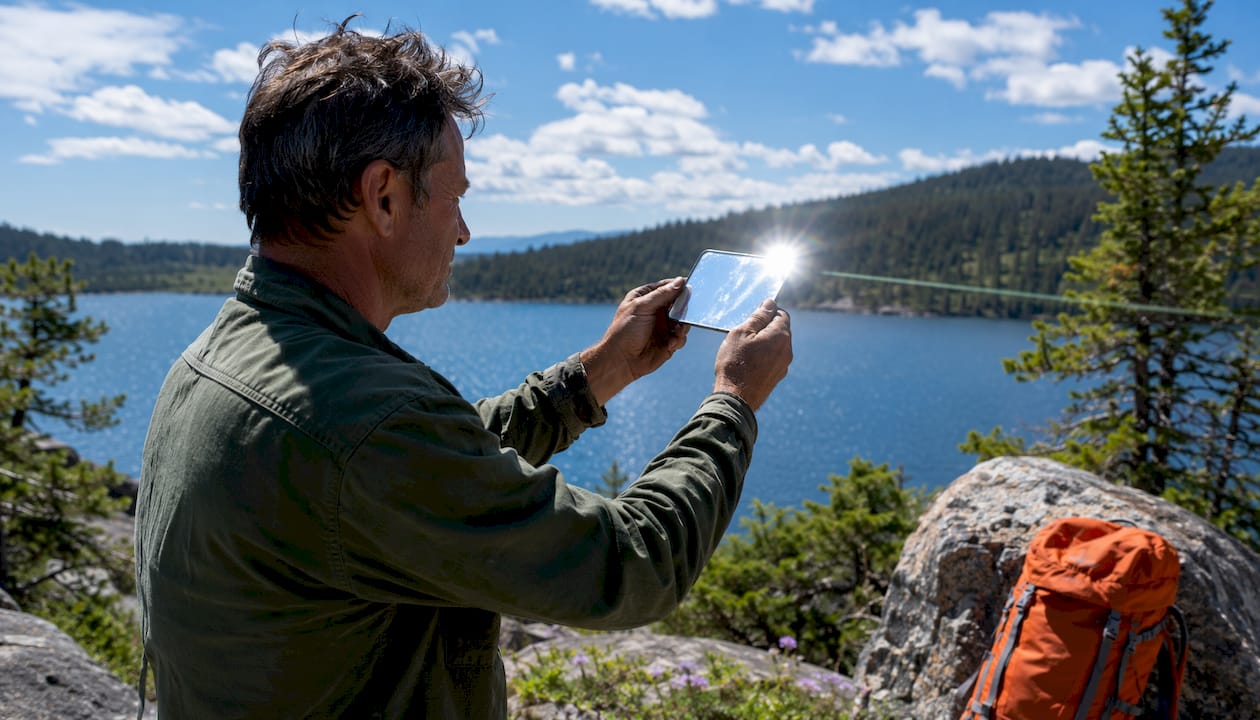
A glass signal mirror is the single most effective daytime visual tool. Properly aimed, it produces a flash visible for miles. Hold the mirror close to your eye, extend your other hand, and create a “V” with two fingers around your target (an aircraft or ridgeline). Tilt the mirror until reflected sunlight hits your fingers, then sweep slowly across the target. Even a phone screen or polished metal can work when aimed with proper technique.
Lay bright fabric, an emergency blanket, or a high-contrast tarp in a clearing. The goal is maximum contrast against the ground: orange on green, silver on brown. Secure the corners with rocks so wind doesn’t flip it.
Nighttime signals
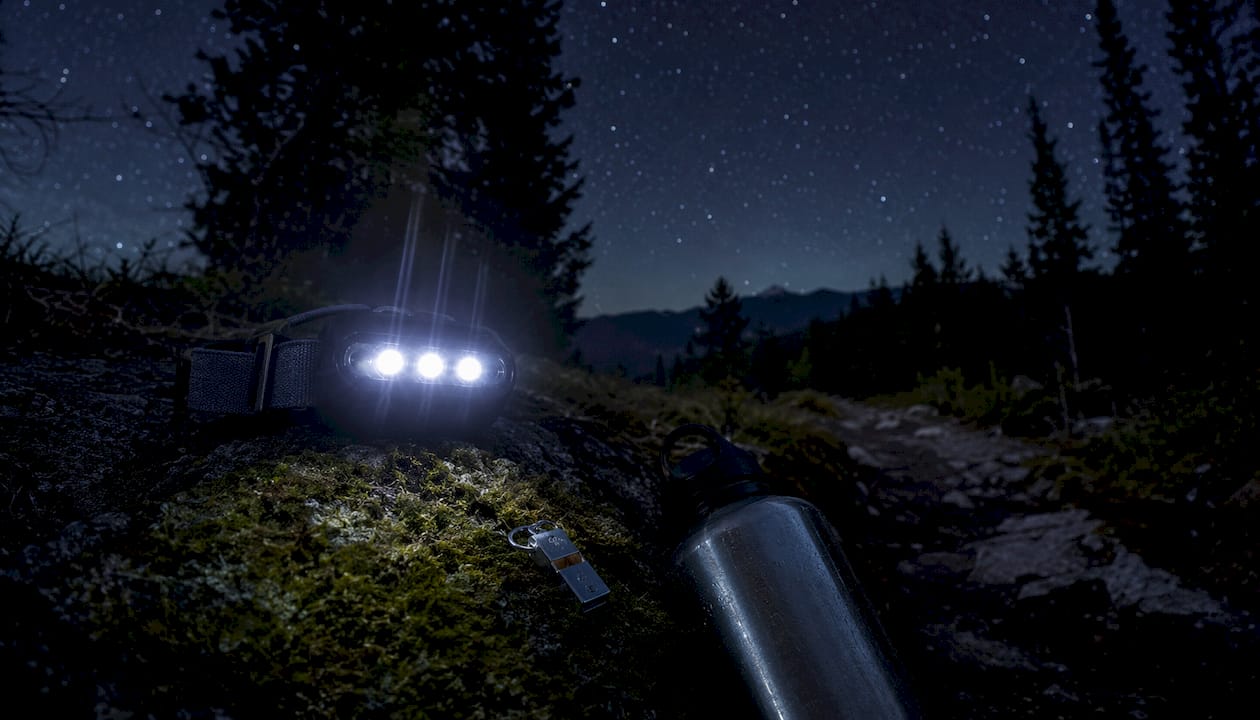
Switch to a headlamp or flashlight with a strobe mode. Flash three times, pause, repeat. SOS in Morse (three short, three long, three short) works on any light source. Point the beam upward at a 45-degree angle toward likely aircraft routes rather than straight up, which scatters light.
Flares are powerful at night. Red parachute flares and red star shells are recognized distress signals across maritime and land contexts. Use them only when you hear or see an aircraft or rescue vehicle — a flare burns for seconds, so timing matters. Check local regulations before carrying pyrotechnic flares in wilderness areas.
Fire and smoke
Three separate fires arranged in a triangle is a recognized distress signal. Space them roughly 100 feet apart. Daytime: add green leaves, wet grass, or rubber to produce dark smoke against a light sky. Nighttime: keep flames bright and clear. Never build signal fires in high fire-danger conditions. Use a fire-starting guide to build a controlled fire on mineral soil with a cleared perimeter.
Signal Type | Best Conditions | Effective Range | Key Caution |
Signal mirror | Sunny, open sky | Miles | Requires sun angle |
Whistle | Any, dense forest | Up to 1 mile | Conserve energy |
Strobe/flashlight | Night, low visibility | Several miles | Battery life |
Smoke fire | Daytime, calm wind | Miles from air | Wildfire risk |
Flares | Night, aircraft nearby | Miles | Time activation |
How to build ground-to-air signals rescuers can read from altitude
Ground symbols communicate directly to aircraft when you have no other means. The ICAO ground-to-air visual signal code defines two symbols every hiker should know:
X = require assistance
V = require medical assistance
SOS works too, but X is faster to build and equally understood by pilots.
Step-by-step ground signal construction:
Choose an open area: gravel bar, meadow, snow field, or bare ridgeline.
Make each symbol at least 10 feet tall and proportionally wide. Bigger is always better.
Use the highest-contrast materials available: dark rocks on snow, bright fabric on dirt, logs on grass.
Stomp or scrape lines into snow or soft soil if you lack materials — disturbed ground reads differently from the air.
Add an arrow pointing toward your shelter or direction of travel so rescuers know where to look next.
Check the symbol from a short distance to confirm lines are straight and gaps are clear.
Avoid accidental patterns. A random pile of gear or a scattered campsite can look like noise from altitude. Deliberate, geometric shapes read as intentional. Use paracord to keep logs or fabric strips aligned in straight lines.
PLBs, satellite messengers, cellphones, and radio distress procedures
Electronic devices
A 406 MHz PLB transmits a registered digital signal to the Cospas-Sarsat satellite network, which routes your alert to a Rescue Coordination Center. Because the device is registered to you, the RCC can call your emergency contacts to verify the activation before committing major resources. That registration step is not optional — do it before your trip.
Satellite messengers (Garmin inReach, SPOT, and similar) add two-way messaging and GPS tracking. Smartphones can reach 911 in areas with any carrier signal, and some newer models include satellite SOS functions. After activating any device, place it in the open with a clear sky view and leave it running.
Radio distress protocols
MAYDAY signals grave and imminent danger. PAN-PAN signals an urgent situation that is not immediately life-threatening. Both are transmitted three times at the start of your call. MAYDAY commands radio silence on the frequency in use, giving your transmission absolute priority.
Sample MAYDAY call: “MAYDAY, MAYDAY, MAYDAY — [your name or group], [location or last known point], [nature of emergency], [number of people], [injuries], [any other useful information].”
For PAN-PAN, use the same structure but substitute PAN-PAN. See PAN-PAN protocol details for how urgency calls differ in practice.
Frequency | Use | Who Monitors |
121.5 MHz | Aviation emergency, homing | Civil towers, military, direction-finding stations |
243.0 MHz | Military aviation emergency | Military aircraft and towers |
406 MHz | PLB/ELT digital distress | Cospas-Sarsat satellites, RCCs |
Cell/911 | Ground rescue, any carrier | Local emergency services |
What to pack in a compact signaling kit
A signaling kit doesn’t need to be heavy. The goal is redundancy across three categories: electronic, audible, and visual.
Minimal day-hike kit:
Pealess whistle (clipped to chest strap)
Glass signal mirror or reflective device
Compact headlamp with strobe mode
High-contrast bandana or small orange flag
Emergency mylar blanket (doubles as ground panel and shelter)
Expanded overnight/multi-day kit:
406 MHz PLB or satellite messenger (registered before departure)
Pyrotechnic flares where legal (check state and federal land rules)
Larger signal mirror
Spare batteries or a small power bank
Small bright tarp for ground panels
Pack signaling items in the top pocket or hip belt of your pack, never at the bottom. Pair your kit with a solid camping first aid kit — injuries and signaling needs often arrive together. Check batteries monthly, confirm PLB registration annually, and test strobe modes before each trip. Device maintenance is the step most people skip, and it’s the one that matters most when the device actually needs to work.
How to pick a signaling site and build signals safely
Site selection is as important as the signal itself. A perfect mirror flash from a dense forest floor reaches nobody.
Site checklist:
Open sky view in at least a 180-degree arc
Near a natural travel line (ridge saddle, river bar, trail junction) that SAR aircraft typically search
Away from avalanche paths, dead-standing trees, and rockfall zones
Close to your last known point if you haven’t moved far
Fire safety is non-negotiable. Check current fire restrictions for your area before lighting anything. Build on mineral soil, clear a perimeter of at least 10 feet, keep the fire small, and never leave it unattended. Use green vegetation for smoke only when wind is calm enough to keep smoke rising rather than spreading horizontally into dry brush.
Pro Tip: Duct tape a strip of bright orange surveyor’s tape to a high branch above your signaling site. It moves in wind, catches light, and marks your position even when you’re resting or asleep.
Protect electronic devices from moisture by keeping them in a zip-lock bag inside your kit. Rotate strobe modes strategically: run strobe for 10 minutes every hour rather than continuously, which extends battery life significantly. Follow all local wildfire and land-use rules; illegal flare use or unauthorized fires can result in fines and, worse, a new emergency.
When to stay put, when to move, and how to pace your signaling
The default answer is stay put. SAR teams search outward from your last known point, and a moving target is exponentially harder to find.
Decision checklist:
Are you injured in a way that moving worsens the injury? Stay.
Do you have shelter, water, and signaling capability where you are? Stay.
Is nightfall within two hours and your route uncertain? Stay.
Are you confident in the route, physically capable, and within a short distance of help? Consider moving, but leave clear clues.
Is your current position genuinely dangerous (rising water, unstable ground)? Move to the nearest safe open site.
For battery management, run electronic devices on their lowest effective power setting when not actively transmitting. A sample light schedule: strobe for 5 minutes, off for 25, repeat. For whistles, signal for one minute, rest for two. Keep a simple log — scratch times and actions into dirt or write them on a piece of gear — so rescuers can reconstruct your pattern if they find the site before they find you.
Rotate your signal types: electronic transmission, then a whistle set, then a mirror sweep or strobe flash. Drink water on a schedule even when you’re not thirsty, and stay out of wind when resting. Mental focus degrades faster than physical strength in a survival situation, so small routines like a timed signal schedule give your brain something concrete to hold onto. For a deeper look at the self-rescue decision, Thrillofit’s wilderness self-rescue guide covers the tradeoffs in detail.
What SAR teams look for and how you can help them find you
Search managers build their plans around your last known point and searching data: your equipment, clothing color, intended route, and any clues you’ve left behind. The more of that information they have, the faster they narrow the search area.
Survivors who leave deliberate clues — a rock arrow pointing their direction of travel, a piece of bright gear tied to a branch, a note scratched on a flat rock — give SAR teams real-time updates that can redirect a search within hours. Consistency in your signals matters just as much. Repeated three-count patterns and large, simple ground symbols reduce the chance a pilot misreads your position or dismisses a signal as random debris.
Register your PLB before every season. When an RCC receives your 406 MHz alert, they can call your emergency contacts immediately to confirm the activation is real and gather details about your trip plan. That single step can cut response time significantly. Hang your brightest gear in the highest visible spot near your camp, keep your fire or strobe running on a predictable schedule, and record every action you take with a rough timestamp. SAR teams are good at their jobs — your job is to make the signal unmistakable.
Key Takeaways
Electronic SOS first, three-count signals second, and a visible open site always: those three priorities cover the core of any wilderness signaling situation.
Point | Details |
Prioritize electronic SOS | Activate a PLB or satellite messenger first; register it before your trip so RCCs can verify and respond faster. |
Use the three-count pattern | Three whistle blasts, three flashes, or three ground symbols is the universal distress signal recognized worldwide. |
Pick a visible open site | Choose a ridge saddle, gravel bar, or clearing with a wide sky view; signal from cover and rescuers may never see you. |
Pack a minimal kit | A whistle, signal mirror, strobe headlamp, and emergency blanket cover the basics for any day hike. |
Practice and maintain gear | Test strobes and mirrors before each trip; check PLB registration and battery status at least once a season. |
The signal you never practice is the one that fails you
Most people read a guide like this, nod along, and never once blow their whistle in the field before they need it. That’s the gap worth closing.
You don’t need a full survival course to get this right. On your next easy day hike, clip the whistle to your chest strap and practice reaching it with your non-dominant hand. Pull out the signal mirror and try the two-finger aiming method on a passing car or a distant window. Time yourself laying out your emergency blanket in a clearing. These are five-minute exercises that build real muscle memory.
The gear matters less than the habit. A $10 pealess whistle and a $5 mylar blanket, used correctly, have saved lives. A $400 satellite messenger sitting dead in a pack because the battery wasn’t checked has not. Build the pre-trip routine: charge the device, confirm registration, clip the whistle, know the three-count pattern. Then go enjoy the trail.
Thrillofit’s survival category has deeper guides on shelter, fire, and kit building if you want to keep going. The emergency preparedness checklist is a good next stop for organizing your full kit before a longer trip.
Authoritative references and further reading
These are the primary sources behind this guide. Each one is worth bookmarking.
FAA AIM — Distress and Urgency Communications (MAYDAY/PAN-PAN): The official U.S. standard for radio distress procedures, including MAYDAY and PAN-PAN phrasing, frequency use, and priority rules. Use this to verify exact radio protocol.
FAA AIM — Emergency Services, ELT/PLB/406 MHz Guidance: Covers 406 MHz beacon registration, RCC notification procedures, and how PLB activations are processed. Register your device here before every season.
FAA GEN 3.6 — Search and Rescue, ELT Frequencies: Details on 121.5 MHz, 243.0 MHz, and 406 MHz operating frequencies, who monitors them, and how SAR forces use ELT signals to locate downed aircraft and survivors.
ICAO Annex 12 — Search and Rescue, Ground-Air Visual Signal Code: The international standard defining ground symbols (X, V), minimum dimensions, and construction guidance. The authoritative source for any ground-to-air signaling question.
Find 'Em: A Guide for Planning the Search (SARBC): A SAR search-planning reference explaining how managers use last known points, searching data, and survivor clues to narrow search areas. Useful for understanding what SAR teams actually need from you.
Land Search and Rescue Addendum — National SAR Supplement: The U.S. federal guidance document for land SAR operations, covering search theory, coordination, and the roles of RCCs and on-scene coordinators.
CAP Guidance on Signaling — Mirror Use and Techniques: Civil Air Patrol training material on signal mirror technique, reflective surface alternatives, and open-site selection for visual signals.
This article is general preparedness information, not a substitute for professional wilderness training or official emergency management guidance. Verify current device registration requirements, local fire restrictions, and flare regulations with the relevant authorities for your specific area before your trip.
Recommended
Comments