

Hikers, Stop Hauling Excess Water: Plan by Hours to Your Next Source

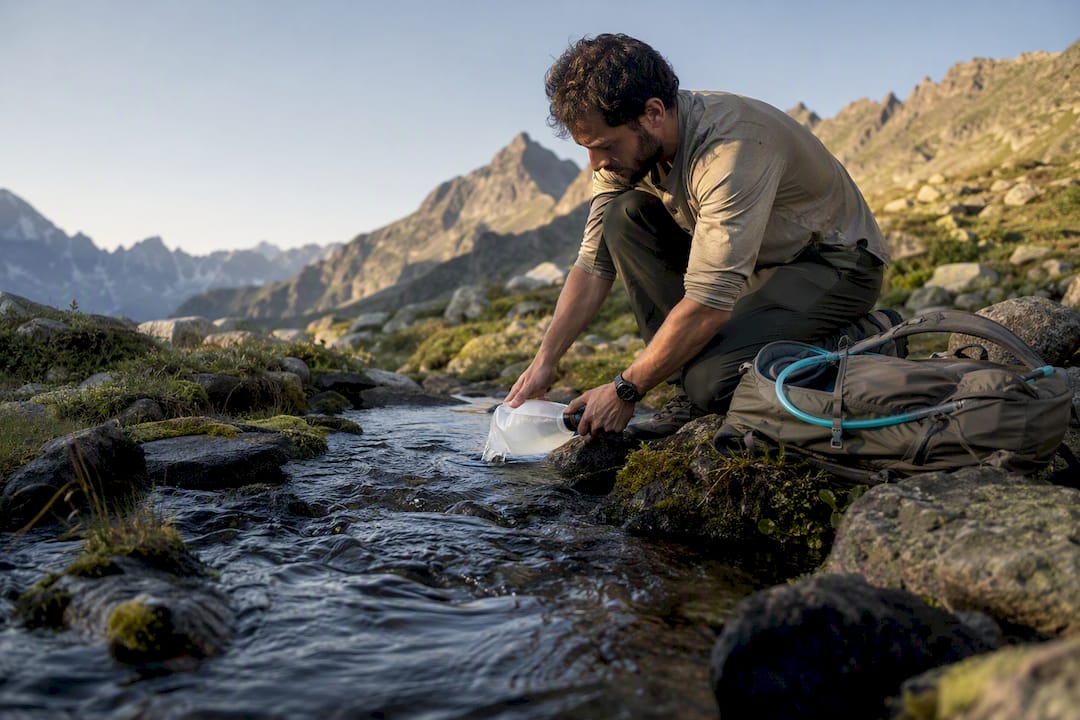
Plan on roughly 0.5 liters per hour in moderate conditions, and adjust up fast when the sun, the climb, or the pack weight changes the math. Increase intake for heat, high altitude, steep grades, and heavy packs. The safest rule: carry enough to reach your next reliable water source, plus a 1-liter buffer for the unexpected.
TL;DR:
Carry enough water to reach the next reliable source plus a one-liter buffer, especially in hot, high-altitude, or exposed environments.
Adjust water intake based on trip length, environment, and conditions, with full-day hikes often requiring two to four liters per person.
Use a simple formula: estimate hours to water, multiply by baseline rate, and add a liter, adjusting for group size and weight.
Hydration containers should match the route; a mix of soft bladders and hard bottles helps maintain steady hydration and monitor water levels.
Refill on trail when possible, using the appropriate method to avoid health risks, and always check recent water conditions before heading out.
Table of Contents
How Much Water Hiking Requires for Different Trip Lengths
The 0.5-liter-per-hour baseline from REI’s hydration guidance works for moderate effort in moderate temperatures, but that number moves depending on how long you’re out and where you’re hiking. A quick loop in the shade and an exposed desert scramble don’t belong in the same calculation, even if both last three hours.
Here’s how the baseline scales across common trip types:
Short hikes (under 2 hours): 0.5 to 1 liter is usually enough, even on warm days, since you’re rarely far from your car or a trailhead spigot.
Half-day hikes (2 to 4 hours): carry a moderate amount of water, increasing if temperatures are hot or the trail has significant elevation gain.
Full-day hikes (5 to 8+ hours): Budget 2 to 4 liters, with the exact figure depending on heat, humidity, and whether you’ll pass a spring or stream worth refilling from.
Multi-day backpacking: Plan to carry several liters per person per day, covering drinking plus cooking and basic hygiene, a range echoed by field guides like HomeyRoamy’s water-carrying breakdown.
Desert routes push these numbers hard. A summer hike through exposed slickrock in southern Utah can demand 1 liter per hour or more, since there’s no shade to slow evaporation and no shortage of climbing. A shaded forest trail in the Pacific Northwest in October might let you get away with half the standard rate, since cool, damp air barely pulls moisture from your skin. The trip length matters less than the environment you’re moving through.
The Formula That Tells You Exactly How Much to Carry
Most hikers either overpack out of anxiety or underpack out of optimism. A simple formula fixes both problems: figure out the hours to your next reliable water source, multiply by your baseline rate, then add a buffer.
Estimate hours to the next source. Use a topo map, a trail app, or recent trip reports to find the longest realistic dry stretch on your route.
Multiply by your baseline rate. Use 0.4 to 0.5 liters per hour for cool, flat terrain, and 0.8 to 1.0 liters per hour for hot, steep, or high-altitude conditions.
Add a 1-liter buffer. This covers delays, a wrong turn, or a source that turns out to be dry.
Adjust for pack weight and group needs. A heavier pack burns more energy and water; hiking with kids or a slower group extends your time on trail, which extends your water needs too.
PackLite Life’s field-planning approach centers on this same idea: plan to the longest dry stretch, not to the whole day at once, since most trails offer at least one refill point.
Scenario | Hours to next source | Rate used | Water to carry |
Mild 3-hour forest loop | 3 | 0.4 L/hr | 1 L + 1 L buffer = ~2 L |
Exposed hot desert section | 4 | 0.8 to 1.0 L/hr | 4 L + 1 L buffer = ~5 L |
High-altitude climb, cool but dry air | 5 | 0.6 L/hr | 3 L + 1 L buffer = ~4 L |
When the math says you need more water than you can comfortably carry, that’s your signal to change the route, not to grit through it. Shortening the dry stretch beats hauling six extra pounds you may never drink.
Choosing Containers That Match Your Route
The container matters almost as much as the volume. Hydration bladders let you sip without stopping, which keeps most hikers better hydrated over long days, but they freeze first in winter and you can’t glance at a gauge to check what’s left. Hard bottles are tougher, easier to monitor, and simpler to refill from a stream, though they’re heavier per liter and awkward to drink from while moving. Soft flasks split the difference: light, collapsible, and easy to stash in a pack pocket, but less durable over years of use.
A common split for a full-day hike: 2 liters in a bladder for steady sipping, plus a 1-liter hard bottle as backup and for treating fresh water on the trail. In winter, run the bladder hose under a layer or use an insulated sleeve to stop it from freezing solid. In summer heat, wrap bottles in a light-colored sleeve or stash them in shaded pack sections to slow warming.
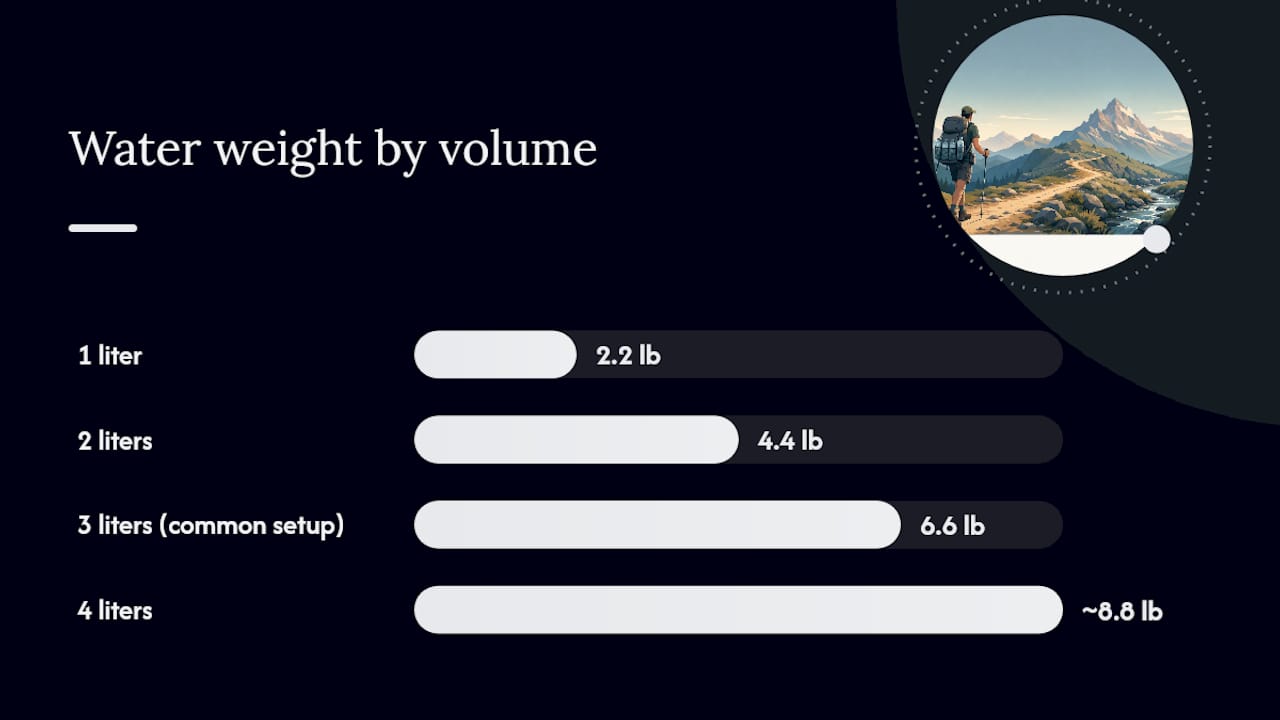
The weight adds up fast. Water runs about 2.2 pounds per liter, so 4 liters means nearly 9 extra pounds on your back before food or gear. That’s a real drag on pace over a long climb, which is exactly why planning to refill beats carrying a full day’s supply from the trailhead.
Pro Tip: Weigh your filled hydration setup once at home. Knowing your pack’s baseline weight makes it obvious when you’re carrying too much water on any given trip.
Electrolytes and Warning Signs You Shouldn’t Ignore
Water alone isn’t always enough. Electrolytes like sodium and potassium keep your muscles and nerves functioning properly, and heavy sweating on long or hot hikes depletes them faster than plain water can replace. Tablets, powders, or a diluted sports drink all work; the point is replacing salt, not just fluid.
Watch for these signs and act on them early:
Dehydration: dark urine, persistent headache, dizziness, or unusual fatigue.
Hyponatremia (too much water, too little sodium): nausea, confusion, or swelling, often after drinking large amounts of plain water without replacing salt.
Heat illness: stopped sweating, hot and dry skin, or confusion demands immediate shade, cooling, and evacuation.
A simple self-check: pale yellow urine generally signals adequate hydration, while headaches or muscle cramps that don’t improve with rest and water mean it’s time to reassess, add electrolytes, or turn around.
Refilling on the Trail Without Getting Sick
Filters remove protozoa and bacteria fast and let you drink almost immediately, but they don’t stop viruses, which matters more in areas with contaminated runoff near populated trails. Chemical treatments (iodine or chlorine dioxide) handle viruses too, but need 30 minutes or more to work. Boiling kills nearly everything but costs fuel and time you may not want to spend mid-hike.
Judging a source before you commit to it matters as much as treating it. Fast-moving water over rock tends to be more reliable than a stagnant pool. Crowdsourced trail apps and recent trip reports beat old topo map “blue lines,” since a spring marked on a map from ten years ago may be bone dry by August.
Check trail apps or ranger reports for current water conditions before you leave.
Carry a backup treatment method in case your primary filter clogs or breaks.
If a source looks uncertain, adjust your route or carry extra rather than gambling on it.
Our guide to purifying water outdoors breaks down each method step by step, including which one fits which situation.
Why Trust This Hydration Guidance
Thrillofit builds its hiking advice around field-tested habits, not generic rules pulled from a spreadsheet. Every recommendation here traces back to real trail planning: how experienced hikers actually calculate water, not how a textbook says they should. For deeper procedure, check our beginner hiking guide and our breakdown of emergency water purification methods for backup plans when a source runs dry.
Should You Drink the Same Amount at Rest and While Hiking?
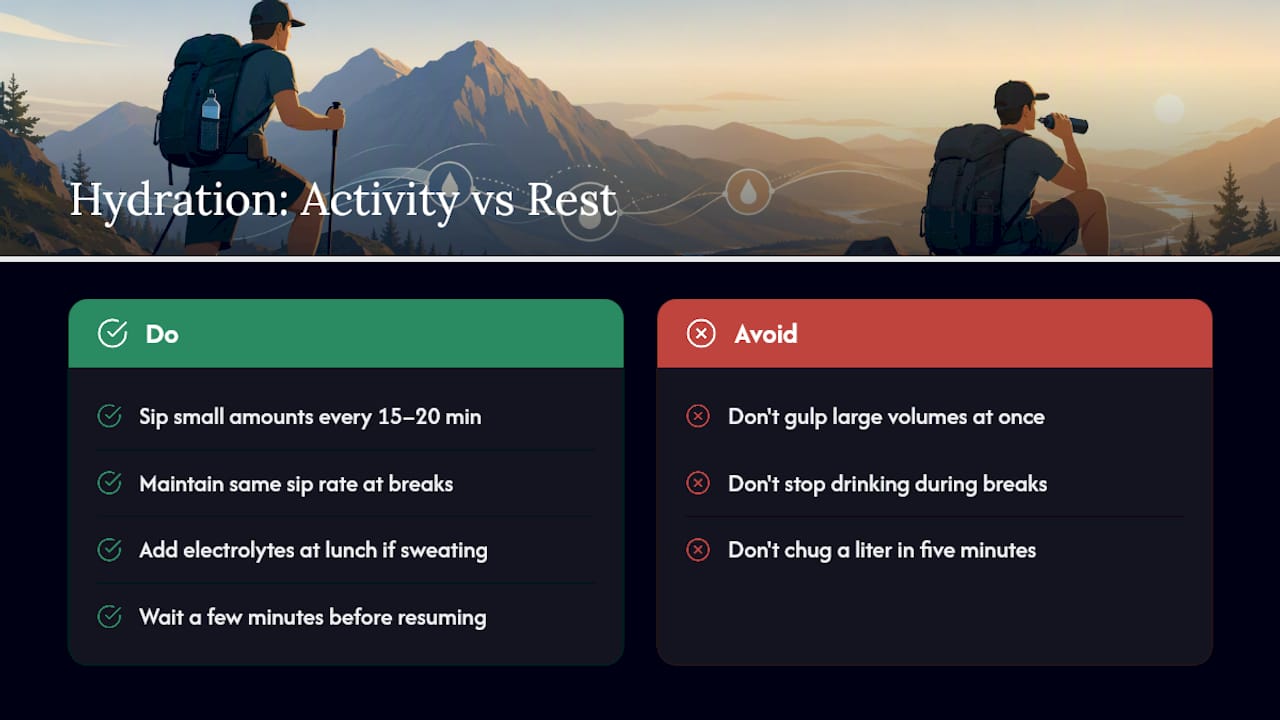
Your body doesn’t need the same water intake sitting at a lunch break that it needs grinding up a switchback. Active hiking burns through fluid fast because muscle exertion and sweat both spike, so your intake should track your movement, not the clock.
During active stretches, sip steadily rather than gulping. Small, frequent drinks (a few ounces every 15 to 20 minutes) keep your body absorbing water efficiently, while chugging half a liter at once just sends most of it straight to your bladder. This steady pace also helps you avoid the swing between feeling parched and feeling waterlogged.
Rest breaks are where a lot of hikers slip up in both directions. Some stop drinking entirely because they’ve stopped sweating visibly, which lets dehydration creep in unnoticed. Others use breaks to overcorrect, downing a full liter in five minutes because they finally have the chance to sit still. Neither is right. Use rest stops to sip at a similar rate to what you’d drink while moving, and treat lunch as a good moment to add electrolytes if you’ve been sweating heavily.
Longer breaks, especially at high heat, are also when your body needs a few minutes to actually absorb what you drink. Give it that time before pushing back onto the trail, since fluid taken in during the final minute of a break hasn’t done much yet.
Does Alcohol or Caffeine Undo Your Hydration Plan?
Coffee before a hike is fine in moderate amounts. Caffeine has a mild diuretic effect, but for hikers who drink coffee regularly, the body adapts and the fluid loss is minor compared to what you’ll drink over the day. A single cup at the trailhead isn’t going to sabotage your hydration plan.
Alcohol is a different story. It suppresses the hormone that helps your kidneys retain water, which means a beer or two the night before a hard hike leaves you starting the day already behind on fluids, even after a full night’s sleep. Drinking alcohol during a hike compounds the problem in real time, since it impairs judgment on exposed terrain at the exact moment you need steady footing and clear thinking.
The practical takeaway: skip alcohol until the hike is over, and if you drank the night before a big trip, add an extra half liter to your morning water intake to make up the deficit. Caffeine deserves far less worry than most hikers give it.
Why Altitude Changes How Much Water You Need
Thin, dry mountain air pulls moisture from your body faster than sea-level conditions do, mostly through increased respiration. You breathe faster and harder at elevation, and each breath at altitude carries out more moisture than the same breath at sea level.
Above roughly 10,000 feet, this respiratory water loss becomes significant enough that The Hiking Tribe’s field data recommends adding extra water beyond what temperature and effort alone would suggest. Altitude also blunts your thirst response, so you can be losing fluid steadily without feeling particularly thirsty, which is exactly how altitude-related dehydration sneaks up on otherwise careful hikers.
The fix is simple: sip more often than feels necessary at elevation, and don’t wait for thirst as your cue. Pair this with a slightly higher baseline rate, closer to 0.6 to 0.8 liters per hour even in cool mountain air, and watch for the early signs of altitude sickness (headache, nausea, unusual fatigue) since dehydration makes those symptoms worse.
The Weight Versus Safety Trade-Off, Honestly
Planning to the next water source plus a 1-liter buffer beats hauling a full day’s supply from the trailhead almost every time. Extra water only earns its weight in true desert stretches, long dry ridgelines, or when hiking with kids who drink unpredictably. The real skill isn’t carrying more. It’s tracking your own urine color and energy level enough to know your actual needs, then trusting the math over the anxiety.
— S
Plan Your Next Hike With Confidence
Getting the water math right is one piece of a bigger puzzle: knowing your route, your gear, and your backup plans before you leave the trailhead. The site emphasizes exactly that kind of field-tested planning, the kind that comes from actually being out there rather than repeating generic checklists.
If you’re still dialing in your kit, our beginner hiking guide covers packing habits and trail-tested gear picks beyond just water. And since refilling on trail always beats carrying more than you need, our water purification walkthrough shows exactly how to treat what you find so you can plan lighter and safer. Bookmark Thrillofit before your next trip, and spend five extra minutes planning to your next water source. It saves pounds on your back and worry on the trail.
Sources
The recommendations above draw on established field guidance, including:
Always check current trail reports and local water conditions before you head out, since spring flow and stream levels shift with the season.
FAQ
How Much Water Is Needed for a 7-Mile Hike?
For most hikers, a several-mile hike takes a few hours, which puts water needs around 0.5 liters per hour using the baseline rate, adjusted upward for heat or elevation gain.
What Should You Avoid Eating Before a Hike?
Heavy, greasy, or high-fiber foods right before a hike can cause stomach discomfort on the trail; stick to something light and familiar, like oatmeal or a banana with peanut butter, a few hours before you start.
How Much Water to Pack for a 3-Day Hike?
Plan for 3 to 5 liters per day per person for drinking, cooking, and hygiene, which totals 9 to 15 liters across three days if you’re not refilling from natural sources along the way.
Is 2 Liters Enough for a 10-Mile Hike?
It depends on conditions. Two liters can work for a cool, moderate 10-mile hike lasting around 4 hours, but hot weather, steep terrain, or high altitude can push actual needs closer to 3 to 4 liters.
Recommended
Comments