

Snow Cave Building: A Safety-First Field Guide

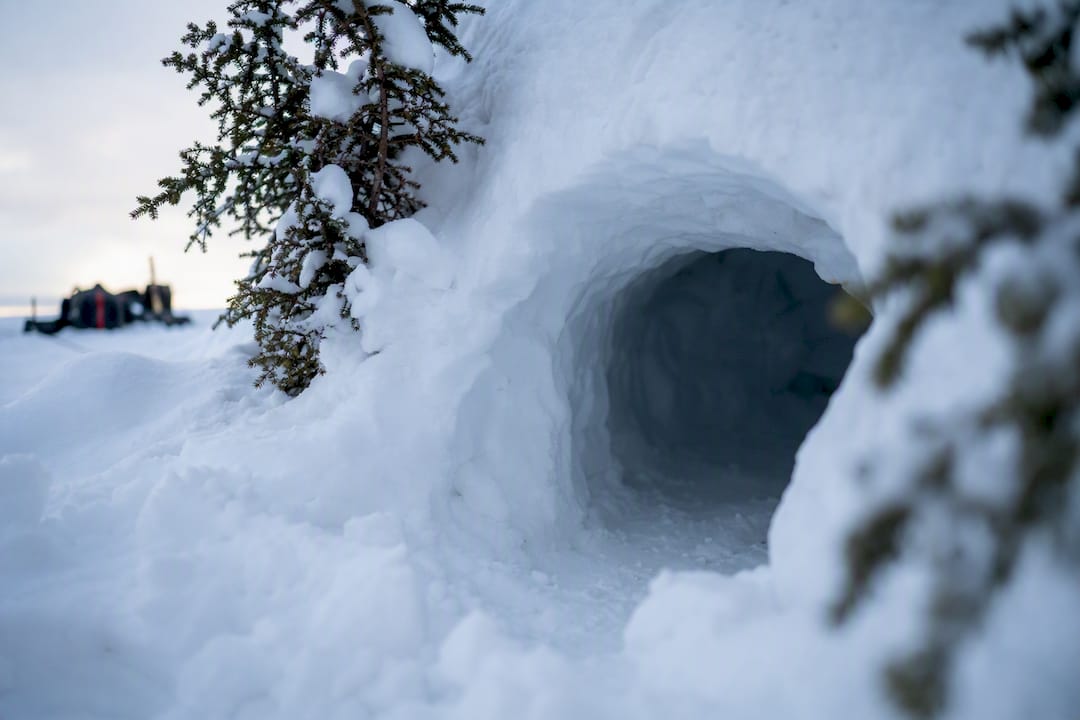
Yes, a properly sited and built snow cave can keep you alive in a winter emergency, and it often outperforms a tent in raw cold. The National Weather Service lists snow caves alongside lean-tos and windbreaks as legitimate wind protection when no other shelter exists, and a well-built one holds interior temperatures near freezing even when it’s far colder outside, according to the Salt & Prepper Learning Center. But the shelter that saves you and the shelter that suffocates or crushes you are built almost the same way. Three things separate them.
Before you touch a shovel, lock in these non-negotiables:
Site safety first: never dig on or below slopes steeper than 30 to 35 degrees, and avoid any terrain with visible avalanche loading.
Ventilation, always: one angled air hole minimum, checked on a schedule, no exceptions.
12 inches of roof, minimum, confirmed by probing with a stick, not by guessing.
If you can commit to those three, practice the sequence below once with a partner in daylight, before you ever need it for real. Bring a real shovel and a probe stick. That single dry run is the difference between a shelter and a grave.
Key Takeaways
Snow cave building works when the site is avalanche safe, the roof holds at least 12 inches of thickness confirmed by probing, and the ventilation hole is checked on a fixed schedule throughout occupation.
Point | Details |
Site safety comes first | Rule out slopes steeper than 30 to 35 degrees, cornices, and wind loaded features before testing snow quality. |
Probe, don’t guess | Insert 12 to 18 inch sticks to confirm roof and wall thickness while hollowing the chamber. |
Ventilation is ongoing | Check the angled vent hole checked regularly throughout occupation and immediately after fresh snow or wind. |
Sleep elevated | Carve a raised bench above the entrance tunnel floor so you sleep in the warmest trapped air layer. |
Quinzee needs patience | Piled snow must sinter for a set period before it’s safe to hollow into a shelter. |
Table of Contents
How Do You Choose a Safe Site for Snow Cave Building?
Terrain kills more snow shelter builders than cold does. Before you assess snow quality, rule out the ground itself. Avoid any slope steeper than 30 to 35 degrees, avoid the base of slopes that could slide onto you, and stay off convex rolls or anything sitting under a cornice. Wind-loaded pockets on lee slopes look inviting because the drifts are deep, but that same wind loading is what triggers slab avalanches.
What you want instead is a stable, well-established drift on flatter ground, ideally against a natural bank or the lee side of a ridge where snow has piled up gradually over the season rather than in one recent dump.
Once you’ve found a spot that isn’t going to move, test the snow itself:
Pack a snowball by hand. If it holds together firmly without crumbling, the snow has enough cohesion to dig.
Probe with a stick or pole across the area to check depth and consistency. Snow quality can change dramatically within a few feet, according to the USAP field manual on snow shelters, so probe more than once.
Give piled snow time to sinter. If you’re building on loose or recently fallen snow, the crystals need time to bond. That waiting period matters more for a quinzee than a natural drift, since piled snow starts with no structure at all.
Pro Tip: Test snow in at least three spots before committing. A patch that feels solid where you’re standing might sit over hollow, wind-scoured snow just a few feet away.
If you’re on flat ground with no natural bank, that’s your cue to pile snow and build a quinzee instead of hunting for a cave site that doesn’t exist. If you’ve got a real drift or a snow bank at least chest-high, dig straight in.
What Tools and Gear Do You Need Before You Dig?
You can improvise a lot in the backcountry, but snow cave building isn’t the place to skimp on tools. Bring a real metal-bladed shovel. Plastic camp shovels flex and crack against dense or wind-packed snow, and you don’t want your only digging tool failing halfway through a chamber.
Pack for the dig itself:
A sturdy shovel, and ideally a second one kept outside as backup.
A probe pole or long stick for checking wall and roof thickness as you go.
A snow saw or long knife for cutting blocks and smoothing interior surfaces.
Pack for your body:
A closed-cell foam pad to insulate you from the snow floor once you’re inside.
An emergency bivy sack for extra warmth.
Dry spare layers, sealed in a bag, because you will sweat while digging.
A headlamp with spare batteries, plus a small candle only if you can maintain strict ventilation.
Set your team protocol before anyone starts digging: one person always stays outside the entrance while another works inside, and a spare shovel stays planted upright near the entrance where it’s visible. Mark the entrance clearly, especially if snow starts falling or light fades, and leave a written trip plan with someone back home. If you’re heading out solo, review the general shelter-building fundamentals in this survival guide before committing to a dig alone.
How Do You Dig a Snow Cave Step by Step?
Excavation is where most of the real work happens, and where most mistakes get made under fatigue. Work in a deliberate sequence rather than hollowing randomly, and rotate diggers every few minutes. Digging snow is exhausting, and tired hands make sloppy, thin walls.
Step 1: Dig the entrance tunnel. Start with a small horizontal opening, just big enough to crawl through on your hands and knees. Angle the tunnel floor slightly upward as you go in. This traps cold, dense air near the entrance and keeps it from pooling where you’ll sleep, since warm air naturally rises above it.
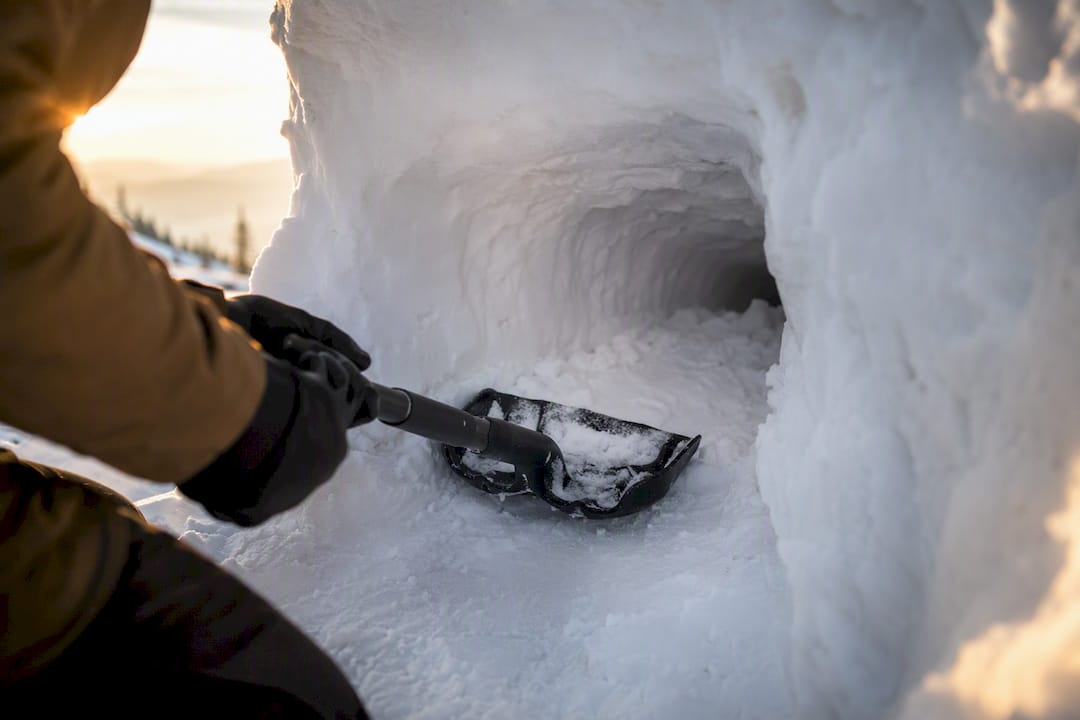
Step 2: Shape a T or low tunnel entrance. Once you’re a few feet in, widen the tunnel into a low T-shape or a small vestibule before opening into the main chamber. This cold-air trap is one of the details beginners skip, and it’s the reason some snow caves feel like refrigerators while properly built ones stay noticeably warmer at sleeping level.
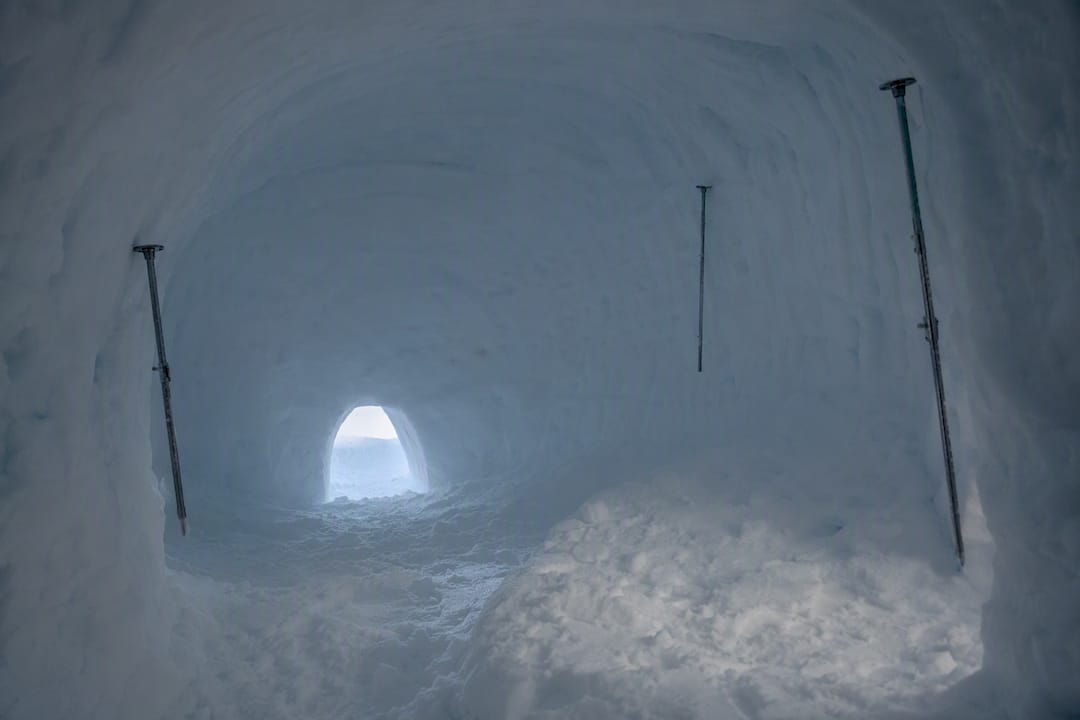
Step 3: Hollow the main chamber. Carve upward and outward into a smooth, rounded dome. Avoid flat ceilings or sharp corners. They concentrate stress and are more prone to sagging or collapse than a rounded arch, which distributes weight evenly. Keep the roof at a minimum of 12 inches thick, and make the side walls thicker still, since they take more structural load over time. The USAP field manual treats this roof-thickness figure as standard practice for safe snow shelters, and it’s not a number to round down.
Step 4: Carve benches and consider a second exit. Cut a raised sleeping platform higher than the entrance tunnel floor. Cold air sinks, so the highest point in the chamber is the warmest place to sleep. Add small shelves for gear, and if you have the time and the snowpack depth to support it, dig a second, smaller exit. A backup route out matters if the main entrance ever drifts shut or collapses overnight.
Throughout excavation, use the probe-stick method that the Appalachian Mountain Club recommends for quinzees, and it works just as well for dug caves: push 12 to 18 inch sticks into the outer surface at regular intervals before you start hollowing from inside. When you hit a stick tip while digging, stop. You’ve reached minimum safe thickness at that spot.
Pro Tip: Pile the excavated snow away from the entrance, not in front of it. A mound of spoil right at your doorway blocks airflow and turns into a tripping hazard in the dark.
How Do You Ventilate a Snow Cave Safely?
Ventilation isn’t optional, and it isn’t a one-time step. Cut at least one angled hole through the roof or upper wall, angled slightly upward so it doesn’t clog as easily with falling or drifting snow. A ski pole or long stick works well for punching and later clearing this hole.
Check it on a schedule, not just when you remember:
Inspect the vent every few hours, and immediately after any heavy snowfall or wind event outside.
Poke the vent clear with a stick from inside without fully exiting, so you can confirm airflow without losing body heat.
Keep a second stick or pole inside the chamber specifically for this job, within arm’s reach of where you sleep.
Watch yourself and anyone with you for early signs of poor air quality: headache, nausea, unusual drowsiness beyond normal fatigue. These symptoms can signal carbon dioxide buildup in a poorly vented shelter, and the response is immediate. Clear the vent, widen it if needed, and exit the shelter if symptoms don’t improve within minutes.
Never run a stove, heater, or generator inside a snow cave. The CDC’s winter storm safety guidance is explicit that any combustion source, and vehicle exhaust, needs to stay clear of snow and away from enclosed spaces because of carbon monoxide risk. A small candle for light can be acceptable, but only alongside strict, constantly monitored ventilation. It is never a substitute for an open vent, and it should never run while you sleep unattended.
How Do You Set Up the Inside of a Snow Cave?
Comfort inside a snow cave comes down to a few deliberate choices, not luck. Elevated sleeping benches matter more than almost anything else you’ll build. Cold air sinks and pools at the lowest point of the chamber, so carving your platform higher than the entrance tunnel floor keeps you sleeping in the warmest layer of trapped air.
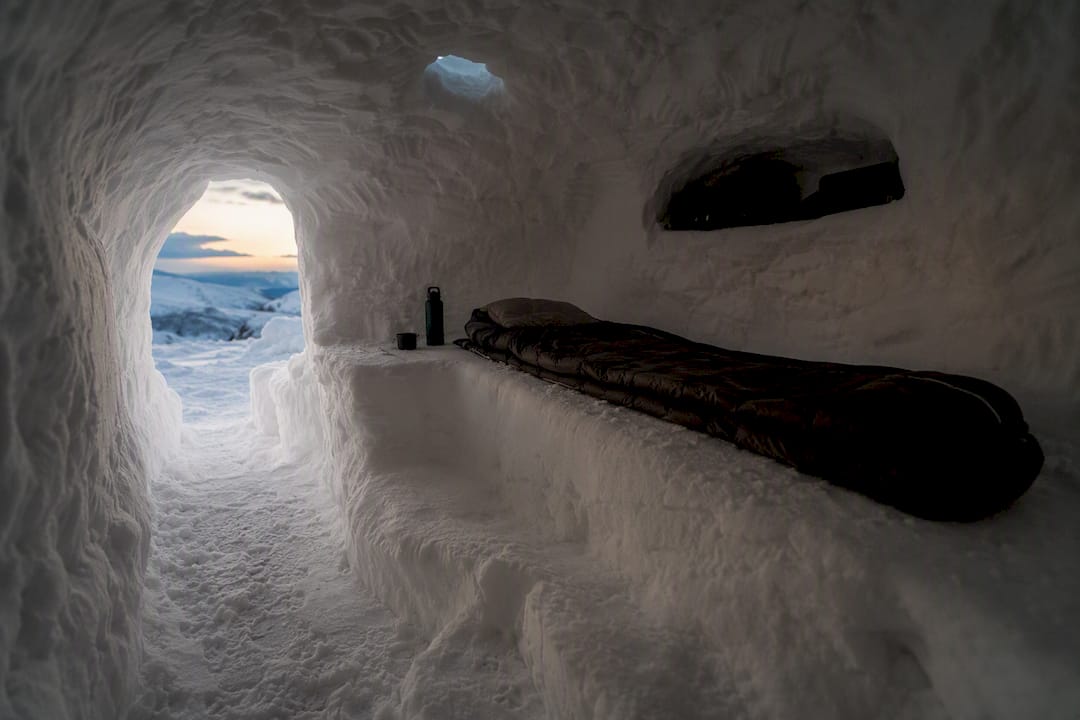
Insulate the bench itself before you lie down on it. Pine boughs work in a pinch, but a closed-cell foam pad or spare dry clothing under your sleeping bag makes a much bigger difference against conductive heat loss into the snow.
Drip control keeps the shelter livable overnight. Smooth and glaze the ceiling as you carve, rounding off rough edges that collect condensation and drip. Carve a shallow groove along the base of the dome where it meets the wall; it channels meltwater away from your sleeping area instead of letting it run down onto your gear.
Re-check the ceiling for cracks or soft spots each time you re-enter.
Re-probe any area that looks thin, especially after a warm afternoon.
Keep a shovel just inside the entrance at all times, not buried under gear.
Pro Tip: A slightly domed, glazed ceiling sheds drips far better than a flat one. Smooth it with a gloved hand or the flat of your shovel as you finish hollowing.
Quinzee or Snow Cave: Which Should You Build?
A quinzee and a snow cave solve the same problem with opposite methods. A snow cave is dug into existing snow, a bank, a drift, or a slope. A quinzee is built by piling loose snow into a mound and hollowing it out once it has bonded.
Pick a quinzee when you’re on flat terrain with plenty of loose snow but no natural drift or bank deep enough to dig into.
Pick a snow cave when a stable drift or bank at least chest-high is already available. It saves you the piling and waiting.
Sintering time is the catch with quinzees. Piled snow needs to bond and firm up before it’s safe to hollow, and the AMC recommends piling snow at least 5 to 7 feet high and letting it set before you start carving into it.
Time and labor differ sharply. A quinzee demands more upfront shoveling to build the pile, plus waiting time you may not have in a true emergency. A dug snow cave skips the piling step entirely but depends on finding the right natural terrain first.
Practice Makes the Difference Between Theory and Survival
Reading about snow cave building and actually doing it are two different skill levels, and the gap between them is exactly where people get hurt. Thrillofit recommends at least one full practice build per winter season, done with a partner, in conditions where failure just means a cold afternoon rather than a real emergency.
Build the habit of running a short rescue drill during that practice: have your partner simulate a partial collapse near the entrance and time how fast you can clear it with the spare shovel kept outside. This single rehearsal, more than any gear purchase, is what the USAP field manual implies when it treats snow shelters as a field skill to be drilled, not just read about.
A few non-obvious tricks worth practicing:
Push depth-gauging sticks in from outside before you ever start hollowing, so you build the habit before it’s critical.
Try glazing a small section of ceiling with careful, minimal heat to see how the surface hardens and sheds drips.
Mark your entrance with a visible pole or brightly colored gear before dark or before a storm reduces visibility.
Practicing a collapse response with a partner, and keeping a spare shovel planted outside the entrance, is a critical part of the protocol Salt & Prepper outlines for snow shelter builders. It’s the detail that turns a scary moment into a five-minute fix.
What Are the Warning Signs of a Snow Cave Collapse?
A snow cave rarely fails without warning, if you know what to watch for. Fine cracks spreading across the ceiling are the clearest early sign, especially if they appear or lengthen after a temperature swing or fresh snow load on top. A soft, sagging feel to the roof when you brush it with a gloved hand means the structure has thinned past a safe margin, even if no crack is visible yet. Small chunks of snow falling from the ceiling on their own, without you touching anything, is not a minor annoyance. It’s the structure telling you it’s under stress.
Sound matters too. A dull, hollow thump or a faint groaning noise from the snow overhead can precede a partial collapse by minutes. Anyone who has spent time around ice or heavily loaded snow will recognize that sound as a signal to move, not to wait and see.
If you notice any of these signs, get everyone out immediately. Don’t stop to grab gear first. Once outside, assess from a safe distance rather than crawling back in to inspect. If the cave partially collapses with someone still inside, the outside team member’s job is to dig toward the last known position immediately, using the spare shovel kept planted by the entrance for exactly this scenario. This is why the one person outside, one person inside protocol matters even during casual practice builds, not just real emergencies.
Re-probe the entire structure before anyone re-enters, and if you’re unsure, treat the shelter as compromised and rebuild rather than gamble on a second night.
What Do the Construction Steps Actually Look Like in Sequence?
Picture snow cave building as four visual stages rather than one long dig. Stage one is a small dark opening at snow level, barely large enough to crawl through, with the tunnel floor sloping upward as it disappears into the drift. Stage two shows that tunnel widening into a low pocket or T-shape before it opens up, which from the outside just looks like the entrance has a slight step or dogleg in it.
Stage three is the chamber itself taking shape: a rounded, dome-ceilinged space with visible probe sticks poking through the outer snow at scattered points, marking where the roof has reached safe thickness. Diggers working this stage typically hollow from the center outward and upward, keeping the dome symmetrical rather than lopsided.
Stage four is the finished interior: a raised bench running along one side higher than the tunnel floor, a small angled vent hole visible near the roofline, and a smoothed, slightly glazed ceiling surface. Gear shelves are carved into the walls at bench height, and if a second exit was dug, it appears as a smaller secondary tunnel opposite the main entrance.
Walking the site afterward, from outside, you should see almost nothing: a low, unassuming mound with one small dark entrance and a barely visible vent hole. That’s intentional. A snow cave that blends into the terrain is also one that’s protected from wind and less likely to be disturbed. If you want a companion reference for laying out the surrounding camp and marking the entrance clearly, this campsite guide covers marking techniques that transfer directly to snow shelter sites.
What Should You Wear While Building and Sleeping in a Snow Cave?
Snow cave building generates far more body heat than most people expect, and dressing wrong for it is a common way to end up cold and wet at the worst possible time. Dress in layers you can shed as you dig. A hardshell or softshell outer layer, a breathable mid layer, and a moisture-wicking base layer let you strip down to just one or two layers once you’re sweating from shoveling.
Waterproof, insulated gloves or mittens are non-negotiable, and pack a spare dry pair sealed in a bag. Wet gloves against snow for an hour will chill your hands faster than the air temperature ever will. The same logic applies to socks and boots: bring a dry backup pair, because damp feet inside a shelter overnight is how frostbite starts.
Once the digging stops and you’re settling in for the night, the layering strategy flips. Put dry layers back on immediately, even if you feel warm from the exertion. Your body temperature drops fast once activity stops, and a snow cave sitting near freezing, as the Salt & Prepper Learning Center notes for well-built shelters, still requires real insulation to sleep safely.
A insulated hat or balaclava matters more overnight than during the dig itself, since a huge share of heat loss happens through an uncovered head. Keep your headlamp and any spare batteries inside your sleeping bag or against your body, since cold drains battery charge fast.
What Mistakes Ruin a Snow Cave Build?
Most snow cave failures trace back to a handful of repeated mistakes, not bad luck. Digging the roof too thin tops the list, usually because someone eyeballs thickness instead of probing it with a stick. A ceiling that looks solid from inside can be paper thin from a fresh snow load pressing down from above.
Skipping the ventilation hole, or cutting one too small and forgetting to check it, is the second most dangerous habit. Some builders treat the vent as an afterthought once the chamber is dug, rather than as a structural requirement from the start.
Building a flat ceiling instead of a rounded dome is a mistake that seems cosmetic but isn’t. Flat surfaces concentrate structural stress at the corners, while a smooth arch spreads that same load evenly across the whole roof.
Other recurring errors:
Choosing a site under a cornice or on a steep, wind-loaded slope without checking avalanche risk first.
Sleeping directly on the snow floor instead of carving an elevated bench, which leads to a miserably cold night even in a well-built cave.
Digging alone with no one outside to help if the entrance collapses or drifts shut.
Rushing a quinzee build without letting the piled snow sinter, which leaves walls weak and prone to sagging or full collapse mid-dig.
Every one of these mistakes is preventable with the checklist habits covered earlier: probing thickness, checking vents on a schedule, and never digging solo without a spotter outside.
Beyond Avalanche Risk, What Else Determines a Good Site?
Avalanche safety rules out unsafe terrain entirely, but among the safe options left, wind and sun exposure decide how comfortable and durable your shelter actually is.
Wind exposure matters because a site that’s fully exposed to prevailing wind will drift shut faster and lose heat through the entrance more aggressively than a sheltered one. Look for natural windbreaks: a stand of trees, a rock outcrop, or the lee side of a ridge that isn’t also a wind-loading hazard. There’s a real balance here, since the same wind that piles up the deep drifts you need for digging also creates the loaded slopes you need to avoid, so choose a site that got its depth from a season of gradual accumulation rather than one recent, heavy dump.
Sun exposure cuts the other way. A south-facing slope in direct sun during the day sounds appealing for warmth, but repeated freeze-thaw cycling from daytime melt and nighttime refreeze weakens the structural integrity of your walls over multiple days. A north-facing or shaded site holds a more stable, consistently cold structure, which is actually safer for a shelter you plan to use more than one night.
Proximity to your intended route or a marked landmark matters too, since a shelter that’s technically excellent but impossible to relocate in a whiteout does you no good in an actual emergency.
How Do You Keep Air Flowing All Night Without Waking Up?
The vent you cut during construction only works if it stays clear, and staying clear overnight takes a deliberate routine, not luck. Before you settle in to sleep, do one final vent check and clear it completely, since new snowfall or wind can partially block it within hours.
Keep a dedicated poking stick within arm’s reach of your sleeping position, not buried in your pack. If you wake up during the night, even briefly, use that moment to reach up and clear the vent again rather than assuming it’s fine. This small habit costs you seconds and prevents the slow buildup that leads to headaches or grogginess by morning.
Set a mental or literal alarm to check the vent every few hours if you’re sleeping in shifts with a partner, which is one more argument for building and camping with someone rather than completely alone. If snowfall is heavy or winds are shifting outside, check more frequently than you would on a calm, clear night.
Watch for subtle signs that airflow has dropped: air inside starting to feel stale or heavy, condensation building noticeably faster on the ceiling, or anyone in the shelter reporting a mild headache. Any of these means it’s time to clear the vent immediately, and consider cutting a second small hole if the first one keeps clogging faster than you can manage it.
Should You Build a Snow Cave Alone or With a Partner?
Building solo is sometimes unavoidable in a true emergency, but it multiplies every risk covered so far. With no one outside, a collapsed entrance or a medical issue mid-dig has no one to respond. If solo construction is genuinely your only option, keep the entrance tunnel shorter than you would with a team, dig with frequent breaks to check your own condition, and leave a visible, obvious sign at the surface showing exactly where you are.
Group construction solves most of these problems by design. One person always stays outside the entrance, watching for structural issues and ready to dig toward the interior if anything goes wrong. That outside person also handles the spare shovel, kept planted and visible near the entrance rather than buried inside with the rest of the gear.
Splitting tasks speeds up the whole process too. One person can hollow the chamber while another shapes the entrance tunnel or starts probing for wall thickness with sticks. Rotate the digging role every few minutes, since fatigue is what causes people to cut corners on thickness and ventilation.
Larger groups building a shared shelter should still assign one clear point person for safety checks, ventilation monitoring, and the collapse-response plan, rather than assuming everyone is watching for the same warning signs. If you’re planning any winter trip where a snow shelter might be your backup plan, pairing this skill with a solid understanding of bivouac shelter basics and general cold-weather trip planning rounds out your preparedness rather than relying on one shelter type alone. A quality emergency kit matters just as much as shelter skills, and StokdUp’s case for upgraded emergency kits makes a solid argument for why the standard kit most people carry falls short in a real winter emergency.
What the Research Actually Supports About Snow Cave Building
Most guides treat snow cave building as a single skill you either have or don’t. That’s wrong. It’s really two separate skills stacked on top of each other: reading terrain well enough to avoid avalanche exposure, and then executing a fairly mechanical dig sequence. The terrain judgment is the harder skill, and it’s the one almost no online guide spends enough time on before jumping straight to shovel technique.
The conventional advice also underplays sintering time and probe-stick discipline, treating them as optional refinements rather than the two things that most reliably separate a survivable shelter from a collapsing one. If you take one thing from everything above, make it this: practice the probe method and the vent-check habit until they’re automatic, before you ever need them under real cold and real fatigue. Site selection and structural minimums aren’t the exciting part of this skill, but they’re the part that actually keeps people alive.
— S
Sources
Recommended
Comments