

Start Fires in Rain: 4 Step Site First Workflow for Campers

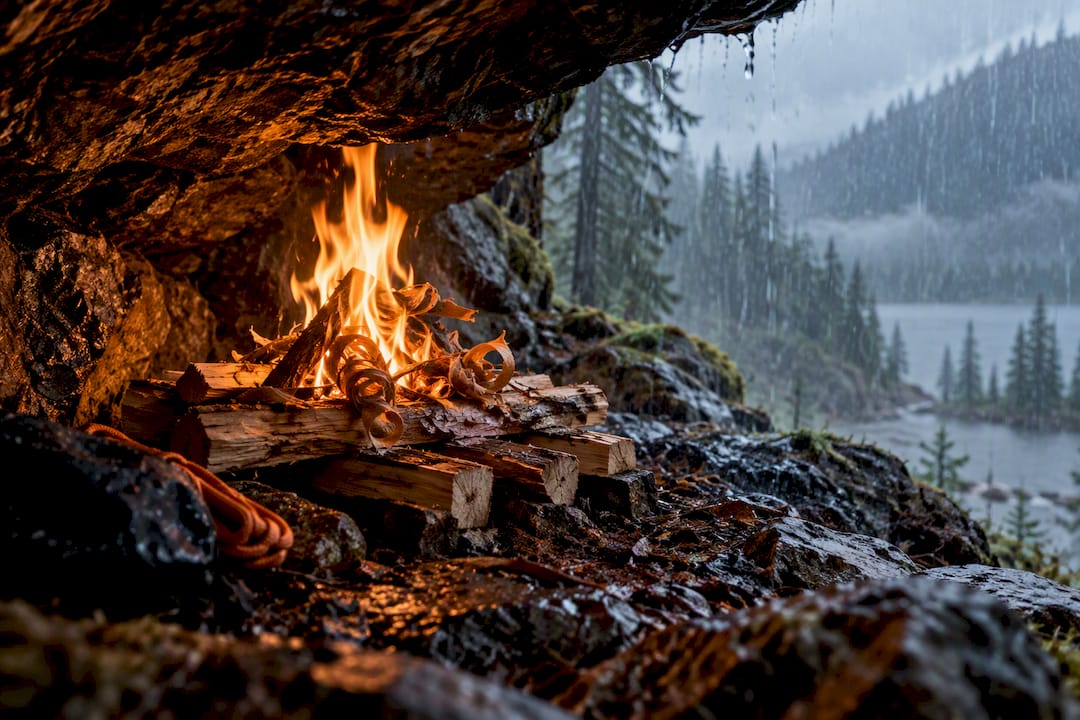
Yes, you can reliably start and sustain a fire in the rain. Success hinges on four moves, in order: pick a sheltered site out of the wind and rain, build a raised platform to keep the hearth off wet ground, load in dry tinder like fatwood or a feather stick, and carry a backup ignition source. Skip any one of these and you’re gambling on luck instead of skill.
TL;DR:
Selecting a sheltered, elevated site with overhead cover and natural windbreaks greatly increases fire survival chances in rain.
Finding dry tinder relies on targeting fatwood, feather sticks, inner bark, or standing dead wood, with processing more than once to ensure dryness.
Building a raised platform using sticks, rocks, or green logs prevents ground moisture from extinguishing the fire and improves stability.
Using a ferro rod for sparks and carrying backup fire starters like stormproof matches or Vaseline cotton balls ensures reliable ignition in wet conditions.
Employing fire lays such as top-down or log-cabin structures enhances resilience against rain and wind, especially when combined with prioritized fuel size and fire management.
Table of Contents
How Do You Start a Fire in the Rain? Site Selection Comes First
Most fire failures in wet weather have nothing to do with the ignition tool. They come down to skipping site prep and a raised platform entirely, according to survival guides that track why fires die in the first minute. You can have the best ferro rod on the market and still lose if you build under a dripping tree with the wind hitting your tinder sideways.
Start by scanning for overhead cover. A rock overhang is ideal because it blocks rain completely without adding fuel to a canopy fire risk. A dense conifer stand works almost as well. The tight needle cover intercepts a surprising amount of rainfall before it ever reaches the ground below. A large fallen log or the root ball of a downed tree can also buy you a dry pocket, especially if you build tight against the upwind side.
Elevation matters more than people expect. Low spots collect runoff, pool water, and stay saturated long after the rain stops. Even a foot or two of rise onto a small hummock or gravel bar keeps your work area from turning into standing water halfway through your build. Avoid dry creek beds entirely. They’re flat, tempting, and the first place that flash-floods.
Wind direction decides your fire’s orientation. Check which way smoke or loose grass drifts before committing to a spot, then position your fire lay so the opening faces away from the prevailing wind, not into it. If no natural windbreak exists, build one. A stacked line of logs, a lean-to of bark and branches, or even your pack angled on its side can cut wind speed enough to keep a fragile early flame alive.
Run through this before you strike anything:
Is there something over your head blocking direct rain?
Are you on ground higher than the surrounding area?
Which way is the wind coming from, and does your fire face away from it?
Is there a natural or built windbreak on the exposed side?
Is the ground itself dry enough to work on, or do you need a platform (covered next)?
Pro Tip: Walk the site for sixty seconds before you unpack anything. A slightly worse spot with real overhead cover almost always beats a “perfect” clearing that’s catching every drop of rain.
Where Do You Find Dry Tinder When Everything Is Soaked?
Wet tinder is the single fastest way to kill a fire before it starts. The good news: dry, ignitable material exists in almost any rainy forest if you know where to cut into it.
Here’s the priority order that works in the field, from most reliable to backup options:
Fatwood. This resin-rich pine heartwood, usually found in the stumps or fallen limbs of dead pines, resists water because the resin itself is waterproof. It’s arguably the single best natural tinder for wet conditions, and a few shavings will catch a spark even when everything around them is dripping.
Feather sticks. Carve thin, curled shavings into a piece of dry-cored wood without cutting them off, leaving them attached like a fringe. Three of these arranged over a spark source will reliably light fine tinder, though the technique takes five to fifteen minutes to do properly with a sharp knife.
Inner bark and cambium. Birch bark, cedar bark, and the fibrous inner layer under the outer skin of many trees stay dry even in a downpour, since rain rarely penetrates deep enough to soak them. Peel gently and only take what you need. Stripping bark all the way around a live tree kills it.
Dead standing wood. Twigs still attached to a dead but upright tree dry out faster than anything lying on the ground, since they never sit in puddles.
Vaseline-soaked cotton or dryer lint. Not natural, but worth packing. Covered in the ignition section below.
The feather stick technique deserves a slower walkthrough. Choose a piece of dead, standing wood roughly wrist-thick. Split it if the outside is wet, exposing the drier core. Hold the stick at an angle away from your body and shave thin curls down its length, stopping before the blade cuts through. Rotate and repeat until you have a stick that looks like a shaggy paintbrush. Stack two or three of these teepee-style over your ember or spark target.
Pack a backup tinder supply in a dry bag or waterproof container before you even leave camp, and if what you find in the field feels damp, tuck it inside your jacket against your body for ten to fifteen minutes. Body heat pulls out surprising amounts of moisture.
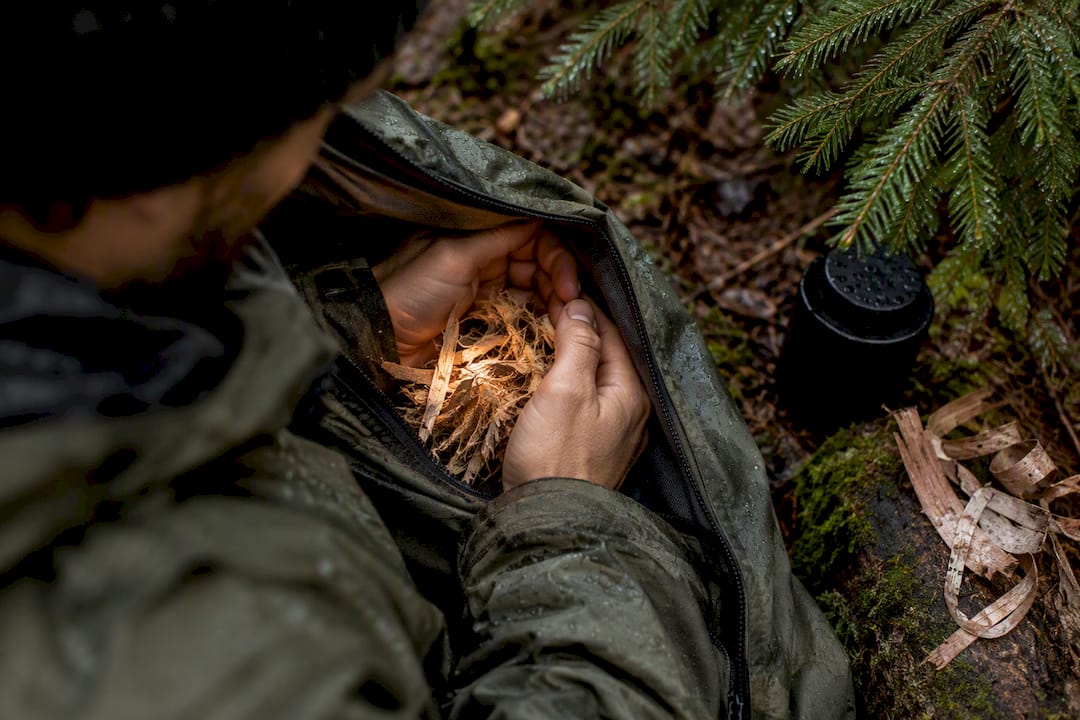
Pro Tip: Process more tinder than you think you need. In the rain, your first attempt often gets snuffed by a stray drop, and a second batch already prepped saves you from starting the entire search over.
Why a Raised Platform Matters More Than the Match
Ground moisture wicks upward into your fire structure and kills heat from below before flame ever gets a real hold. This is the step most beginners skip, and it’s the reason a technically good tinder bundle still fails on saturated ground. Field guides consistently point to a raised hearth as one of the biggest differentiators between a fire that catches and one that smokes out.
Three platform options cover almost every terrain you’ll run into:
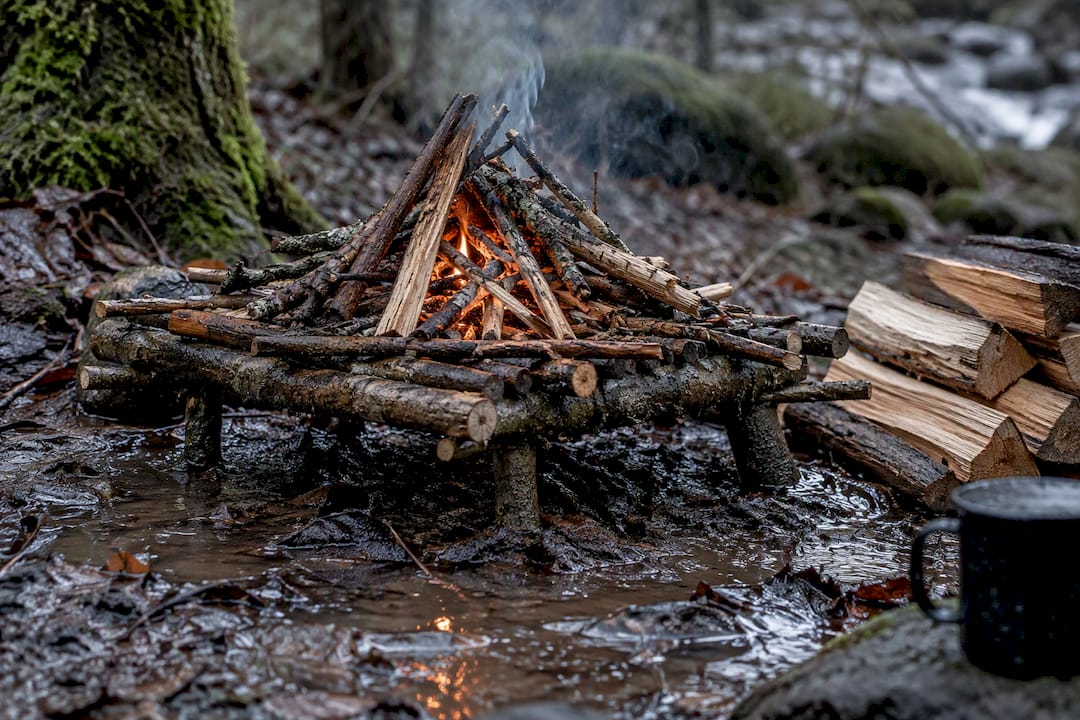
Stick raft. Lay wrist-thick sticks side by side like a raft, then a second perpendicular layer on top. This gets your tinder and kindling several inches off wet soil or mud.
Rock bed. Flat, dry stones arranged tightly together work well on rocky ground, though avoid river rocks. Trapped moisture inside them can cause a rock to crack or even explode when heated.
Green-log platform. On snow or deep saturated leaf litter, two or three green (living) logs laid parallel make a stable base. On snow, expect it to hold for roughly 30 to 45 minutes before it melts down and needs replacing.
Test the platform before you commit tinder to it. Press down with your hand or a boot. If it flexes, sinks, or feels spongy, add another layer of sticks or shift to drier ground nearby. A platform that collapses mid-burn dumps your coal bed straight into mud, and starting over costs you twenty minutes you don’t have if the temperature’s dropping.
Pro Tip: Build the platform slightly larger than the fire lay itself. As the fire burns down and coals spread, an undersized platform lets the outer edges slump into wet ground, which is exactly what you built the platform to prevent.
Which Fire Lay Actually Holds Up in Rain?
The fire lay you choose changes everything about how forgiving your build is once the wind picks up or the rain gets heavier. A teepee lights fast and burns hot, but it’s also the most exposed structure you can build, since every side is open to wind and falling rain. In a light drizzle with calm air, that trade-off barely matters. In steady rain or gusty wind, it’s a liability.
Log-cabin and top-down lays trade ignition speed for resilience. Both stack progressively larger fuel with the tinder either at the base or, in a top-down build, layered underneath everything else so upper wood physically shelters the flame as it works downward. Field-tested comparisons show these outperform a simple teepee in sustained wet or windy conditions, even though they take longer to get burning. A top-down fire with a solid starter can build a working coal bed even in steady rain and needs less early tending than a teepee that’s collapsing every time the wind gusts.
A lean-to splits the difference. Lean kindling against one thick log or rock, angled so the log blocks wind and rain from one direction while the open side faces away from the weather. It ignites almost as fast as a teepee but with meaningfully better wind tolerance.
Match the lay to the conditions instead of defaulting to one every time:
Calm drizzle: Teepee is fine. Fast ignition, minimal wind exposure to worry about.
Steady rain, light wind: Lean-to against a log or rock windbreak.
Steady rain, real wind: Log-cabin or top-down. Slower to light but far less likely to collapse or blow out.
Very limited dry fuel: Top-down, since it concentrates your best tinder in one protected spot underneath everything else.
The smartest field approach often combines two lays rather than picking one. Ignite a small lean-to first for a fast, protected flame, then feed that flame into the base of a log-cabin or top-down structure you built beside it. You get the quick ignition of a lean-to and the staying power of a heavier lay, without betting everything on one geometry surviving the first five minutes.
Pro Tip: If wind keeps shifting direction, a Dakota fire pit (a hole with a side air channel dug into the ground) shields the flame almost entirely from gusts and works well when you have a shovel or digging stick and firm, dig gable soil.
Ferro Rods, Fatwood, and Backup Plans: Ignition That Survives Rain
A ferrocerium rod, commonly called a ferro rod, throws sparks hot enough (roughly 3,000°F) to ignite prepared tinder even soaking wet, which is why so many experienced campers treat it as their primary ignition tool in wet weather rather than a backup. Unlike a lighter, it has no fuel to run dry and no wick to get damp. The catch is technique. Hold the rod stationary and pull the striker back toward you in one firm motion, or better, hold the striker still and pull the rod itself, aiming the shower of sparks directly at a tightly fluffed pile of tinder or fine fatwood shavings. A weak, glancing scrape wastes most of the spark. A ferro rod is rated for many thousands of strikes, so don’t baby it. Scrape aggressively with the rod’s spine.
Stormproof matches are a solid secondary option. They’re coated to resist water and wind and will often relight even after being briefly submerged, but store them in a dedicated waterproof case, not loose in a pocket, since the coating can wear against fabric over a long hike.
A standard lighter still works in the rain, but only if it’s dry and warm. Butane struggles to vaporize in cold, wet conditions, so keep a lighter in an interior pocket close to your body rather than an outer pocket where it sits cold and damp.
For homemade backups, two options punch well above their cost:
Vaseline-soaked cotton balls. Work petroleum jelly into a cotton ball until it’s fully saturated, then store several in a small waterproof container. Pulled apart and lit with a spark, one burns for several minutes, giving you enough sustained flame to feed in kindling even if it’s damp.
Waxed dryer lint cubes. Pack dryer lint into a cardboard egg carton cup, pour in melted wax, and let it set. Each cube burns long and hot, and they’re nearly free to make from household scraps.
Commercial fire starter cubes work the same way with more consistent burn times, useful if you’d rather buy than build.
None of this replaces redundancy. Carry a ferro rod as your primary, a warmed lighter or stormproof matches as your secondary, and a handful of sealed Vaseline cotton balls as your emergency layer. If you want to build genuine friction-fire skill as a true backup with zero gear dependency, a guide on starting a fire without a lighter or matches walks through the bow drill and related methods.
Pro Tip: Test your ferro rod technique at home, dry, before you ever need it in the rain. The motion feels awkward the first dozen tries, and a downpour is the worst possible moment to be learning it for the first time.
From Spark to Coal: Feeding a Fire That Won’t Quit
Getting a flame going is only half the job. Keeping it alive through the next ten minutes is where most rain fires actually die, usually from someone dumping in fuel that’s too big, too soon.
Stage your fuel into three distinct sizes before you strike anything, laid out in separate piles within arm’s reach:
Tinder. Fatwood shavings, feather stick curls, inner bark, or your DIY starter. This catches the initial spark or flame.
Kindling. Pencil to thumb-thick dry sticks, added gradually once tinder is burning steadily. Add too fast and you smother the small flame; too slow and it burns out waiting.
Fuel wood. Wrist-thick and larger pieces, added only once you have a solid bed of coals glowing underneath the kindling layer.
If your available wood is wet on the outside, split it. Rain typically penetrates only a few millimeters into solid wood during light to moderate showers, so a split log exposes a bone-dry core almost every time. Baton the wood with a knife and a striking branch if you don’t have a hatchet, working the blade down the grain in stages.
Once your fire has a real coal bed, you can dry additional wet wood by propping it near the flames, not directly on top where it smothers airflow. Stand split pieces at an angle around the fire’s edge and rotate them every few minutes so no single side scorches before the moisture cooks off.
You’ll know the fire has moved from fragile to established when it survives a few seconds of rain hitting it directly without hissing out, and when you see a visible orange coal bed glowing under the flame rather than just burning kindling on top. That’s your signal to scale up fuel size and stop babysitting every stick.
Pro Tip: Keep a “reserve” pile of your driest wood untouched until the coal bed is solid. It’s tempting to burn your best material early, but that reserve is what carries you through the first heavy gust or downpour that tests the fire’s stability.
Fire Keeps Dying? Fast Fixes for Common Failures
A fire that keeps going out almost always traces back to one of three problems, and all three are fixable in under a minute if you catch them early.
Wet tinder that never fully caught. If your first flame flickered and died, don’t add more of the same damp material. Pull it out, grab dry fatwood shavings or a fresh feather stick, and rebuild the tinder nest from scratch rather than trying to revive soggy fibers.
Poor airflow. A fire that smokes heavily but won’t produce real flame is usually starved for oxygen. Ash buildup underneath blocks airflow from below. Clear it out, and loosen the structure slightly so air can move through rather than around a tightly packed pile.
Platform failure. If the fire suddenly sinks or the flame drops noticeably, check whether the platform underneath has collapsed or sagged into wet ground. Rebuild it a layer thicker than before, and shift a few inches to firmer ground if the original spot turned to mud.
Quick troubleshooting checklist:
Flame dying fast: swap in dry fatwood, don’t reuse damp tinder.
Heavy smoke, no flame: clear ash, loosen the pile for airflow.
Fire sinking or sagging: rebuild the platform, thicker this time.
Structure keeps collapsing: switch to a log-cabin lay for stability.
Nothing’s working after two real attempts: stop and reassess your site entirely.
If you’ve made two honest attempts and the fire still won’t hold, that’s the point to stop burning through tinder and matches. Set up emergency shelter first using a tarp or natural cover, get out of wet clothing if you have a dry layer, and revisit the fire once you’ve addressed exposure risk directly.
Putting the Fire Out Safely and Leaving No Trace
Extinguishing a fire in the rain still requires the same care as dry conditions, because rain alone rarely kills every hot spot underneath the surface. Follow the same core sequence:
Smother the flames by spreading the coals apart with a stick so they cool faster and more evenly.
Drown the remains with water, pouring generously rather than sprinkling.
Stir the wet ash and coals with a stick to expose anything still glowing underneath.
Recheck by holding your hand near the ash bed. If you feel any heat at all, repeat the drown-and-stir step.
Even a fire that looks fully out from steady rain can hold a hot coal buried under wet ash. Fires that seem extinguished but aren’t fully cold are a recurring cause of accidental wildland ignitions once weather clears.
For leave-no-trace practice, never strip bark from a live tree for tinder or fuel, and avoid cutting live branches when dead standing wood is available nearby. Scatter cooled ash once fully out rather than leaving a visible black scar, and dismantle any rock platform you built back into the surrounding landscape.
Rules on open fires vary by region, season, and land management agency, even during wet weather when fire risk feels low. Check current fire bans and permit requirements for wherever you’re camping before you build anything.
Who’s Behind This Wet-Weather Firecraft Guide
This guide was put together by Thrillofit’s editorial team, drawing on field-tested techniques documented across survival and backpacking sources, cross-checked against real conditions outdoor enthusiasts actually face. The content is built around practical, field-tested advice rather than theory, aiming to give campers and hikers something they can actually use at the tree line, not just read about at home.
If you want to go deeper on any single piece of this workflow, relevant guides cover it. Read the friction fire and no-lighter guide for zero-gear backup skills, the campsite building guide for choosing a site that solves shelter and fire problems at once, and campfire cooking hacks for putting that hard-won coal bed to work once the fire’s established.
Speed vs. Efficiency: When to Prioritize Which
Most guides treat every rain fire the same way, but speed and fuel efficiency actually pull in opposite directions, and picking the wrong priority costs you. If someone’s cold, wet, and needs heat in the next five minutes, that’s not the moment for a patient log-cabin build. Grab your Vaseline cotton, go teepee or lean-to, and get flame fast. Warmth now beats efficiency later.
If you’re settling into camp for the night with time to spare, build for the long game instead. A top-down or log-cabin lay burns slower, needs less tending once lit, and holds coals through hours rather than minutes. That’s the fire you want feeding a Dutch oven or drying gear overnight, not the one you built in an emergency.
The one-line test I use: if someone’s safety depends on heat in the next few minutes, build fast and simple; if you’ve got time and shelter, build slow and let the structure do the work for you.
— S
Prep Before You Go: Build Your Wet-Weather Fire Kit
A ferro rod does nothing for you sitting in a gear closet at home. The gap between people who start fires confidently in the rain and everyone else usually comes down to what’s already packed before the trip starts, not what they figure out on the trail.

Before your next trip into wet or unpredictable weather, run through a short kit check: a ferro rod plus a warmed backup lighter, a sealed bag of Vaseline cotton balls or wax cubes, a lightweight tarp for a quick windbreak or overhead cover, and a fixed-blade knife for feather sticks and splitting wood. None of it is expensive, and all of it fits in a jacket pocket or the top of a pack.
Thrillofit built its library specifically for campers who want field-tested skills, not generic advice recycled from a dozen other sites. Beyond fire, the site covers shelter building for when weather turns worse than expected, plus first aid basics and gear breakdowns aimed at people who actually spend nights outdoors. Browse Thrillofit’s guides before your next trip and build out the rest of your wet-weather kit while you’ve still got dry socks and a warm kitchen table to plan from.
Sources
FAQ
Can You Start a Fire While It’s Raining?
Yes. A properly sheltered site, a raised platform, dry tinder like fatwood, and a ferro rod that works even when wet make it entirely possible, even in steady rain. The key is protecting the first minute of flame from wind and direct water contact.
How Do You Start a Fire After It’s Been Raining?
Focus on ground moisture first, since standing water and saturated leaf litter are often the bigger problem, not the air itself. Build a stick raft or rock bed to lift your fire off wet ground, then split any available logs to expose dry interior wood for kindling and fuel.
How Do You Start a Fire in Wet Weather Without a Lighter?
A ferro rod remains the most dependable no-lighter option in wet weather, since it produces sparks hot enough to ignite tinder even when the rod itself is soaked. For a fuel-free backup with no gear dependency at all, Thrillofit’s guide on starting fire without matches covers friction methods like the bow drill.
Is Firewood Ruined If It Gets Rained On?
Not usually. Rain typically soaks only the outer few millimeters of a solid log, leaving the interior dry. Splitting the wood exposes that dry core, so rained-on firewood is often still perfectly usable fuel once you get past the wet surface layer.
Recommended
Comments