

Step by Step Shelter Building: Survival Guide for 2026


Building a survival shelter comes down to seven core actions: pick a dry, flat site away from hazards; set a ridgepole between two supports; lean branches against it to form a frame; cover the frame with debris or a tarp; insulate the floor with dry natural material; create a small, sealed entrance; and test for drafts before you sleep. That sequence works whether you have a full pack or nothing but what the forest offers.
Choose ground that is flat, dry, and elevated above drainage paths
Rig a ridgepole between two trees or forked supports at a height suitable for shelter use
Lean ribs against the ridgepole, spaced moderately close together for support
Layer debris from the bottom up, shingling toward the ridge
Build a floor bed of dry leaves or boughs thick enough to provide adequate insulation
Create a small entrance just wide enough to crawl through, then seal it
Crawl in and check for light gaps or cold drafts; add material until they disappear
The rest of this guide breaks each step down so you can execute it confidently, even under pressure.
Step by step: how to build a survival shelter
A functional lean-to or debris hut takes 2–4 hours for a beginner, with the frame phase typically running 30–45 minutes depending on what materials are nearby, and debris layering another 45–90 minutes. Work through these steps in order.
Select your site. Look for flat, dry ground on a hillside or at the top of a rise. Avoid valley bottoms, ravines, and any spot near standing water. Dead overhead branches, called “widow makers,” are a real hazard at night, so scan the canopy before you commit. Point the back of your shelter into the prevailing wind.
Rig the ridgepole. Find a straight, strong pole roughly 1.5 times your body length and at least 3 inches in diameter. Rest one end in a tree fork or on a forked upright at 3–4 feet high for a sleeping lean-to. Before you add anything else, press your full body weight onto it. A pole that flexes or cracks under you will collapse under wet debris at 2 AM.
Add the ribs. Lean long branches against the ridgepole at a downward angle, spacing them 6–12 inches apart. Aim for a roof pitch of 30–45 degrees minimum. Below 30 degrees, rain pools instead of running off.
Weave a lattice (optional but worth it). Lay smaller branches horizontally across the ribs. This keeps loose debris from falling through into your sleeping space.
Layer the debris covering. Start at the bottom and work upward, shingling each layer over the one below so water runs off rather than in. Shingle debris from the bottom up and build to at least 12–24 inches thick; add more for heavy rain or freezing temps.
Insulate the floor. Ground pulls heat from your body far faster than cold air does, so this step matters as much as the roof. Pile dry leaves, pine boughs, or grass to a depth of 4–6 inches minimum, and more in freezing conditions. A foot of loose leaves compresses to about 2 inches under body weight, so pile deep.
Seal the entrance. Keep the opening just large enough to crawl through. Use your pack, a woven debris bundle, or a pile of loose leaves pulled in behind you. An open entrance turns any shelter into a cold tunnel.
Pro Tip: Build your shelter in fair weather at least once before you need it. Speed and confidence come from repetition, not reading.
What gear do you actually need?
You can build a shelter with nothing but your hands and what the forest provides. That said, a few tools cut hours off the process.
Cutting tools: A fixed-blade knife handles most tasks; a folding saw speeds up ridgepole and rib cutting considerably; a small hatchet helps split thicker wood for framing.
Cordage: Paracord is the gold standard for lashing a ridgepole to tree supports. Natural cordage from twisted bark or roots works in a pinch but takes longer to prepare.
Natural materials: Branches for the frame, dry leaves, pine boughs, bark slabs, and grass for debris layering and bedding.
Gloves: Handling rough bark and branches without gloves leads to cuts and splinters that become real problems in a multi-day survival situation.
Tarp or emergency blanket: Either one dramatically speeds up waterproofing. A tarp lean-to can be functional in 15–30 minutes versus hours for a debris build.
Two knots worth learning before you go out
With a few knot-tying skills, you can build a simple shelter to protect yourself from the elements using just paracord and trees. Two knots cover most shelter scenarios.
Taught-line hitch: This is the knot for ridgeline tension. It slides to adjust and locks under load, so you can tighten a sagging ridgeline without retying. Use it on both anchor trees when rigging a tarp lean-to.
Bowline: Creates a fixed loop that will not slip or tighten under load. Tie it around a tree trunk as a secure anchor point for your ridgeline. The loop stays the same size no matter how much tension you apply.
Half hitches (single and double): Fast, simple, and useful for tying ribs or loose elements to the frame. A double half hitch is more secure than a single and takes about three seconds to tie.
Simple lashings: Wrap cordage in an X-pattern around two crossing poles, then cinch between them with a couple of frapping turns. No fancy technique required, and it holds a frame together reliably.
Knot choice affects how long your shelter holds up. A slipping knot on the ridgeline means a collapsed shelter at the worst possible time.
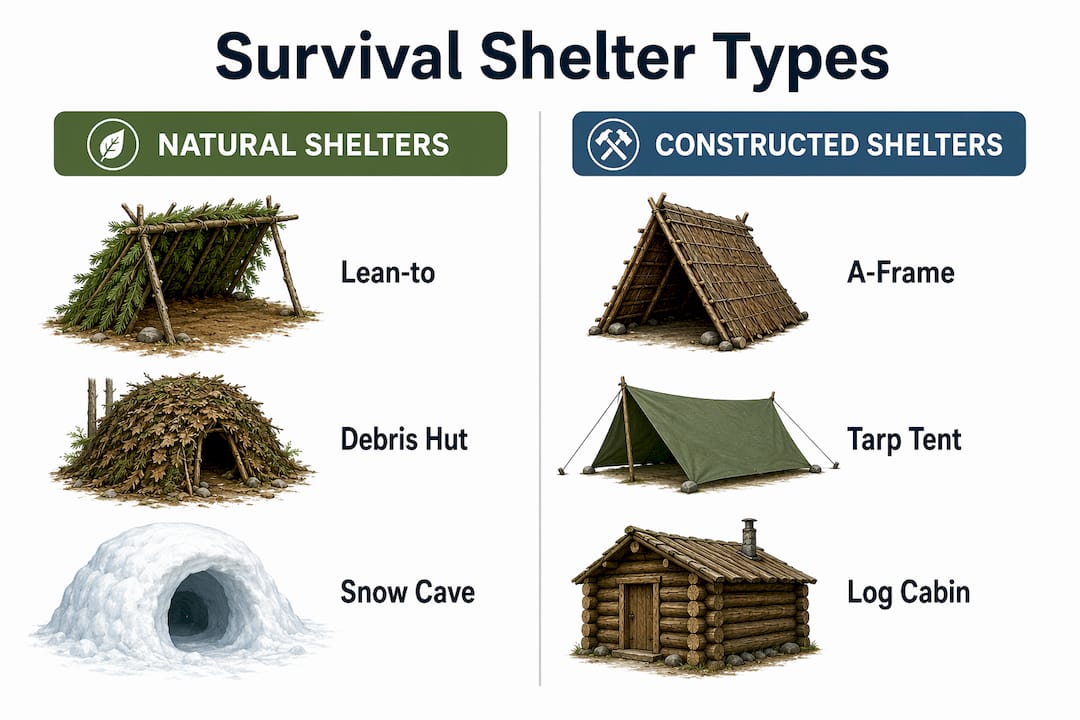
Types of survival shelters and when to use each
Choosing the right shelter type depends on your environment, available materials, and how much time you have before dark. Insulated shelters preserve body heat better for extreme cold, while heated shelters rely on fire and suit milder conditions.
Lean-to: The fastest natural-material build. Set a ridgepole, lean ribs against it, pile debris on top. Works best paired with a fire on the open side. Not ideal for extreme cold without fire.
Debris hut: A fully enclosed, body-heat-powered shelter. Requires a large volume of debris for adequate insulation in freezing temps. Longer to build, but no fire needed.
Snow cave or quinzhee: Excellent insulation in deep snow. Snow traps air and maintains interior temps well above outside lows. Requires consolidated snow and time to build safely.
Natural shelters: Rock ledges, fallen logs, and dense spruce trees can provide immediate cover with minimal construction. Fast but limited in protection.
Tarp A-frame or lean-to: The fastest option when you carry a tarp. Provides wind and rain protection quickly; pair with ground insulation and fire for cold conditions.
Shelter type | Build time | Insulation | Best conditions |
Lean-to (natural) | 2–4 hours | Low without fire | Mild temps, fire available |
Debris hut | 2–4 hours | Excellent | Extreme cold, no fire |
Snow trench | — | Good | Deep snow |
Quinzhee | 1.5–3 hours | Excellent | Any snow, no tools |
Tarp lean-to | 15–30 min | Low to medium | Mild to moderate rain/wind |
Expert tips and mistakes that cost people their lives
Poor site selection is the single most common error in wilderness shelter construction. Low-lying areas collect cold air, flood in rain, and attract insects. Scan for overhead dead branches before you start digging in.
Keep the shelter small. A shelter sized just for your body retains heat from your breath and body far better than a roomy one. Build small, then expand later if you genuinely need to.
Test the ridgepole before you build on it. Apply your full body weight before adding debris. A pole that fails under load at night can injure you in the dark.
Layer debris from the bottom up. Starting at the top lets water channel straight through every gap. Starting at the bottom creates a shingled surface that sheds rain the way roof tiles do.
Seal the entrance completely. An open or loose entrance plug defeats the entire purpose of an insulated shelter. Even a crude plug of loose leaves makes a measurable difference in warmth.
Manage fire placement carefully. Lean-tos used with fire must be angled to reflect heat back toward the occupant. Fire inside any enclosed shelter requires ventilation to prevent carbon monoxide buildup. For more on fire safety near shelters, Thrillofit’s guide on starting a fire safely covers the basics.
Check insulation depth from outside. Push your arm into the debris wall. If you feel warmth at the surface, the insulation is adequate. If the wall feels cold throughout, add more material.
Practice before you need it. Building a shelter in fair weather teaches you where the process breaks down. Speed in a real emergency comes directly from that practice.
Pro Tip: To check your insulation depth quickly, push your arm into the debris wall from outside. If you feel body warmth at the surface, you have enough. If not, keep piling.
For a deeper look at the mindset behind these skills, Thrillofit’s piece on wilderness self-reliance pairs well with the hands-on techniques here.

Key Takeaways
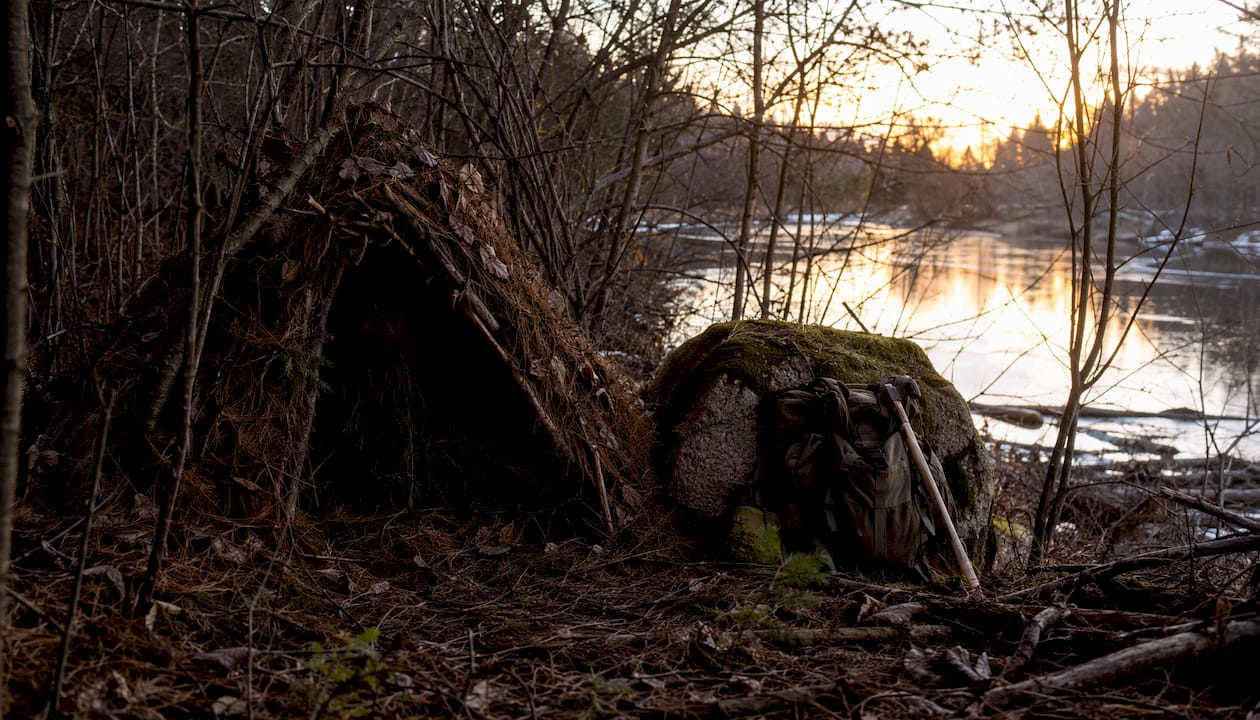
A survival shelter built correctly, with the right site, a tested frame, and deep ground insulation, can protect you from lethal exposure using nothing but materials found in a temperate forest.
Point | Details |
Site selection first | Avoid low ground, flood paths, and dead overhead branches before you build anything. |
Test the ridgepole | Apply full body weight before adding debris; a weak pole can collapse and injure you at night. |
Roof pitch matters | Keep the roof angle at 30–45 degrees minimum so rain sheds off rather than pooling. |
Floor insulation is critical | Build at least 4–6 inches of dry debris underfoot; ground pulls heat faster than cold air does. |
Seal the entrance | An open entrance turns any insulated shelter into a cold tunnel; even a loose debris plug helps. |
Recommended
Comments