

The Role of Camp Kitchen Setup for Better Camping

TL;DR:
A camp kitchen should be divided into three zones: heat, prep, and cleanup, to improve safety and efficiency. Placing the kitchen at least 10 feet from tents reduces fire risk and wildlife attraction. Proper organization, planning, and setup practices help create a safe, functional outdoor cooking environment.
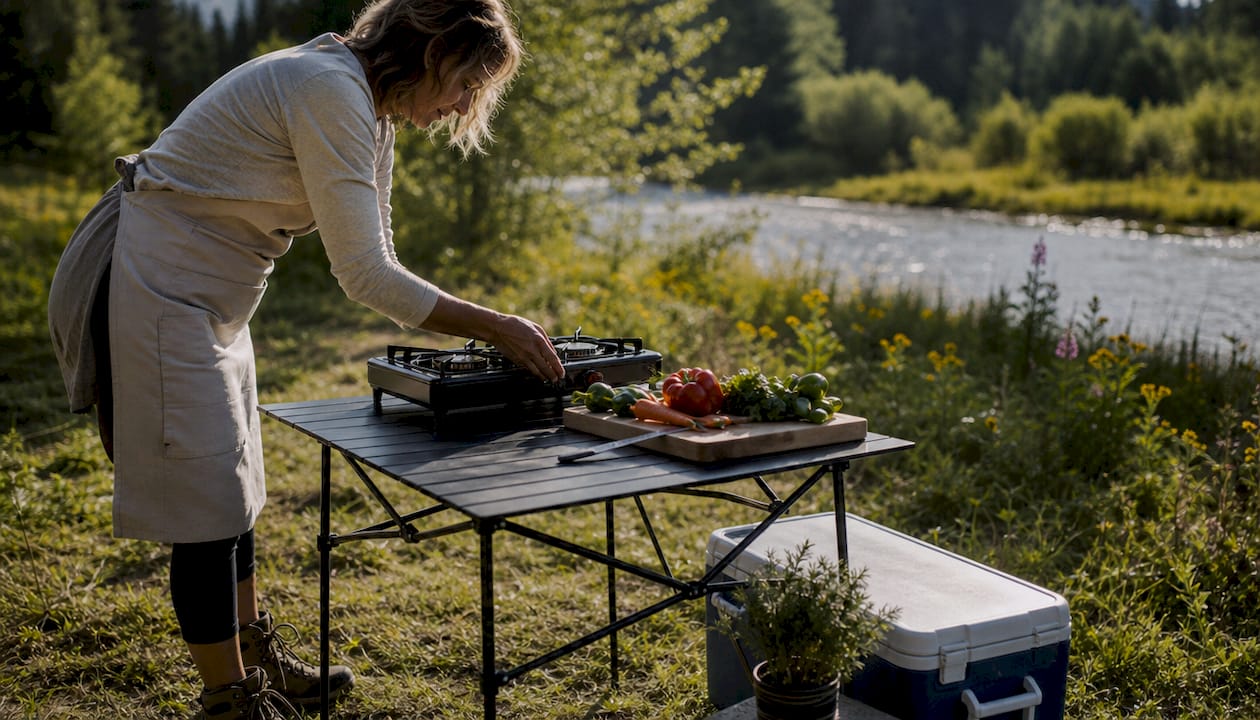
A camp kitchen setup is a dedicated outdoor cooking space divided into three functional zones: heat, prep, and cleanup. The role of camp kitchen setup goes far beyond convenience. A well-organized cooking area prevents accidents, reduces wildlife attraction, and turns a chaotic mealtime into something you actually enjoy. Industry safety standards call for placing your kitchen at least 10 feet from sleeping tents to cut fire risk and keep animals away from your sleeping area. Get this foundation right, and every meal outdoors gets easier. Thrillofit covers the full picture below.
What are the key zones in a well-organized camp kitchen?
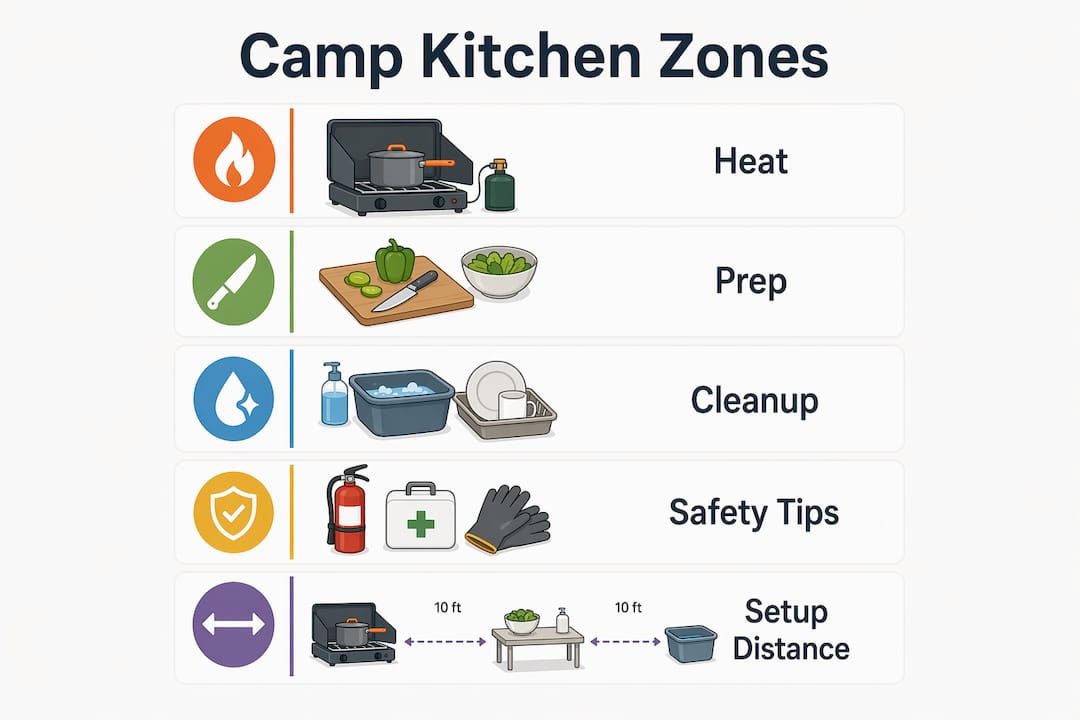
A functional camp kitchen runs on three zones: heat, prep, and cleanup. Each zone has a specific job, and keeping them separate is what makes outdoor cooking safe and fast.
The heat zone holds your stove, fuel, and any fire-starting tools. Place it on a stable, flat surface away from dry brush. A standard two-burner stove handles about 90% of camp meals, with a fuel canister lasting 1.5–2 hours on high heat. That burn time matters when you are planning a multi-day trip and need to pack the right number of canisters.
The prep zone sits adjacent to the heat zone and holds your cutting board, ingredients, and utensils. Arranging zones according to your dominant hand creates a logical left-to-right workflow from prep to heat to cleanup. This mirrors how professional kitchen lines operate, and it works just as well on a folding table in the woods.
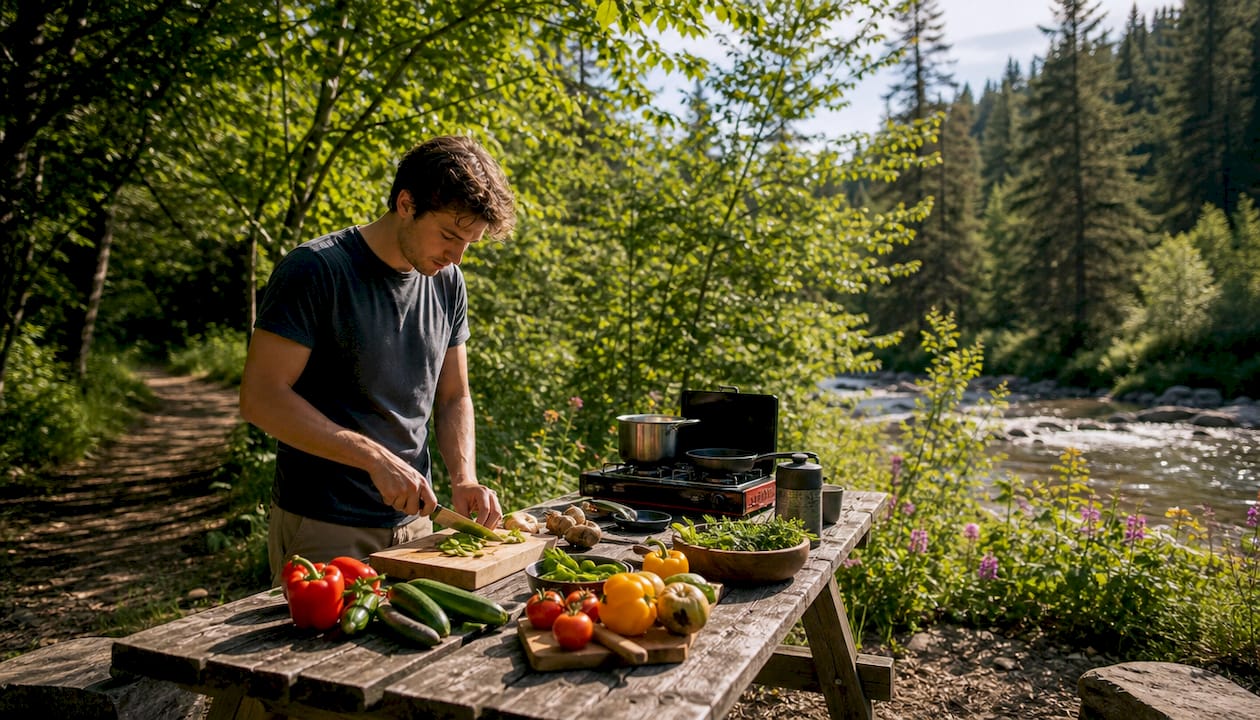
The cleanup zone goes on the opposite side of the stove. Position your wash basin, biodegradable soap, and drying cloths there to reduce cross-contamination between raw food and dirty dishes. Setting up the cleanup station before you start cooking, not after, is the single habit that keeps your camp kitchen hygienic and wildlife-free.
Zone | Primary Function | Key Items | Safety Note |
Heat | Cooking and boiling | Stove, fuel, lighter | 10 feet minimum from tents |
Prep | Food preparation | Cutting board, knives, ingredients | Keep raw and cooked foods separate |
Cleanup | Washing and waste | Basin, soap, drying cloth | Set up before cooking begins |
Pro Tip: Place the cleanup zone downwind of the heat zone so cooking smells do not drift back over dirty dishes and attract insects or wildlife.
How to choose essential camp kitchen gear for your trip
Gear selection starts with your menu, not your gear list. Menu planning prevents overpacking and the gear sprawl that turns a simple camp kitchen into a cluttered mess. Decide what you are cooking first, then build your kit around those meals.
For most campers, a two-burner propane or butane stove covers the full range of meals from scrambled eggs to pasta. Simple boil-in-bag setups need almost nothing beyond a pot and a spoon. Multi-pan cooking with cast iron adds weight and complexity, so reserve that approach for car camping where you are not hauling gear on your back.
Water is the most underestimated camp kitchen essential. Experts recommend at least 2 gallons of water for two people over a weekend, covering both drinking and dishwashing. A gravity-fed bag or a USB pump faucet keeps water accessible without lifting heavy jugs repeatedly.
The items campers forget most often are also the ones that cause the most frustration:
Can opener: Non-perishable meals rely on canned goods. Forgetting this one tool can ruin a meal plan entirely.
Coffee kit: Keep your coffee setup together in one bag. Scrambling for a filter at 6:00 AM is a miserable way to start a camp morning.
Cutting board: Prep on the ground is a hygiene problem and a back problem.
Biodegradable soap: Standard dish soap harms waterways. This is a non-negotiable swap.
Headlamp or lantern: Cooking after dark without light is how burns and spills happen.
Pro Tip: Pack your gear into three labeled bins: pantry, cookware, and utensils. This system cuts setup time significantly and means you never dig through a single giant bag looking for a spatula.
What are the best practices for arranging your camp cooking area?
Working at waist height is the single most important factor for comfort and safety when cooking outdoors. Ground-level cooking causes back fatigue, increases the chance of spills onto your legs, and makes it harder to control heat. A folding camp table at roughly 28–32 inches solves all three problems at once.
Wind direction shapes your entire kitchen layout. Position the stove so the prevailing wind blows smoke away from your prep zone and dining area. Checking wind direction before you unpack gear takes 30 seconds and saves an hour of smoky, uncomfortable cooking. If natural shade is available, set up under it. If not, a tarp rigged above the kitchen keeps sun and rain off your food and your stove flame stable.
Lighting deserves more planning than most campers give it. A headlamp frees your hands but limits your field of view. A lantern hung above the kitchen table illuminates the full workspace. Use both: a lantern for ambient light and a headlamp for detail work like reading labels or checking meat doneness.
Organize food storage off the ground at all times. Bear canisters or hanging food bags keep wildlife out of your pantry. Even in areas without bears, raccoons and rodents will find an unprotected food bag within hours. Keeping food sealed and elevated is both a safety practice and a camp kitchen efficiency habit.
Choose your kitchen site before unpacking anything. Check for level ground, wind direction, and proximity to tents.
Set up the table and cleanup station first. This forces you to establish the layout before gear piles up randomly.
Arrange zones left to right: prep, heat, cleanup. This matches natural cooking workflow.
Hang or store all food off the ground immediately. Do not wait until after dinner.
Set up your light source before it gets dark. Fumbling with a lantern in the dark is avoidable.
Pro Tip: Use a small bungee cord or carabiner to hang a headlamp from your tarp or a nearby branch directly above the stove. It gives hands-free overhead lighting right where you need it most.
What common mistakes do campers make with their camp kitchen setup?
Most camp kitchen problems trace back to five repeatable errors. Recognizing them before your next trip is faster than learning them the hard way.
Skipping menu planning. Packing gear without a meal plan leads to duplicate items, missing tools, and a kitchen table so cluttered you cannot find anything. Plan your menu first, then build your kit.
Cooking at ground level. This is a comfort and safety issue. Bending over a ground-level stove for 20 minutes causes real fatigue. Spills at ground level are harder to control and more likely to cause burns.
Ignoring the 10-foot rule. Placing your kitchen too close to tents increases fire risk and draws wildlife toward sleeping areas. The 10-foot minimum distance is a safety standard, not a suggestion.
Splitting essential kits across multiple bags. When your coffee supplies are in three different places, morning prep becomes a scavenger hunt. Keep each functional kit in one container.
Skipping the cleanup station setup. Campers who plan to “deal with dishes later” end up with a pile of dirty cookware that attracts animals overnight. Set up your wash basin before the first meal, not after the last one.
The pattern across all five mistakes is the same: reactive setup instead of deliberate planning. A camp kitchen that works well is built before cooking starts, not assembled on the fly.
Key Takeaways
A well-organized camp kitchen built on the three-zone system, placed 10 feet from tents, and stocked based on a pre-planned menu is the most reliable way to cook safely and efficiently outdoors.
Point | Details |
Three-zone system | Divide your kitchen into heat, prep, and cleanup zones for safe, logical workflow. |
Safety distance | Place the kitchen at least 10 feet from tents to reduce fire risk and wildlife encounters. |
Menu-first gear selection | Plan meals before packing gear to avoid clutter and missing tools. |
Waist-height workspace | Cook at table height to prevent fatigue, spills, and burns. |
Cleanup station first | Set up your wash basin before cooking starts to maintain hygiene and deter animals. |
What I’ve learned after years of camp kitchens going wrong
My first solo camping trip featured a stove on the ground, a bag of gear I could not find anything in, and coffee supplies split between two different packs. I spent 40 minutes making breakfast. The food was fine. The experience was not.
The shift happened when I started treating my camp kitchen like a real workspace instead of a pile of stuff near the fire. Adopting the three-zone layout changed everything. Prep on the left, heat in the center, cleanup on the right. That one structural decision cut my setup time in half and made cooking feel like part of the trip rather than a chore I had to survive.
The detail most guides skip is repeatability. The best camp kitchen setup is one you can rebuild from memory at a new site in under 15 minutes. That means keeping your bins labeled, your kit consolidated, and your layout consistent trip after trip. Once the system is automatic, you stop thinking about the kitchen and start enjoying the meal.
Safety is the part I take most seriously now. The 10-foot distance rule felt like overkill until I watched a camp neighbor’s tarp catch a spark. Hygiene matters too. A cleanup station set up before cooking is not extra work. It is the difference between a clean camp and one that smells like last night’s dinner at 3:00 AM when something outside starts investigating.
— S
Thrillofit has the gear guides and tips to back your kitchen up
Thrillofit covers the full range of outdoor cooking knowledge, from campfire cooking hacks that work without a stove to complete gear breakdowns for every camping style. Whether you are setting up your first car camp kitchen or refining a system you have used for years, the site gives you practical, experience-backed advice without the filler.
The camping food ideas section pairs directly with this guide, helping you build a meal plan that shapes your gear list before you pack a single item. Browse Thrillofit’s camping content to find the specific tips that match your setup, your group size, and your next destination.
FAQ
What is the role of a camp kitchen setup?
A camp kitchen setup organizes your cooking, prep, and cleanup into distinct zones so outdoor meals are safer, faster, and less stressful. The three-zone system is the standard framework used by experienced campers.
How far should a camp kitchen be from tents?
Place your camp kitchen at least 10 feet from any sleeping tent. This distance reduces fire risk and keeps food smells away from your sleeping area, which lowers the chance of wildlife encounters.
What gear do I actually need for a basic camp kitchen?
A two-burner stove, one pot, a cutting board, utensils, biodegradable soap, a wash basin, and at least 2 gallons of water for two people covers a full weekend of camp cooking.
How do I avoid overpacking my camp kitchen?
Plan your full menu before you pack a single item. Simple meals need far less gear than complex ones, and a written meal plan reveals exactly which tools you need and which you can leave home.
Why is waist-height cooking important outdoors?
Cooking at waist height prevents back fatigue and reduces the risk of spills and burns. Ground-level stoves are harder to control and more dangerous, especially when working with boiling water or open flames.
Recommended
Comments