

Tick Removal Steps: A Fast, Medically Sound Guide

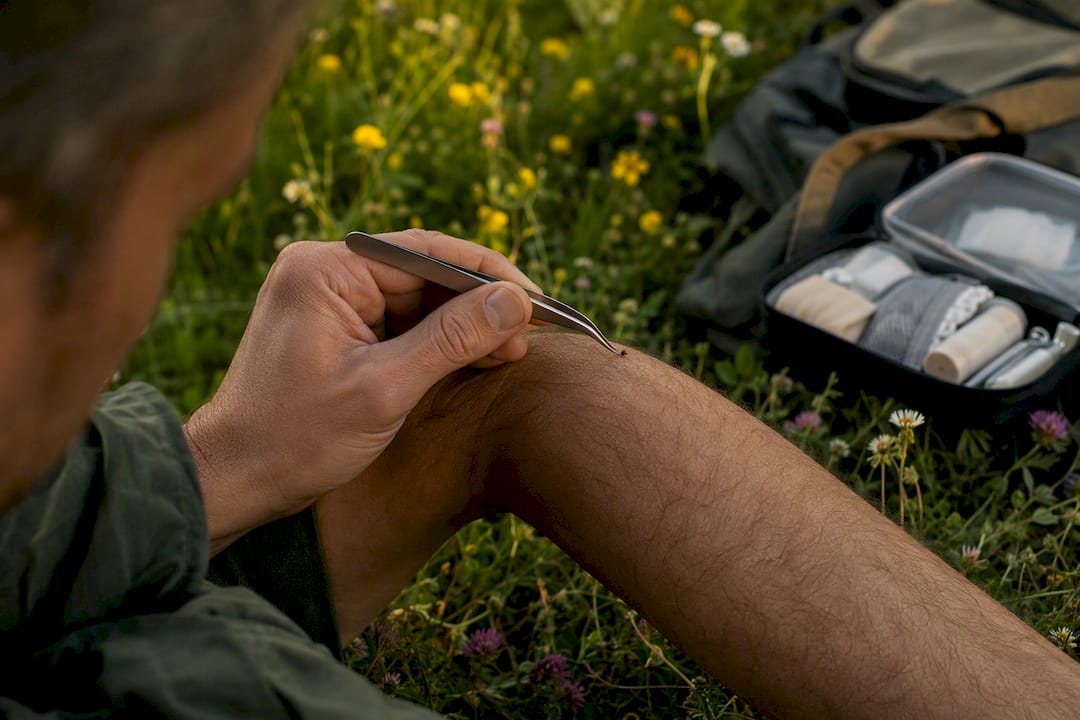
Grab a pair of fine-tipped tweezers, grasp the tick as close to your skin as possible, and pull straight up with slow, steady pressure. Do not twist. Do not jerk. That single motion is what CDC guidance on tick bites and Mayo Clinic’s first aid guidance both point to as the correct move, and it works better the sooner you do it after finding the tick.
Once it’s out, you have three more things to handle before you move on with your day.
Remove it now. Don’t wait for a clinic visit. Acting quickly matters more than doing it in a sterile setting.
Clean the area and your hands. Soap and water or rubbing alcohol both work.
Save the tick or a photo, and jot down the date. This detail helps a lot if symptoms show up weeks later.
Key Takeaways
Prompt removal with fine-tipped tweezers, steady upward pressure, and no twisting is the single most important factor in reducing tick-borne infection risk.
Point | Details |
Act immediately | Remove the tick as soon as you find it rather than waiting for a clinic visit. |
Use the right grip | Fine-tipped or curved-tip tweezers grasp mouthparts without squeezing the tick’s body. |
Pull straight, never twist | Steady upward traction avoids snapping off mouthparts under the skin. |
Clean and preserve evidence | Wash with soap and water, then save the tick or a photo with the bite date. |
Watch for 30 days | Rash, fever, joint pain, or swollen lymph nodes mean it’s time to call a provider. |
Pack the right gear | Thrillofit’s camping first aid kit essentials guide covers the tools worth carrying, including tick removal tweezers. |
Table of Contents
Tools and Quick Preparation Before Removal
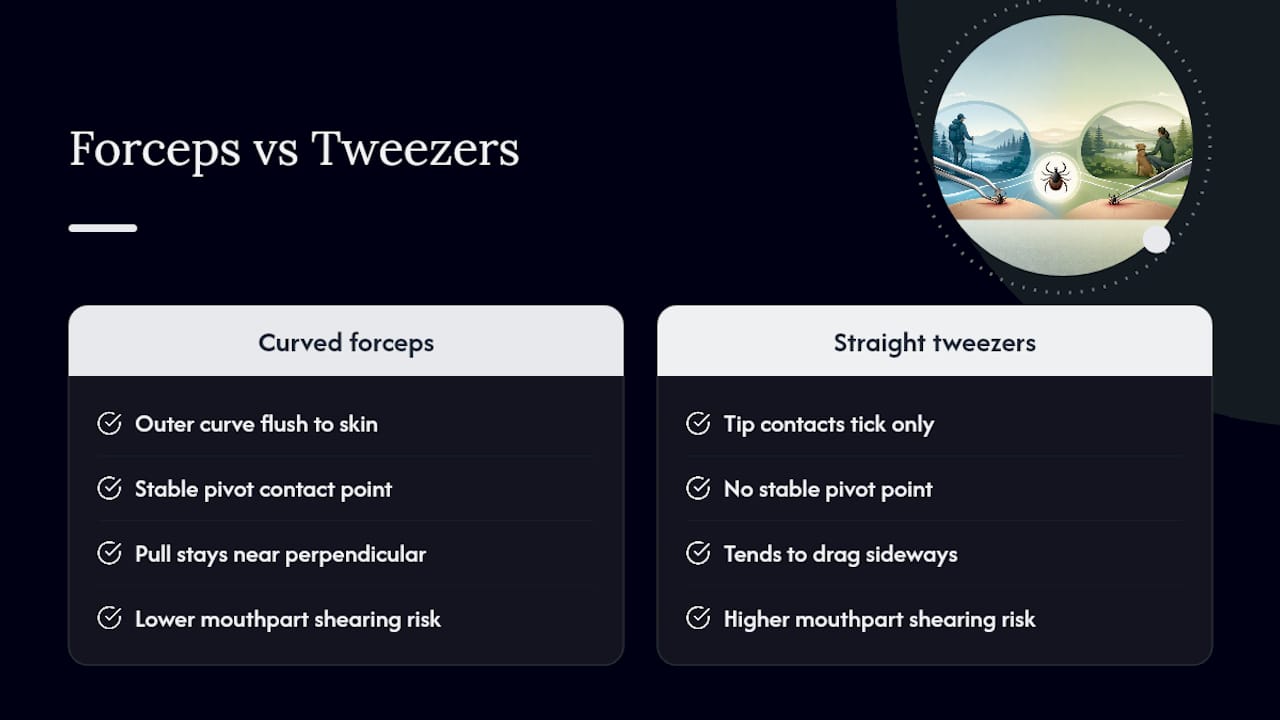
Fine-tipped tweezers beat every other option because they let you grab the tick’s mouthparts without squashing its body. A wide, blunt tweezer tip tends to grip the abdomen instead, and squeezing that abdomen can push infected fluid straight into the bite. Curved-tip forceps work even better for stability, according to the Merck Manual’s clinical guidance, because the curve rests flush against your skin and gives you a steadier pull.
No tweezers on hand? Regular tweezers work in a pinch, and so does a piece of tissue or a thin plastic bag wrapped around your fingertip.
Skip anything involving heat, petroleum jelly, nail polish, or a lit match. These old-school tricks don’t make ticks “back out,” they just agitate them.
Pro Tip: Toss a $3 pair of fine-tipped tweezers into every first-aid kit, backpack pocket, and glove box you own. The five seconds it saves when you actually need one is worth more than the tweezers themselves.
How Do You Remove a Tick Step by Step?
Here’s the exact sequence, whether you’re standing in a bathroom or crouched on a trail.
Get good light and a clear view. Lay the person flat if you can, part any hair covering the bite, and use a phone flashlight or magnifier if the tick is small.
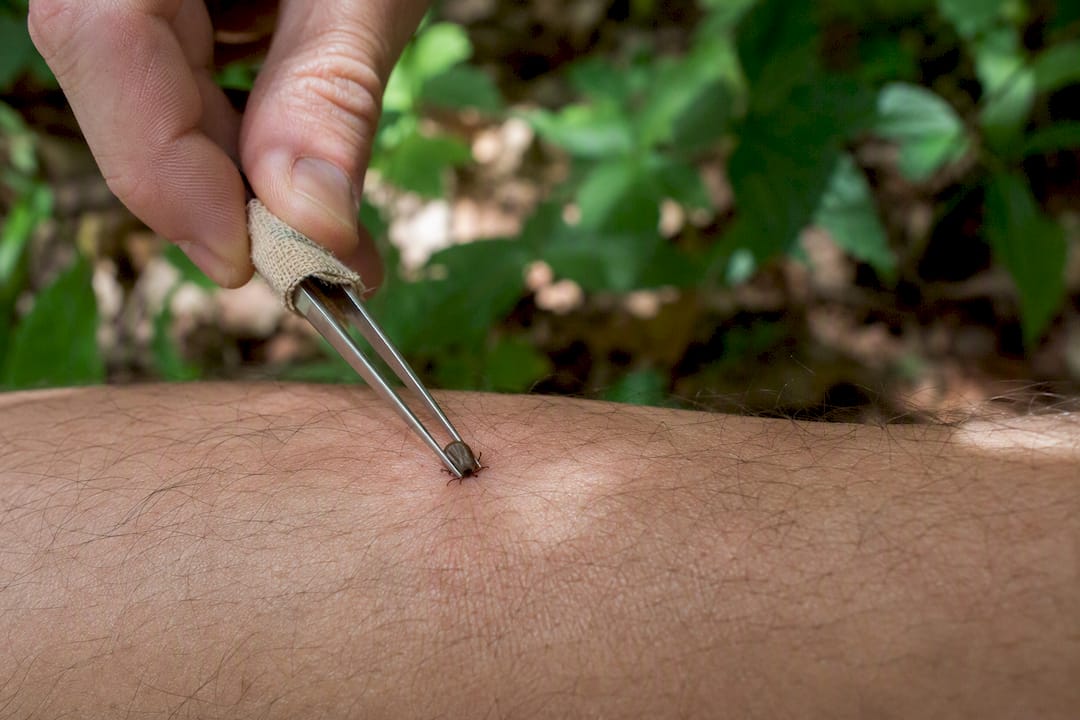
Position the tweezers at the skin line. Grab the mouthparts as close to the surface of your skin as possible. Avoid pinching the tick’s swollen abdomen; that’s where fluid backs up under pressure.
Pull straight up, steady and slow. No twisting, no yanking. A few seconds of firm, even traction usually does it. StatPearls’ clinical guidance describes this same gentle, sustained traction as the standard clinical technique.
Check what came out. You want the whole tick, legs and all. If the body pulls free but mouthparts stay lodged, don’t panic.
Handle stuck mouthparts calmly. If they’re shallow, try again with clean tweezers. If they’re buried deep and won’t budge easily, leave them alone. The skin often pushes them out on its own over the following days, and aggressive digging usually causes more harm than the leftover mouthpart ever would.
Know when to stop and call a clinician. If the tick is embedded somewhere you can’t safely reach (an eyelid, deep in the scalp of a squirming toddler, or close to the groin), or if the area looks infected afterward, get medical help instead of forcing it.
Special situations deserve extra caution. A tick on a child’s scalp or a pet’s ear line moves the moment you touch it, so having a second person hold still or steady the head makes a real difference. Groin and eyelid removals are trickier because the skin is thin and sensitive. When in doubt, a walk-in clinic can finish the job in minutes.
Pro Tip: If the tick is engorged and slippery, wrap a small piece of gauze around the tweezer tips for extra grip before you pull. It keeps them from slipping mid extraction.
Cleaning and Disposing of the Tick Safely
Wash the bite site and your hands with soap and water right after removal. Rubbing alcohol or an iodine scrub works too, and either one covers you if soap isn’t available on a trail.
For getting rid of the tick itself, the CDC’s after-bite guidance lists a few solid options:
Seal it in a container or ziplock bag.
Wrap it tightly in tape.
Flush it down the toilet.
Drop it in a small jar of rubbing alcohol, which kills it outright.
If you want to keep the tick for identification later, freezing it in a sealed container for a few days works as a preservation method. Whatever you do, don’t crush it between your fingers or a paper towel. Crushing a tick can release the same fluids that cause disease transmission in the first place, so it defeats the purpose of removing it carefully.
If you’re saving it, snap a quick photo too: date, where on the body it bit you, and roughly how long it may have been attached. That detail is gold for a doctor if anything develops later.
When Should You Call a Doctor After a Tick Bite?
Watch the bite site for about 30 days. Most tick bites heal without incident, but a handful of warning signs mean it’s time to call a provider rather than wait it out.
A rash that expands, especially one with a bull’s-eye pattern.
Fever or chills that show up days or weeks after the bite.
Joint pain or muscle aches that seem to come from nowhere.
Swollen lymph nodes near the bite.
Keep the tick or your photo, and note the bite date and location on your body. According to Mayo Clinic’s first aid recommendations, that information helps a clinician identify the species and assess your regional risk far faster than a description alone.
Urgent care makes sense for a spreading rash or high fever. A routine call to your primary care doctor works fine for milder concerns or general questions. Whether antibiotics make sense as a preventive measure is a clinical call that depends on the tick species, how long it was attached, and how common tick-borne illness is in your area, so that decision belongs to your provider, not a home remedy guide.
Common Tick Removal Mistakes That Make Things Worse
A surprising number of people still reach for petroleum jelly, a lit match, or a puddle of alcohol, hoping the tick will simply back out on its own. It won’t, and trying it can backfire. Research on tick removal risks shows that irritating a tick this way tends to make it regurgitate, which pushes infected fluid into the wound instead of keeping it out.
Twisting or jerking the tick can snap off mouthparts and leave them embedded.
Squeezing the body forces fluid toward the bite site.
Waiting for a doctor’s office to open often delays removal longer than necessary, and prompt removal at home is usually the safer call when you have the right tools.
Expert Notes on Tick Removal Technique
Curved-tip forceps have a real edge here. Placing the outer curve flush against the skin gives you a stable pivot point, so your pull stays close to perpendicular instead of dragging sideways, which is exactly the angle that shears off mouthparts.
If mouthparts stay embedded after a clean pull, judgment matters. Superficial fragments usually come out fine with a second gentle attempt. Deeper ones are often better left alone to work their way out naturally while you watch for redness or swelling.
In the field, recruit a second set of hands if the person is squirming, work in daylight or with a headlamp, and keep a compact tweezers kit clipped inside your pack.
A Field Note From Author S
I’ve pulled ticks off hiking partners more times than I can count, and the thing that separates a clean removal from a frustrating one is almost always the tool, not the technique. Carry fine-tipped tweezers, always. For more on outdoor readiness, check Thrillofit’s other first aid and prevention guides.
Build a Kit That Handles More Than Ticks
A good tweezers kit is step one, not the whole plan. Thrillofit puts together outdoor safety content built for people who actually spend time on trails, not just people reading about them from a couch. If you want the full list of what belongs in your pack beyond tweezers, the camping first aid kit essentials guide covers wound care, bite treatment, and the small tools that matter when you’re miles from help. For prevention before you’re ever bitten, Bug Away’s practical tick prevention guide walks through clothing and repellent choices that cut your exposure on the trail. Check Thrillofit’s gear picks next and stock your pack before your next hike.
Frequently Asked Questions
Do you twist to remove a tick? No. Twisting or jerking increases the odds of snapping off the mouthparts under the skin. Pull straight up with steady, even pressure instead.
What’s the safest tick removal method? Fine-tipped tweezers or curved-tip forceps, grasping close to the skin and pulling straight out, is the method backed by CDC and Merck Manual guidance alike.
Can I use my fingers to remove a tick? Only if tweezers aren’t available, and only with a tissue or thin plastic wrapped around your fingertips to avoid direct contact and to keep from squeezing the tick’s body.
How long should I watch the bite site after removing a tick? About 30 days. Watch for a spreading rash, fever, joint pain, or swollen lymph nodes, and call a healthcare provider if any of those show up.
Should I save the tick after removing it? Yes, if you can. Seal it in a container or take a clear photo, and note the date and location on your body. That information helps a clinician assess your risk later.
This article is general information, not a substitute for advice from a qualified doctor. Consult a qualified healthcare professional about your own circumstances before acting on anything here.
Sources
Recommended
Comments