

Report Rescue Ready Coordinates in 20 Minutes: UTM for Hikers

Use UTM coordinates for hiking whenever you can. They give you a single, meter-based grid that makes distance math trivial, cuts down on radio-format confusion, and plots faster on a paper map than any latitude and longitude string. Three habits make it work: always state your zone number, match your GPS datum to your map’s datum, and remember “Read Right, then Up” when you record easting before northing. Practice plotting a point before you rely on it off-trail.
TL;DR:
Practice interpolating and reading UTM coordinates with a romer and a topo map until the “Read Right, then Up” habit is automatic, ensuring quick and accurate positioning.
Always verify your GPS or phone is set to UTM format with the correct datum, and confirm the zone number at a known location before relying on it in the field.
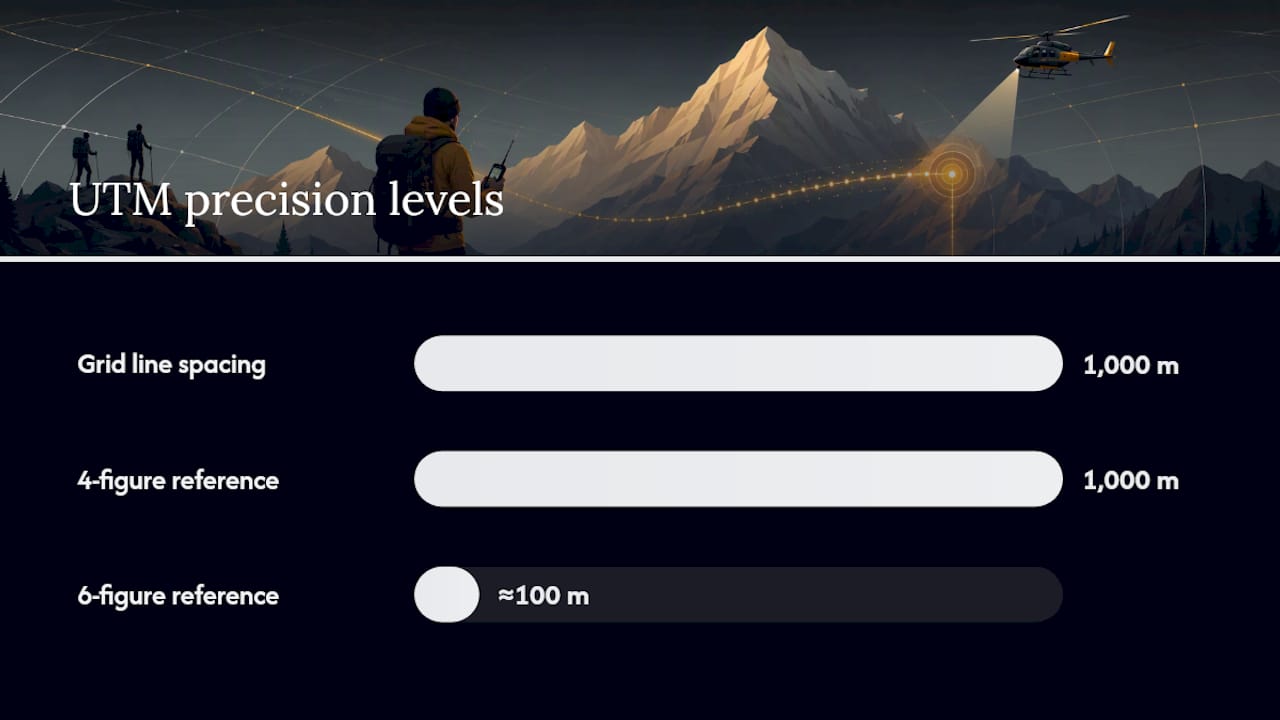
Use six-figure UTM references for about 100-meter precision and eight-figure references for roughly 10-meter accuracy by interpolating between grid lines.
Write the complete coordinate string digit-by-digit over radio in case of emergency, starting with the zone number, to avoid miscommunication during rescue.
Build muscle memory through drills at trailheads, matching plotted or known coordinates, to ensure reliable use of UTM navigation under stress or low visibility conditions.
Table of Contents
What UTM Coordinates Are and Why Hikers Prefer Them
The Universal Transverse Mercator system splits the planet into 60 vertical zones, each spanning 6 degrees of longitude. Every zone gets its own flat grid, which is the whole point: instead of curved lines of latitude and longitude, you get straight, square grid lines measured in meters. That’s what makes UTM so useful for hikers doing quick math in the field, like figuring out you’re 1,400 meters from a water source instead of squinting at decimal degrees.
Positions inside each zone report as an easting (distance from the zone’s central reference line) and a northing (distance from the equator, in the northern hemisphere). To avoid negative numbers on the west side of a zone, surveyors assigned the central meridian a false easting value of 500,000 meters. So an easting reading of 480,000 simply means you’re 20,000 meters west of the zone’s centerline. Northings count up from the equator, so a reading of 4,512,000 tells you you’re roughly 4,512 kilometers north of it.
This matters more than it sounds like it should. Latitude and longitude come in at least three common formats, degrees-minutes-seconds, decimal degrees, and degrees-decimal-minutes, and mixing them up has genuinely sent search-and-rescue teams to the wrong ridge. UTM has one dominant format. That consistency is why:
Search and rescue dispatch prefers UTM for verbal coordinate reports over the radio.
Trail distances and area calculations use simple subtraction instead of trigonometry.
USGS topographic maps have printed UTM grid ticks since the 1970s, with many modern US Topo maps showing full grid lines at a typical 1:24,000 scale.
Coordinating with a partner who’s reading a different device is less prone to transcription error.
Pro Tip: Write your UTM zone on a piece of tape stuck to your map case before you leave the car. It sounds unnecessary until you’re the third hiker that season who forgot which zone you started in.
How to Read UTM Coordinates on a Topo Map, Step by Step
Reading UTM off a paper map is a skill you can learn in twenty minutes and never forget, as long as you practice it before you actually need it. Here’s the sequence that works every time.
Find the Grid Zone Designation. It’s printed in the map margin, usually near the scale bar or in the map’s metadata block. Continental U.S. maps fall between zones 10 and 19. Write this number down first, every time. A coordinate without its zone is just two numbers floating in space.
Locate the nearest grid lines below and left of your point. These are your base values. USGS 1:24,000 quads print grid lines every 1,000 meters, each labeled along the map edge.
Read Right, then Up. This is the single most important convention in UTM work: read the easting value first (moving right along the bottom margin), then the northing value (moving up along the side margin). Reverse this order and you’ve just sent someone to a point that could be miles off, according to guidance from TopoStreets on reading UTM coordinates.
Interpolate between grid lines for precision. A raw reading to the nearest 1,000-meter line gets you a 4-figure grid reference, which is not precise enough for anything but general orientation. Estimating tenths of the distance between two grid lines gets you a 6-figure reference, accurate to about 100 meters. Estimating hundredths gets you an 8-figure reference with roughly 10 meter accuracy, according to MapTools’ quick guide to UTM.
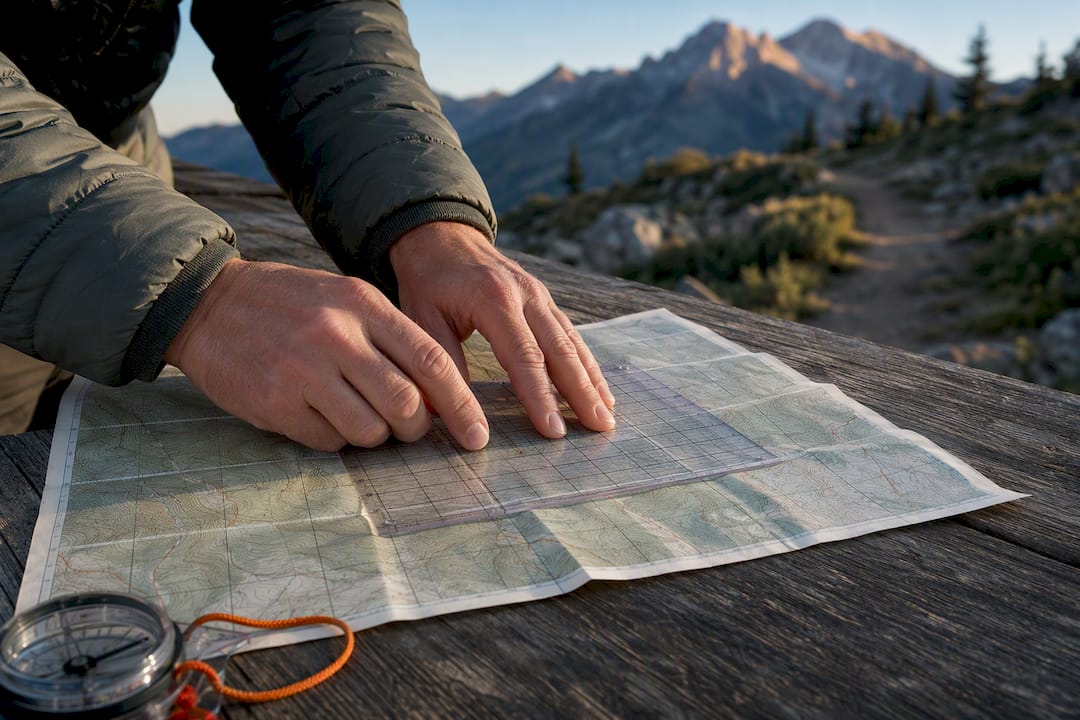
Use a romer or UTM scale for the interpolation step. A romer is a small transparent plastic ruler cut to your map’s scale, with the 1,000 meter distance pre-divided into tenths. Lay it over your point and read the fractional distance directly instead of eyeballing it.
Write out the full digit string. Never round up when you’re uncertain. If your interpolated value falls between two digits, use the lower one, since overstating precision is more dangerous than admitting you’re within a 100-meter box rather than a 10-meter one.
Zero-padding matters here too. If your easting reads as 4,800 meters into the grid square rather than 48,000, write it with leading zeros to maintain correct digit count. Dropped or added zeros are a quiet, common way for a plotted point to land a kilometer from where you meant.
Pro Tip: Practice reading a coordinate at a trailhead kiosk map before you ever need it in the backcountry. If your 6-figure reading matches the kiosk’s marked coordinate within 100 meters, your technique is solid.
For a deeper walkthrough with worked examples, A guide on step-by-step map reading for beginner hikers covers grid interpretation in more visual detail.
Getting UTM From Your GPS or Phone (and Where It Goes Wrong)
Every consumer GPS unit and most hiking apps can display UTM, but almost none do it by default. You have to go find the setting, and if you skip this step, you’ll waste time converting decimal degrees by hand later.
On a dedicated GPS unit, look for “Position Format” in the setup or units menu and change it from the default lat/long format to UTM/UPS. Right next to it, you’ll find a “Datum” setting. Set this to WGS84 unless your paper map explicitly specifies a different datum, in which case match the map. This same workflow applies across most Garmin units and mapping apps like CalTopo, which lets you toggle coordinate display formats from a settings menu.
Before you trust any of it, verify at a known point. Stand at a trailhead sign, benchmark, or another location with a published coordinate, check what your device reads, and confirm it matches. This single step catches a wrong datum or format setting before it costs you.
A few mistakes account for most of the real navigation errors hikers report:
Swapping easting and northing. This is the most common transcription error, and it can shift a plotted point by kilometers depending on where you are in the zone, according to field guidance on common UTM mistakes.
Dropping the zone number. A coordinate pair without a zone could technically apply to dozens of locations worldwide.
Datum mismatch. GPS set to WGS84 while your paper map uses an older datum like NAD27 can shift a plotted position by hundreds of meters, enough to put you on the wrong side of a ridge.
Assuming Google Maps accepts raw UTM. It doesn’t. The Google Maps search box only understands decimal degrees or degrees-minutes-seconds, so you’ll need Google Earth, CalTopo, or a UTM-capable GPS app to work with those coordinates directly.
An outdoor navigation tools field guide breaks down which apps and devices handle UTM display natively versus which require a workaround.
Your Compact Field Workflow for UTM Navigation
None of this matters if you can’t execute it with cold hands, low light, or an adrenaline spike from a real emergency. Build the habit before you need it.
The kit is short:
A topographic map at 1:24,000 scale with printed UTM grid lines, ideally a current USGS quad.
A romer or UTM coordinate scale matched to your map’s scale.
A compass, for cross-checking bearing and confirming you’re reading the correct grid square.
A GPS unit or phone set to UTM position format with the datum matched to your map.
A waterproof notebook and pencil, because batteries die and pens freeze.
At the trailhead, run three quick checks. Confirm your GPS is set to UTM mode and the correct datum. Confirm the zone number printed on your map matches what your device displays. Then pick one known landmark, a parking area, a trail junction, a benchmark, and confirm your device’s coordinate reading against the map before you start walking.
Build the skill with drills, not just theory. Pick a coordinate off the map, plot it with your romer, then navigate to that physical point using compass and pace count alone. Do the reverse too: stand at a known location, record the coordinate, and check it against the map. Thrillofit’s navigation workflow guide walks through building this kind of repeatable field system, and the step-by-step navigation skills guide adds more drill variations for solo practice.
If you ever need to report your position for an emergency, use this script: state your zone number first. Then read the easting digits one at a time, not as a grouped number, followed by the northing digits the same way. Search and rescue teams often divide their search area into 1,000-meter grid squares, and a full zone plus complete digit string lets them plot your position without guessing at which zone or rounding your intent.
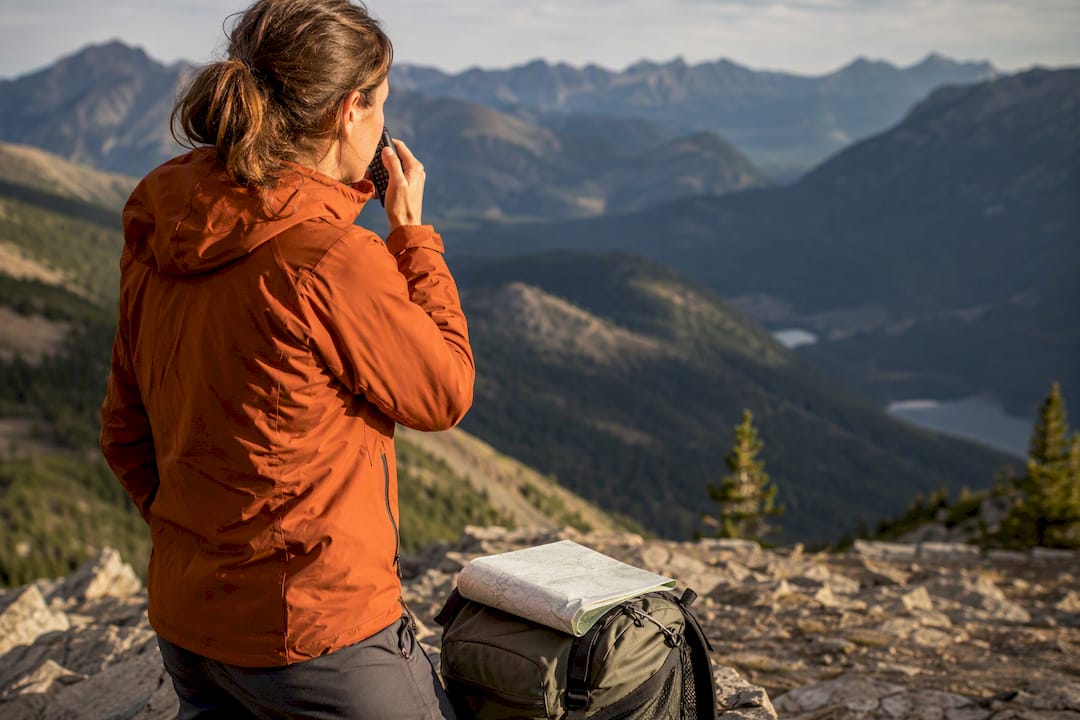
Pro Tip: Say your coordinates over the radio exactly as you’d read a phone number, digit by digit. “Four, eight, zero, zero, zero” is far less likely to be misheard than “forty-eight thousand.”
Why Thrillofit Teaches UTM as a Core Navigation Skill
Some navigation content builds around what actually keeps people found when things go wrong, not textbook cartography theory. That’s why guides walk through the same field-tested conventions covered here: setting your datum before you leave the car, verifying at a known point, and reading digits individually when it counts.
Tutorials on map reading for beginners and building a field navigation workflow exist because GPS units fail. Batteries die, screens crack, satellite lock drops in a canyon. Hikers who can also read a paper grid have a backup that never needs charging.
Good navigation habits don’t stop at coordinates, either. Carrying extra food and understanding your energy reserves matters just as much when a wrong turn turns a day hike into an overnight. The goal across all of it is the same: fewer surprises, faster self-rescue, and less reliance on any single tool working perfectly.
The Conventional Wisdom on UTM Gets the Hard Part Backwards
Most guides to UTM spend their energy explaining projections and zone math, then treat the actual field skill, reading a romer under time pressure, as an afterthought. That’s backwards. The projection math is interesting to exactly nobody standing on a ridge with fading light. What matters is muscle memory: can you interpolate a 6-figure grid reference in under thirty seconds, and can you say your coordinates over a radio without transposing a digit.
The gap between knowing UTM exists and being able to use it under stress is where most navigation failures actually happen, not in the concept itself. GPS units fail quietly, often by defaulting back to lat/long after a factory reset nobody remembers doing. If you’ve never practiced reading a paper grid, that failure becomes a real problem instead of a minor inconvenience.
Prioritize the drills over the theory. Learn the false easting number as trivia if you want, but spend your practice time at a trailhead kiosk, romer in hand, until “Read Right, then Up” is automatic.
— S
Keep Practicing Your Grid Skills With Thrillofit
Reading a coordinate correctly once, at your kitchen table, is not the same as doing it cold on a windy summit. Some navigation content is specifically built for that gap, walking recreational hikers through the field habits that actually hold up when your phone battery hits 8 percent and the fog rolls in.
Start with an outdoor navigation workflow guide to build a repeatable trailhead checklist, then check a navigation tools field guide before your next gear purchase. Your shopping list is short: a current 1:24,000 topo map of your route, a romer scale sized to that map, and a waterproof notebook that survives being dropped in a creek. If your trip involves long stretches of remote driving to reach the trailhead, the boondocking and remote-location planning guide from our partners at Gently Used RVs covers the logistics side of getting there. Pick one drill from this guide, run it this weekend, and you’ll walk into your next hike with a skill most people on the trail don’t have.
Sources
For definitions straight from the source, the USGS FAQ on UTM measurement is the authoritative starting point. MapTools’ UTM tutorial and TopoStreets’ reading guide both cover interpolation and plotting in practical detail. For coordinate conversion, CalTopo and Google Earth remain the most accessible free tools, and your GPS unit’s manual will confirm exactly how to switch its position format.
FAQ
How Do You Find UTM Coordinates?
Set your GPS or mapping app’s position format to UTM in its settings menu, or read them directly off a USGS topographic map by locating the grid zone in the margin, then reading easting (right) before northing (up) between the printed 1,000-meter grid lines. A romer scale makes the interpolation step far more precise than eyeballing it.
Can I Put UTM Coordinates in Google Maps?
No. The Google Maps search box only accepts decimal degrees or degrees-minutes-seconds formats, not raw UTM. You’ll need a conversion tool, Google Earth, CalTopo, or a UTM-capable GPS app to work with UTM coordinates online.
Why Use UTM Instead of Lat/Long?
UTM reports position in meters on a flat grid, which makes distance and area math simple subtraction instead of trigonometry. It also has one dominant format, unlike latitude and longitude, which comes in several variants that have historically caused rescue-reporting errors.
What’s the Difference Between UTM and WGS84?
UTM is a grid system that divides the earth into zones and reports position as easting and northing in meters. WGS84 is a datum, the underlying model of the earth’s shape that UTM coordinates are calculated against. Mismatching your GPS datum against your paper map’s datum, such as WGS84 versus an older NAD27 map, can shift a plotted point by hundreds of meters.
How Many Digits Do I Need for an Accurate UTM Reading?
A 6-figure grid reference gets you accuracy that is generally about 100 meters, while an 8-figure reference narrows that to about 10 meters, based on how finely you interpolate between the map’s 1,000-meter grid lines. Zero-pad any short values rather than dropping digits, since a missing zero can shift your reported position by a full order of magnitude.
Recommended
Comments