

What Is a Bivy Sack? A Guide for Minimalist Campers

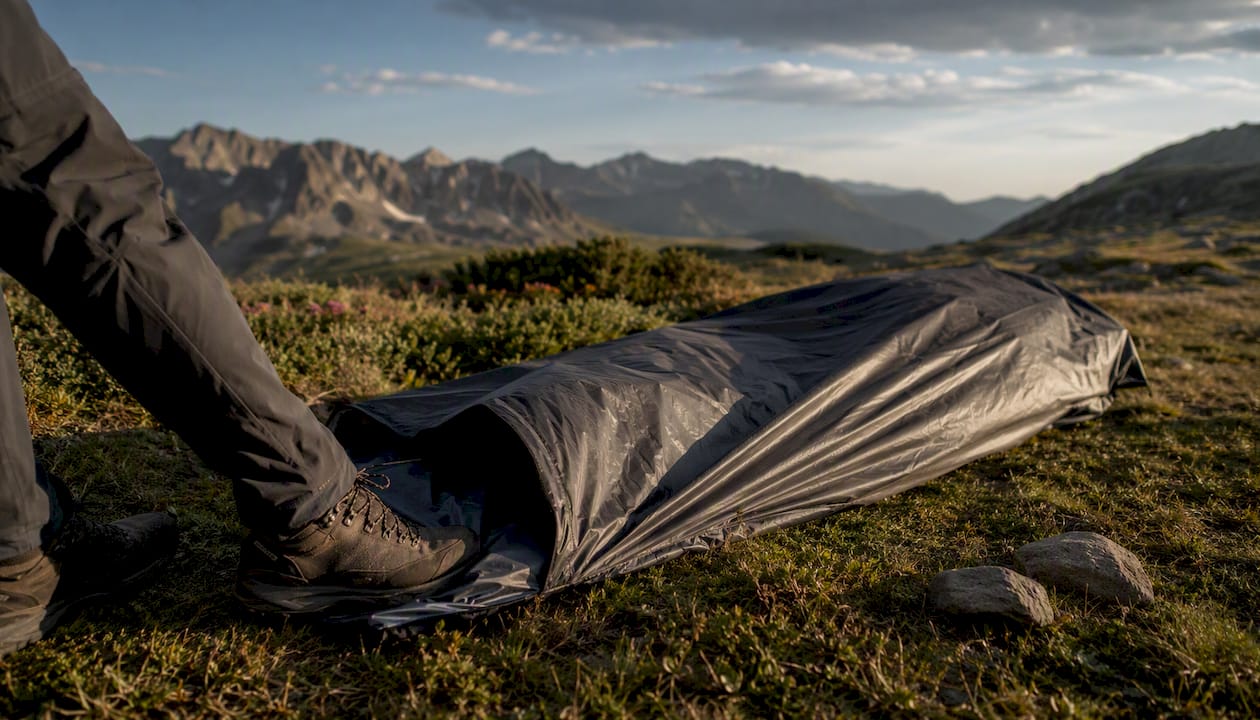
A bivy sack (short for bivouac sack) is a waterproof, form-fitting cover that slips over your sleeping bag and acts as your entire shelter. That’s it. No poles, no guy lines, no footprint to stake out. REI’s expert advice traces the design back to alpine climbers who needed a lightweight emergency shelter that could keep a sleeping bag dry and add roughly 10°F of warmth in a pinch. Today, ultralight backpackers, bikepackers, and solo campers use them as intentional primary shelters, not just backup plans.
When a bivy makes sense at a glance:
Alpine climbs and technical routes where every ounce counts
Ultralight or fast-and-light overnight trips
Bikepacking, where pack volume is as tight as weight
Emergency bailout shelter carried as insurance
Stealth camping where a low-profile footprint matters
If you’re deciding whether a bivy fits your camping style, Thrillofit’s guides on shelter types and camping gear can help you build the full picture.
Key Takeaways
A bivy sack is the lightest shelter you can carry, but breathability and floor strength determine whether it actually works for your conditions.
Point | Details |
Core definition | A bivy is a waterproof sleeping bag cover that functions as a complete minimalist shelter. |
Warmth bonus | A bivy adds roughly 10°F of insulation to your sleeping bag system. |
Main trade-off | Bivies save the most weight but sacrifice interior space and condensation control versus tents. |
Most important spec | Prioritize breathable laminate fabric and higher floor denier for regular three-season use. |
Best pairing | Combine a bivy with a tarp for overhead ventilation and weather protection on longer trips. |
Table of Contents
What is a bivy sack made of, and how is it built?
The shell fabric is where most of the real differences between bivies live. Three material families cover most of the market:
PU-coated nylon: Fully waterproof, inexpensive, and heavy enough to be durable. The catch is zero breathability, so moisture from your body has nowhere to go.
Breathable laminates (Gore-Tex and similar membranes): Water vapor passes out while rain stays out. Wikipedia notes that breathable laminates have significantly reduced the condensation problem that plagued older plastic sacks, though they don’t eliminate it entirely.
Dyneema/Cuben Fiber: Ultralight and highly waterproof, used in premium minimalist designs where shaving grams is the priority.
A basic bivy has four parts: a footbox at the bottom, a torso section that wraps your sleeping bag, a head opening at the top (often with a drawcord or mesh hood), and a floor that takes the most abrasion. Some models add a partial hoop near the face to lift the fabric off your nose and mouth, which helps both breathability and the claustrophobia factor. Sealed seams are standard on any bivy worth buying.
Who actually uses a bivy sack, and when does it make sense?
According to Wikipedia’s bivouac shelter entry, bivouac shelters range from improvised coverings to modern bivy sacks, with speed of setup and a tiny footprint as their defining advantages. That history explains the user base well.
Who reaches for a bivy:
Alpine climbers catching a few hours on a ledge where a tent simply won’t fit
Ultralight backpackers cutting base weight below what any solo tent allows
Bikepackers working with minimal frame-bag space
Solo minimalist campers who want to sleep under the stars with a safety net
Military and search-and-rescue personnel carrying bivies as emergency kit
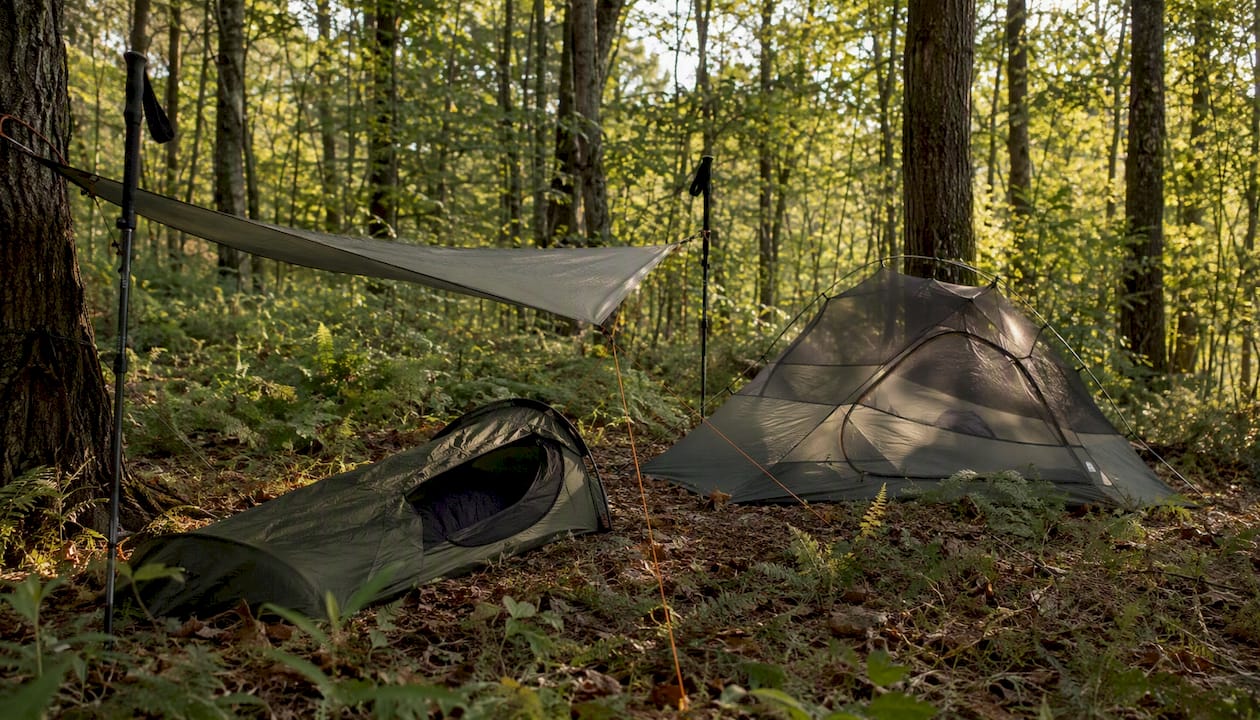
For trip length, bivies work best for 1–3 nights in fair to moderate weather. Push into multi-day wet weather without a tarp overhead and the condensation problem compounds fast. Pair a bivy with a tarp for camping and you get meaningful overhead protection while keeping the system lighter than any tent.
Bivy vs. tent vs. tarp: which shelter should you pick?
TentExplorer frames this decision as a weight-vs-livability axis, and that framing holds up. Bivies win on grams and footprint; tents win on comfort and interior space. Here’s how the three shelter types compare across the factors that actually matter:
Factor | Bivy sack | Solo tent | Tarp + bivy |
Weight | Lightest (often under 1 lb) | Heaviest (2–4 lbs typical) | Light (combined, still less than most tents) |
Weather protection | Good (waterproof shell) | Best (two-wall system) | Good (tarp overhead, bivy below) |
Breathability / condensation | Lowest (especially PU models) | Best (inner/outer separation) | Better (tarp vents overhead) |
Interior space / headroom | Minimal | Most | Moderate |
Setup speed | Fastest | Slowest | Moderate |
Price | Budget to premium | Budget to premium | Varies by tarp quality |
Choose a bivy when you need minimum weight, a tiny footprint, or rapid setup in alpine or stealth scenarios.
Choose a tent when you want insect protection, room to sit up, or you’re facing a long wet-weather trip. Advnture confirms that tents still generally offer superior comfort and insect protection even as bivy fabrics have improved.
Choose a tarp + bivy when you want the lightest possible system with more overhead protection than a bivy alone. WhereTheRoadForks recommends this combo specifically for extending comfort and weather coverage without the weight of a tent. For a deeper look at tent options, Thrillofit’s camping tent buyer’s guide covers the full range.
Which materials and design specs actually matter when you shop?
Fabric specs sound technical but they reduce to a few practical questions. Here’s what to focus on:
Denier (D): Higher denier = heavier but more abrasion-resistant. A 70D floor holds up on granite; a 20D floor is fine on soft ground but won’t last long on gravel.
PU coating vs. breathable laminate: PU is cheaper and fully waterproof but traps moisture inside. A Gore-Tex or equivalent laminate lets vapor escape, which matters enormously on multi-hour sleeps.
Seam construction: Taped or welded seams keep water out at the stitching lines. Uncoated seams on a budget bivy will leak in sustained rain.
Fit: The bivy needs to accommodate your sleeping bag at full loft, not compress it. Compressing loft kills insulation. Check the manufacturer’s stated bag size compatibility before buying.
Hooped vs. flat: A flat bivy is lighter and packs smaller. A hooped or bivy-tent design lifts fabric off your face, reduces condensation contact, and feels far less coffin-like.
Pro Tip: If you camp regularly on rock, gravel, or abrasive terrain, prioritize a higher-denier floor over a lighter overall weight. A punctured floor on night one is worse than carrying an extra two ounces.
What are the main drawbacks of a bivy sack, and how do you fix them?
Condensation is the central problem, and it’s worth understanding why. Your body releases moisture all night. In a two-walled tent, that vapor hits a cold inner wall, condenses, and drips away from you. In a bivy, there’s one wall, and it’s right against your sleeping bag. Breathable laminates help move vapor out, but they can’t keep pace with a cold night and a fully sealed system.
Here’s how to manage it, in order of impact:
Choose a breathable laminate fabric. A Gore-Tex bivy moves significantly more vapor than PU-coated nylon. This is the single biggest lever.
Vent the hood. Leave the face opening cracked or use a mesh hood insert. Even a small gap drops interior humidity noticeably.
Pair with a tarp as an awning. Lifting a tarp over the bivy lets you open the hood without rain getting in, which dramatically improves airflow.
Keep wet gear outside. Wet clothing inside the bivy adds moisture load. Stash it under the tarp or in a pack.
Use an insulating sleeping pad. Cold ground conducts cold into the bivy floor, which accelerates condensation on that surface. A good pad breaks that transfer.
Beyond condensation, the other real drawbacks are limited space (you can’t sit up, read, or wait out a storm comfortably), insect exposure if your bivy has no mesh, and awkward entry and exit in wet weather when you’re trying not to soak your bag. Terra Nova’s pros-and-cons breakdown flags these same issues and points to tarp pairing and ventilation management as the practical fixes.
Pro Tip: Orient the head of your bivy toward the prevailing wind. It sounds counterintuitive, but a slight breeze across the face opening pulls humid air out faster than a sheltered position traps it in.
How do you choose the right bivy for your trips?
Run through these questions before you buy:
What’s your primary use? Emergency backup, fast-and-light primary shelter, or alpine climbing? Each has a different weight and durability priority.
What’s your weight budget? Sub-10-oz options exist in Dyneema; breathable-laminate models typically run 12–20 oz; PU-coated budget options can hit 2 lbs.
How breathable does it need to be? One warm-weather overnight: PU is fine. Regular three-season use: get a breathable laminate.
What’s the floor denier? Check the spec sheet. Anything under 30D needs careful site selection.
Is there a hood or mesh vent? Non-negotiable for comfort on anything longer than a single night.
Does it fit your sleeping bag and pad? Measure your bag’s shoulder girth at full loft and compare to the bivy’s stated dimensions.
What’s your price range? Budget PU-coated options are inexpensive, midrange breathable-laminate models are moderately priced, and premium Dyneema options are at the higher end of the price spectrum.
How do you pack, set up, and care for a bivy sack?
Packing and storage:
Dry the bivy completely before packing it away. Storing a damp bivy accelerates delamination of coatings.
Roll it loosely rather than stuffing it tight. Long-term compression degrades PU coatings faster than use does.
Keep it away from heat sources, solvents, and direct sunlight during storage.
Field setup:
Pick a low, wind-sheltered spot and clear sharp rocks, sticks, and debris before laying the bivy down. A well-chosen campsite makes a real difference in bivy performance.
Orient the hood toward the prevailing wind for ventilation.
If your hooped bivy has attachment points, use a trekking pole or cord to add tension and lift the fabric off your face.
Care and repair:
Spot-clean with mild soap and cold water. Avoid machine washing coated fabrics unless the manufacturer explicitly allows it.
Re-treat the DWR (durable water repellent) finish annually or when water stops beading on the shell.
For small punctures, a patch of duct tape holds in the field until you can apply a proper seam sealer or fabric patch at home.
Where can you learn more and compare bivy models?
Three names come up consistently as reference points, and each serves a different research need:
REI publishes a detailed bivy buying guide covering material types, fit, and use-case matching. It’s the clearest starting point for first-time buyers.
MSR frames the bivy as “ultralight insurance” and distinguishes clearly between simple bivy sacks, hooped bivies, and bivy tents on their product pages. Worth reading for design-level detail.
Gore-Tex explains the membrane technology behind breathable laminates on their site, which helps you evaluate whether a specific bivy’s fabric will actually manage vapor in your conditions.
Beyond brand sites, ultralight shelter forums (r/ultralight on Reddit is active and opinionated) and gear-comparison resources like TentExplorer give real-world performance context that spec sheets don’t. Match the bivy type to your use case: a flat sack for emergency or warm-weather use, a hooped bivy for regular three-season trips, a bivy tent if you want near-tent livability at near-bivy weight.
When I’d actually choose a bivy over everything else
The honest answer is: not as often as the ultralight community suggests, but more often than most car campers realize.
For a single-night alpine push or a fast-and-light overnight where I’m covering miles and sleeping is secondary to moving, a bivy is the obvious call. The weight savings over even a light solo tent are real, and setup takes thirty seconds. Those things matter when you’re setting up in the dark after a long day.
Where I’d stop recommending a bivy is a three-day trip with sustained rain in the forecast. Condensation management becomes a full-time job, and the inability to sit up and wait out a storm in any comfort wears on you by day two. At that point, a lightweight solo tent or a well-rigged tarp earns its extra weight. The tipping point is roughly this: if you’re moving more than you’re camping, a bivy wins. If you’re camping more than you’re moving, a tent or tarp gives back more than it costs in grams.
Sources
Recommended
Comments