

Primitive Shelter: A Practical Guide for Beginners

TL;DR:
Primitive shelters use only natural materials and are built temporarily for survival. Proper site selection and insulation are vital, and debris huts are the most effective cold-weather shelters. Practicing shelter-building improves confidence and skills critical for wilderness safety.
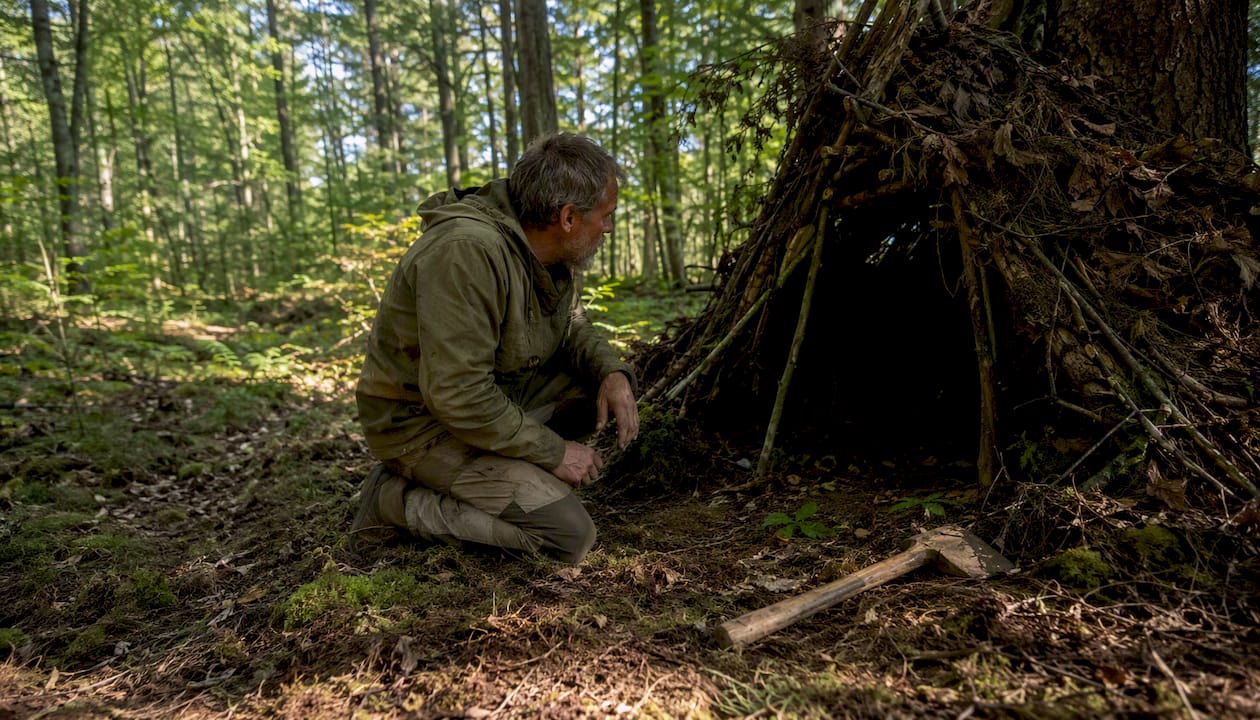
A primitive shelter is a temporary structure built from raw, natural materials found in the immediate environment — branches, leaves, grasses, pine needles, and mud — designed to protect you from wind, rain, snow, and temperature extremes without manufactured gear. No tent poles, no synthetic insulation, no stakes. Just what the land gives you.
The most common types of survival shelters you can build from scratch include:
Debris hut — the gold standard for cold-weather, gear-free survival; wraps your body in a natural sleeping bag of leaves and branches
Lean-to / A-frame — the fastest build, best for mild conditions or when paired with a fire
Wigwam / wickiup — a dome or cone frame covered with bark, hides, or thatch; more permanent than the above
Ramada / shade structure — open-sided, built for desert or tropical heat where sun is the threat
Snow cave / quinzhee — counterintuitive but highly effective; snow insulates better than most people expect
Natural shelters — caves, rock overhangs, and dense fallen trees you improve rather than build from scratch
What makes any of these “primitive” is the same three things: natural materials, no manufactured components, and temporary use. That framework matters because it tells you what to look for, what to gather, and how to judge whether what you’ve built will actually keep you alive.
Table of Contents
What counts as a primitive shelter (and what doesn’t)
The line between a primitive shelter and an improvised modern one is cleaner than most guides admit. A tarp lean-to is not a primitive shelter. Neither is a poncho rigged to a tree. Both are improvised shelters that use manufactured materials, and that distinction matters when you’re deciding what skills to practice and what gear to carry.
A true primitive shelter uses only what the environment provides: structural poles cut from standing wood, insulating debris gathered from the forest floor, cordage twisted from plant fibers or bark strips. The moment you introduce manufactured materials like a tarp, paracord, or foam sleeping pad, you’ve crossed into improvised modern territory. That’s not a criticism — a tarp lean-to is faster and often more effective in a pinch — but it’s a different skill set.
When is a primitive shelter actually preferable? Three scenarios: you have no gear at all, your manufactured shelter has failed, or you’re practicing bushcraft skills deliberately. Outside those cases, a tent or tarp almost always wins on speed and reliability.
Historically, early human shelters were built from locally available materials by necessity. Modern primitive shelter techniques are a direct continuation of that tradition, refined by wilderness instructors and survival educators over decades.
One legal note worth stating plainly: building any structure on public land in the US, including national forests and BLM land, generally requires that you leave no trace and avoid permanent construction. On private land, you need the owner’s permission. Check local regulations before you build anything that alters the landscape.
Manufactured vs. primitive at a glance: A tent solves the same problem faster. A primitive shelter teaches you to solve it with nothing.
Why shelter is your first survival priority
Shelter sits above water, fire, and food in the survival priority order under most conditions. That ordering surprises people until they understand the physiology behind it.
Exposure is a leading cause of wilderness fatalities, and the threshold at which shelter becomes critical is lower than most hikers expect: roughly 50°F (10°C), combined with rain, wind, or nightfall without adequate bedding. At that point, your body is losing heat faster than it can produce it. Hypothermia can develop in hours, and the first symptom — impaired judgment — is the one that kills you, because you stop making good decisions precisely when you need them most.
The physiological timeline is unforgiving. In wet, windy conditions around cool temperatures, an unprotected person can become hypothermic quickly. Lower temperatures reduce this window further. Wind accelerates heat loss through convection; wet clothing conducts heat away from the body roughly 25 times faster than dry air at the same temperature.
Building a shelter also delivers psychological benefits that are easy to underestimate. The act of constructing something reduces panic, gives you a task to focus on, and restores a sense of control. Wilderness instructors consistently report that students who build shelters early in a scenario make better decisions about water, fire, and signaling afterward. The shelter isn’t just thermal protection. It’s a cognitive reset.
How to choose the right site before you build anything
Site selection is often more important than the shelter design itself. Even a well-built debris hut fails if it’s sitting in a cold-air drainage hollow or under a widow-maker branch. Spend five minutes evaluating your site before you cut a single pole.
What to look for:
Drainage: Build on slightly elevated, flat ground. Water flows downhill; your shelter floor should never be the lowest point nearby.
Natural windbreaks: A dense stand of conifers, a rock face, or a hillside on the windward side cuts heat loss dramatically.
Material proximity: If your debris source is 200 yards away, you’ll burn energy you can’t afford. Build where materials are within 50 feet.
Sun exposure: In cold weather, a south-facing slope gets more winter sun. In hot climates, shade is the priority.
Escape routes: You should be able to exit the shelter quickly in any direction. Never block your only way out.
Where not to build:
Drainage hollows and valley floors — cold air pools there overnight, and flooding is a real risk after rain
Under dead or dying trees — falling limbs (“widow-makers”) are a leading cause of campsite injuries
On or near game trails — animals use these paths at night
Cliff edges or unstable slopes — obvious, but easy to overlook when you’re exhausted
Dry riverbeds — flash floods can arrive with no warning, especially in canyon country
Pro Tip: Before committing to a site, look up. Dead branches overhead are harder to spot in low light. Check the canopy in daylight and from multiple angles before you start building.
A good site with a mediocre shelter usually beats a perfect shelter on a bad site. That’s the experienced instructor’s rule, and it holds up in practice. For more on campsite layout and selection, Thrillofit’s campsite guide covers the full decision process.
The four essentials every primitive shelter must manage
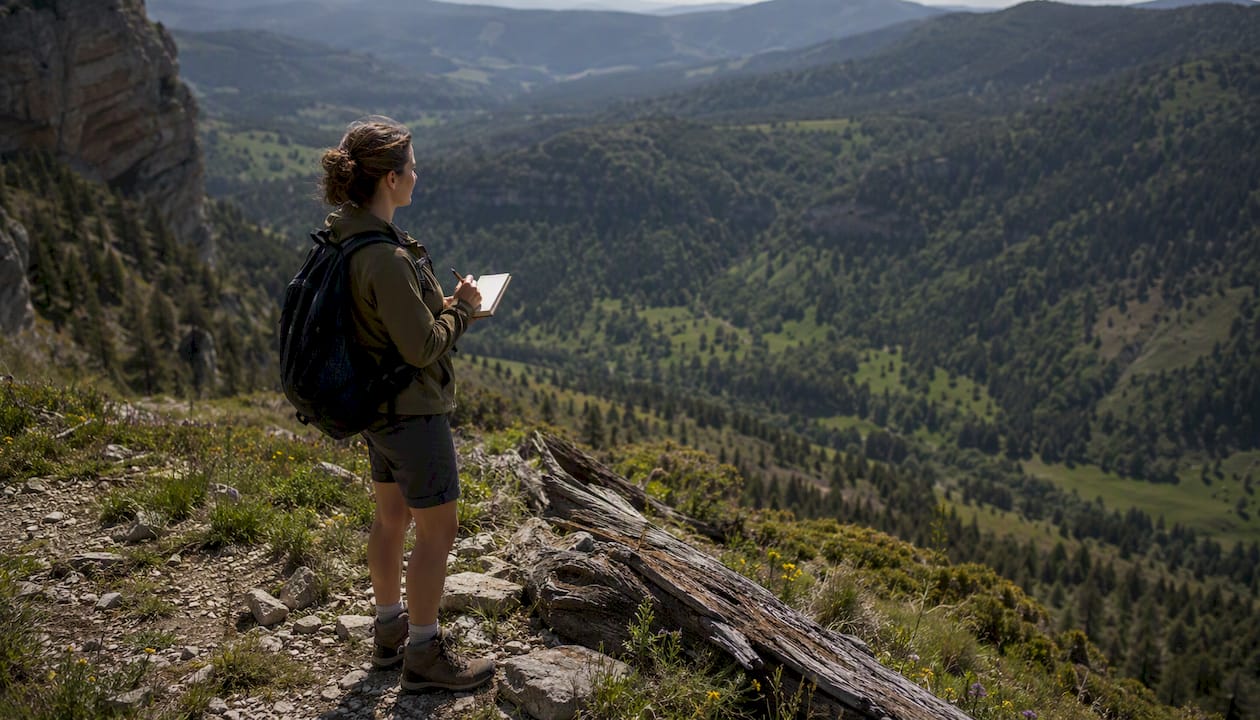
Every primitive shelter, regardless of design, succeeds or fails on four variables: waterproofing, insulation, heat, and wind/ventilation. Think of these as a checklist, not a hierarchy — you need all four working together.
Waterproofing means keeping precipitation off your body and out of your sleeping space. For debris shelters, this comes from layering material thick enough that water can’t penetrate before it runs off. A single layer of branches does nothing. You need depth — think of it like thatching a roof, where each layer overlaps the one below it and sheds water outward.
Insulation is where most novices underestimate the work involved. A debris hut packed to approximately 3 feet of insulating material can maintain livable interior temperatures near 20°F (−7°C) in temperate North American forests. That’s the target depth. Less than 2 feet and you’re gambling with your core temperature. Critically, insulation needs to stay “fluffy” — packed debris loses its trapped air and drops in effectiveness fast.
Heat in a primitive shelter comes almost entirely from your own metabolism. That’s why size matters so much. A shelter sized closely to your body traps metabolic heat far more effectively than a large cavity. Novices consistently make shelters too large to heat, then wonder why they’re cold. The interior should be just big enough to roll over in — nothing more. If you need a fire for warmth, a lean-to facing a reflective fire works well; a debris hut is not designed for fire use inside. For fire-starting skills to pair with your shelter, see Thrillofit’s guide on starting a fire safely.
Wind and ventilation pull in opposite directions. You want to block wind to prevent convective heat loss, but you need enough airflow to prevent carbon monoxide buildup if you’re using any heat source inside. In a snow shelter especially, always maintain a ventilation hole. In a debris hut, the entrance itself provides adequate airflow for a single occupant with no fire.
Pro Tip: Size your shelter by lying down inside the frame before you add insulation. If you can sit up comfortably, it’s too tall. If you can spread your arms wide, it’s too wide. Snug is warm.
A catalog of the main primitive shelter types
The right shelter depends on your environment, available materials, and how much time and energy you have. Here’s a quick-reference breakdown of the main options.
Shelter Type | Best Environment | Approx. Build Time | Thermal Protection | Main Trade-off |
Debris hut | Temperate forest | 2–4 hours | High (near-freezing) | Labor-intensive; needs abundant debris |
Lean-to / A-frame | Forest, mild conditions | 20–30 minutes | Low–moderate | Open front loses heat without a fire |
Wigwam / wickiup | Forest, semi-permanent | 3–6 hours | Moderate–high | Requires more structural skill |
Ramada / shade | Desert, tropical | 30–60 minutes | Heat protection only | No insulation; useless in cold |
Snow cave / quinzhee | Alpine, deep snow | 2–3 hours | High (25–32°F interior) | Risk of collapse; requires snow depth |
Natural shelter | Any terrain | 15–30 minutes (improvement) | Varies | Dependent on what terrain offers |
Debris hut: The most thermally effective gear-free shelter in temperate forests. You build a ridgepole frame, cover it with a lattice of sticks, then pile on leaves, pine needles, and forest debris until the walls are 2–3 feet thick. The interior becomes a natural sleeping bag. Build time runs 2–4 hours depending on debris availability.
Lean-to / A-frame: A ridgepole between two trees, angled supports leaned against it, and a covering of branches and leaves. Build time can be around tens of minutes with no tools when suitable trees are available. It won’t hold heat on its own, but facing the open side toward a reflective fire changes the equation entirely.
Wigwam / wickiup: A dome or cone of bent saplings lashed together and covered with bark, hides, or woven grass. More structural work upfront, but it encloses heat on all sides and handles rain better than a lean-to. Indigenous peoples across North America used variations of this design for semi-permanent camps.
Ramada / shade structure: Four posts and a roof of branches or palm fronds, open on the sides. Properly built shade can reduce felt temperature by about 10–15°F (5–8°C) by eliminating direct solar heating. In the desert, this is often the only shelter you need during daylight hours.
Snow cave / quinzhee: Snow provides meaningful insulation with sufficient depth. A properly built quinzhee can maintain interior temperatures above freezing even when outside temperatures drop well below zero. The risks include collapse and CO buildup. The risk is collapse and CO buildup from any heat source inside — always poke a ventilation hole and mark the entrance.
Natural shelters: Caves, rock overhangs, and dense fallen trees you improve with debris and windbreaks. The fastest option when terrain cooperates. Check for animal occupants, standing water, and overhead hazards before committing.
How to build a debris hut step by step
The debris hut is the benchmark primitive shelter for cold-weather survival in North American forests. It requires no tools and no gear, just time, energy, and enough forest debris. Here’s how to build one that actually works.
Materials checklist:
One ridgepole, 9–12 feet long, wrist-thick or thicker
Dozens of rib sticks, 2–4 feet long
Abundant dry leaves, pine needles, or grass (you’ll need far more than you think)
Optional: small knife for trimming, natural cordage for lashing
Steps:
Find your ridgepole (15–20 min). Select a straight, strong branch 9–12 feet long. One end rests on a forked tree stump or Y-shaped branch at about hip height; the other end lies on the ground. This is your spine.
Set the ridgepole angle (5 min). The elevated end should sit at roughly hip height. Too high and the interior volume becomes too large to heat. Lie down alongside the pole to check: your body should fit underneath with just a few inches of clearance above your chest.
Add rib sticks (20–30 min). Lean sticks at roughly 45-degree angles along both sides of the ridgepole, close enough together that debris won’t fall through. Think of a fish skeleton. Cover the entire length from the entrance to the closed end.
Layer debris over the frame (60–90 min). Start at the bottom and work upward, like thatching. Pile leaves, pine needles, bark, and any dry organic material until the walls are at least 2 feet thick, targeting 3 feet for near-freezing conditions. At approximately 3 feet of debris depth, a properly built hut can maintain livable temperatures near 20°F (−7°C). This step takes longer than most beginners expect.
Build a debris door (10 min). Stuff a large pile of leaves into a stuff sack, a bag made from bark, or just a loose bundle you can pull in behind you. This plugs the entrance and prevents cold air from flowing in.
Prepare interior bedding (20–30 min). Without adequate insulating bedding on the floor, you’ll lose much of your body heat to the ground regardless of wall insulation. Pile dry leaves, pine needles, or grass inside until the floor layer is thick and springy.
Test the fit (5 min). Crawl inside. Your shoulders should nearly touch the walls. If you have room to roll over easily, the shelter is sized correctly. If you can sit up, the ridgepole is too high.
Total build time: 2.5–4 hours for a first-time builder. Experienced builders can complete a functional hut in under 2 hours.
Pro Tip: Gather substantially more debris than you initially estimate before layering. Running out mid-build and having to forage again wastes energy and time. Pile it all near the site first.
Troubleshooting:
Problem | Likely Cause | Fix |
Cold despite thick walls | Debris packed too tightly | Fluff and re-layer; loose debris traps more air |
Wet interior | Insufficient debris depth or poor site drainage | Add more layers; check site slope |
Can’t stay warm | Shelter too large | Reduce interior volume with extra debris inside |
Condensation buildup | No airflow | Leave a small gap at the entrance plug |
A well-built debris hut in a temperate forest can keep you alive through a near-freezing night without a fire. In temperatures well below 20°F, you’ll want a fire nearby or additional insulation layers. The hut handles the insulation problem; it doesn’t solve the heating problem on its own.
Fast shelters you can build in 15–30 minutes
When you’re exhausted, injured, or losing daylight fast, a two-hour debris hut build isn’t realistic. These options trade thermal performance for speed.
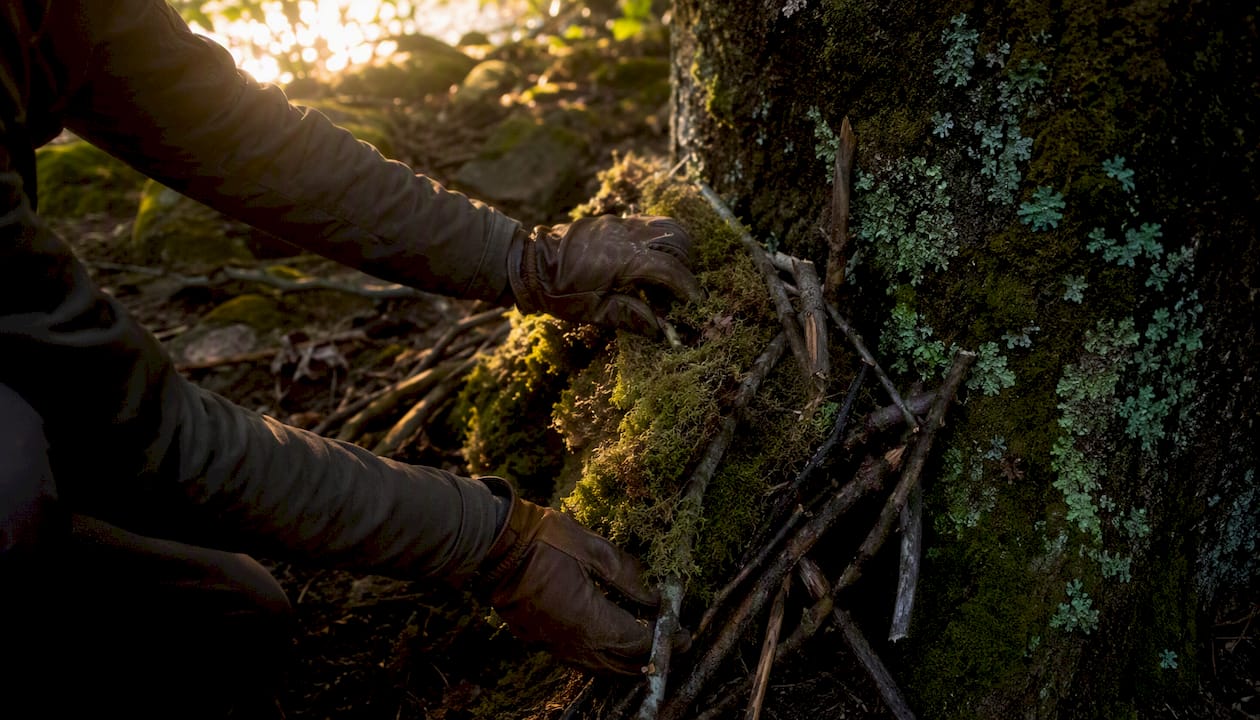
Basic lean-to (20–30 min): Two trees 6–8 feet apart, a ridgepole lashed or wedged between them at shoulder height, angled support sticks leaned against it, and a covering of branches and leaves. A basic lean-to with no tools takes roughly 20–30 minutes when suitable trees are available. It won’t hold heat without a fire, but it blocks wind and rain immediately.
Debris lean-back (15–20 min): Find a large fallen log or boulder. Lean sticks against it at a steep angle and pile debris over them. You’re essentially building half a debris hut using a natural wall. Faster than a full hut, and the natural feature adds structural stability.
Snow trench (15–20 min): In deep snow, dig a trench just wide enough for your body and deep enough to get below the wind line. Cover it with branches and a layer of snow. Not comfortable, but it cuts wind exposure dramatically and uses snow’s insulating properties. Always mark the entrance so rescuers can find you.
Tarp lean-to (10–15 min, if you have a tarp): Not a primitive shelter, but worth naming here: a tarp rigged at an angle between two trees is faster and more waterproof than any natural build. If you have one, use it. Save your energy for fire and water.
The key decision is this: accept a quick shelter now and plan to improve it later, or invest the energy in a better build while you still have daylight and strength. In most scenarios, a fast shelter built before dark beats a perfect shelter started at dusk. You can always add insulation in the morning.
Adapting your shelter to different environments
The same principles apply everywhere, but the materials and priorities shift significantly depending on where you are.
Environment | Priority | Best Shelter Type | Key Adjustment |
Temperate forest | Insulation + waterproofing | Debris hut | Maximize debris depth to 3 feet |
Desert / tropical | Shade + ventilation | Ramada / shade structure | Open sides; orient for prevailing breeze |
Alpine / deep snow | Thermal buffering | Snow cave / quinzhee | Maintain ventilation hole; mark entrance |
Rocky / coastal | Wind protection | Natural shelter + windbreak | Use terrain features; fill gaps with debris |
Tropical forest | Rain shedding + elevation | Raised lean-to or platform | Get off the ground; use large leaves for roofing |
Temperate forest is where primitive shelters perform best. Abundant debris, structural wood, and moderate temperatures mean a debris hut is both feasible and highly effective.
Desert and tropical environments flip the priority entirely. Heat and solar radiation are the threats, not cold. A ramada with open sides and a roof of branches or palm fronds can reduce felt temperature by 10–15°F by blocking direct sun. Insulation is irrelevant here; airflow is everything.
Alpine and snow environments reward counterintuitive thinking. Snow feels cold, but its R-value of approximately 1 per inch makes it a genuinely effective insulator once you’re inside a properly built cavity. A quinzhee interior stays between 25–32°F even when outside temperatures plunge to −20°F. The risks are structural collapse and CO buildup from any heat source, so always maintain a ventilation hole and never sleep without one.
Rocky and coastal terrain often provides the fastest shelter opportunities. A rock overhang improved with a debris windbreak on the open side can be functional in 20 minutes. The limitation is that you’re dependent on what the terrain offers.
What materials to gather and what minimal tools help
Natural materials do almost all the work in a primitive shelter. Knowing what to prioritize before you start gathering saves time and energy.
Structural materials:
Ridgepole: straight, wrist-thick or thicker, 9–12 feet long; test by standing on the middle — it shouldn’t flex much
Rib sticks: straight branches 2–4 feet long, thumb-thick; you’ll need 30–50 for a full debris hut
Lashing material: bark strips, plant fibers, or roots twisted into cordage; for a full guide on field cordage, see Thrillofit’s cordage survival guide
Insulating materials:
Dry leaves (oak and maple work well; avoid wet or decomposing piles)
Pine needles, dry grass, cattail fluff, or bracken fern
Bark sheets for waterproofing layers
Bedding:
Any dry, fluffy organic material; prioritize this over wall insulation if you have to choose
Minimal tools that speed the work:
A small fixed-blade knife for trimming branches and processing cordage
Paracord or natural cordage for lashing the ridgepole
Nothing else is strictly necessary
Pro Tip: Dry debris is non-negotiable. Wet leaves compress, lose their insulating air pockets, and conduct cold. Before you gather, squeeze a handful — if water drips out, find a different source.
On ethics: leave-no-trace principles apply even in a survival practice context. Cut only what you need, use dead wood before live, and scatter debris back when you’re done practicing. On public land, this isn’t just courtesy — it’s often a legal requirement under US Forest Service and National Park Service regulations.
Common mistakes and safety rules that could save your life
Most primitive shelter failures come down to a short list of predictable errors. Knowing them in advance is the difference between a rough night and a dangerous one.
Top novice mistakes:
Building too large. The single most common failure. A shelter you can’t heat with your own body warmth is just a windbreak. Size it close.
Skipping the bedding layer. Without 6–8 inches of insulating material on the floor, ground conduction pulls heat from your body all night, regardless of how good the walls are.
Insufficient debris depth. Two feet of debris feels like a lot when you’re gathering it. It’s the minimum. Three feet is the target for near-freezing conditions.
Building under dead trees. Widow-makers are unpredictable and silent. Check the canopy before you commit to a site.
Poor ventilation in enclosed shelters. Any heat source inside a snow cave or enclosed shelter produces carbon monoxide. A ventilation hole is not optional.
Blocking the entrance. You need to be able to exit quickly. Never build in a way that traps you inside.
Safety checklist:
Ventilation hole in any enclosed snow shelter: always
Fire kept outside and downwind of the shelter entrance
Know the early signs of hypothermia: shivering, confusion, slurred speech, loss of fine motor control
Check for structural hazards overhead before sleeping
Tell someone your location before any solo shelter practice
Exposure is a leading cause of wilderness fatalities, and most of those deaths involve at least one of the mistakes above. The good news is that all of them are preventable with a few minutes of deliberate checking before and after you build.
A brief legal note: this article provides general survival information, not professional wilderness safety instruction. For high-risk environments or formal training, consult a certified wilderness first responder or survival instructor.
How to build real competence through deliberate practice
Reading about primitive shelters is useful. Building one in your backyard on a Saturday afternoon is where the skill actually forms.
The progression that works best for most beginners:
Cold-weather supervised practice — Do this with a partner or in a structured course setting. Building in cold conditions is physically harder, and the consequences of a mistake are real. Organizations like the Wilderness Awareness School offer structured shelter-building instruction with experienced instructors.
How to measure progress: Log your build time, the debris depth you achieved, and whether you stayed warm through the night. Three successful cold-night builds in different conditions is a reasonable benchmark for genuine competence.
For a deeper step-by-step reference to complement your practice, Thrillofit’s step-by-step shelter building guide walks through construction in detail with additional technique notes.
Key Takeaways
A primitive shelter built from natural materials, sized close to your body, and insulated to at least 2–3 feet of debris depth is a genuinely effective life-saving tool in temperate North American wilderness conditions.
Point | Details |
Site beats design | Choose a site with drainage, wind protection, and nearby materials before selecting a shelter type. |
Size it small | A shelter sized closely to your body traps metabolic heat far more effectively than a large cavity. |
Debris depth matters | Target 3 feet of loose, dry debris for near-freezing protection; a debris hut can hold livable temps near 20°F (−7°C). |
Bedding is non-negotiable | Without 6–8 inches of insulating floor material, ground conduction defeats even well-insulated walls. |
Environment changes everything | Desert conditions call for shade and airflow; snow environments use snow’s R-value of ~1 per inch for thermal buffering. |
Why practicing primitive shelters matters more than most people realize
There’s a gap between knowing how to build a primitive shelter and actually being able to build one under stress. The gap is wider than most beginners expect, and it only closes one way: repetition in real conditions.
What most survival guides don’t say plainly enough is that the psychological benefit of shelter practice is almost as valuable as the physical skill. When you’ve built a debris hut three times in daylight, the fourth time, in the dark, cold, and tired, you don’t panic. You have a sequence. You know how much debris you need. You know what “good enough” looks like. That mental template is what keeps you moving when panic would otherwise freeze you.
The other thing worth saying: beginner mistakes are not just normal, they’re necessary. Your first debris hut will probably be too large, under-insulated, and built on a slightly wrong site. That’s fine. The lesson sticks precisely because you felt the cold. No amount of reading replicates that feedback.
Start in your backyard. Build it small. Sleep in it once. The skill you develop in that one afternoon is more durable than anything you’ll read in a guide, including this one. Thrillofit’s resources on wilderness self-reliance go deeper on the mindset side of field skills if you want to keep building from there.
Useful sources and further reading
The following sources informed this guide and are worth consulting directly for additional depth:
Wilderness Awareness School — How to Build a Survival Shelter — Instructor-level guidance on shelter construction with a strong emphasis on the psychological dimensions of the skill; one of the most credible voices in wilderness education in the US.
Thrillofit — Step-by-Step Shelter Building Guide — Thrillofit’s own detailed construction walkthrough; a practical companion to this article for readers ready to build.
Recommended
Comments