

Why Choose Natural Shelters for Wilderness Survival

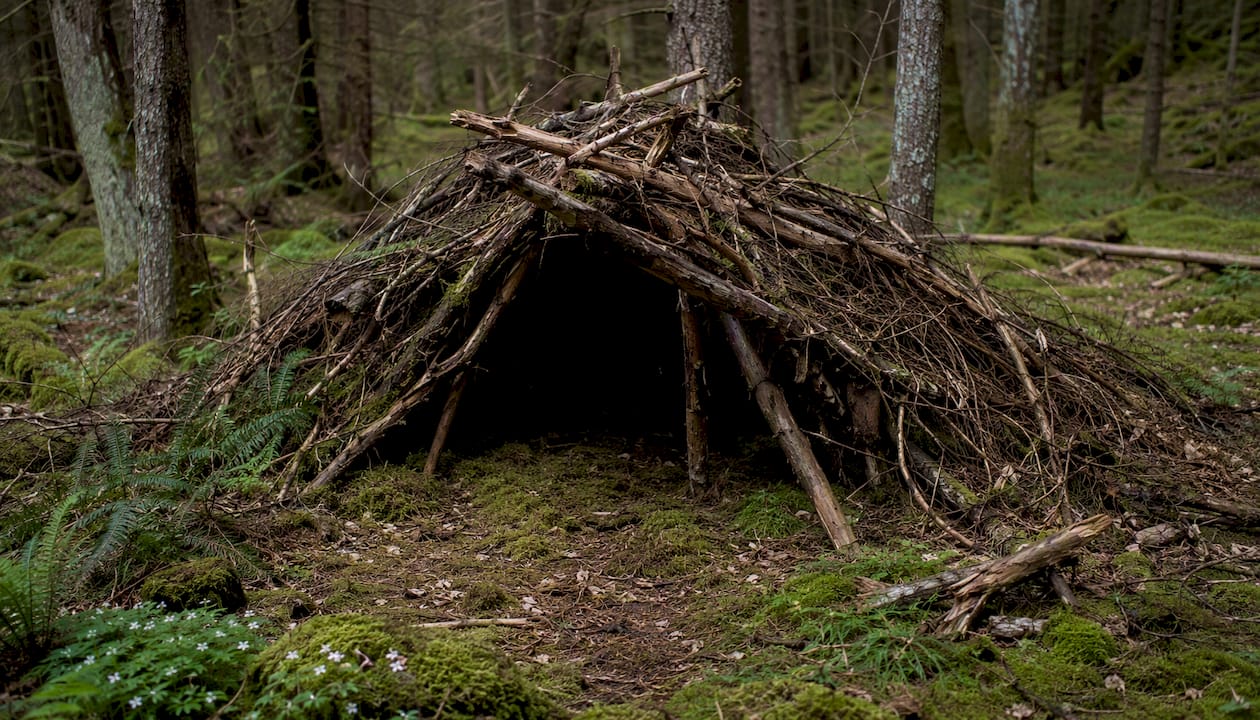
Choose a natural shelter when you need fast, low-resource protection using only what the land gives you. No tent, no tarp, no problem — if you know what to build and where to build it. The three reasons survivalists reach for natural materials first: they retain metabolic heat without any gear, they block wind and rain using the landscape itself, and they leave you with no weight to carry and nothing to lose.
The decision rule is simple. If you have a functional tent and the time to pitch it, use it. If your gear is damaged, lost, or too heavy for the terrain, or if you’re caught out after dark with 30 minutes of daylight left, a natural shelter built from local debris is the faster, safer call. Outdoor Life puts it plainly: leeward microclimates and evergreen thickets are practical year-round options that require nothing from your pack.
Heat retention: Dead leaves, pine needles, and bark trap your body heat the same way a sleeping bag does — through air pockets.
Wind and rain protection: A well-placed lean-to or debris hut cuts convective heat loss dramatically.
Low-resource concealment: Natural shelters blend into the environment and require zero purchased materials.
Key Takeaways
Natural shelters are the right choice when you lack carried gear, and a debris hut built correctly can maintain survivable warmth down to 20°F using only your body heat.
Point | Details |
Choose natural shelters when gear fails | Use local materials when your tent is lost, damaged, or impractical for the terrain. |
Hypothermia risk is fast | At 50°F in dry still air, dangerous heat loss can begin within 4–6 hours without shelter. |
Debris hut is the warmest gear-free option | A properly built debris hut can hold survivable warmth down to 20°F using metabolic heat alone. |
Site selection beats shelter design | Avoid flood lines, overhead hazards, and animal signs before you build anything. |
Practice closes the gap | A lean-to you’ve built before takes 20 minutes; one you haven’t takes 40 or more. |
Table of Contents
Why choose natural shelters: the core survival benefits
The most urgent reason is hypothermia prevention. At 50°F (10°C) in dry, still air, a healthy person without shelter can begin losing dangerous amounts of heat within 4–6 hours. Add wet clothing or wind, and that window shrinks to under an hour. A shelter doesn’t just keep you comfortable — it buys you time to think, signal, and recover.
Heat loss happens through four mechanisms: conduction (contact with cold ground), convection (wind stripping warmth from your skin), radiation (heat radiating off your body into cold air), and evaporation (sweat or wet clothes pulling heat away). A good natural shelter addresses all four. Insulating debris on the floor blocks conduction. Walls and a tight roof kill convection. Dense material overhead reduces radiation loss. Staying dry handles evaporation.
Beyond temperature, natural shelters offer concealment from wildlife and, in rare scenarios, from other people. They require no batteries, no poles, and no fuel. They’re also genuinely sustainable: you use what’s already there and leave it behind when you go. Yost Survival Skills makes the point that insulation is the single most important variable — the thicker your debris layer, the more metabolic heat you retain, and the warmer you sleep.
There’s a psychological dimension too. A completed shelter, even a rough one, reduces cortisol and restores a sense of control. Survivalists who’ve spent nights in the open report that the act of building something — anything — shifts the mental state from panic to problem-solving. That shift can be the difference between a rational decision and a fatal one.
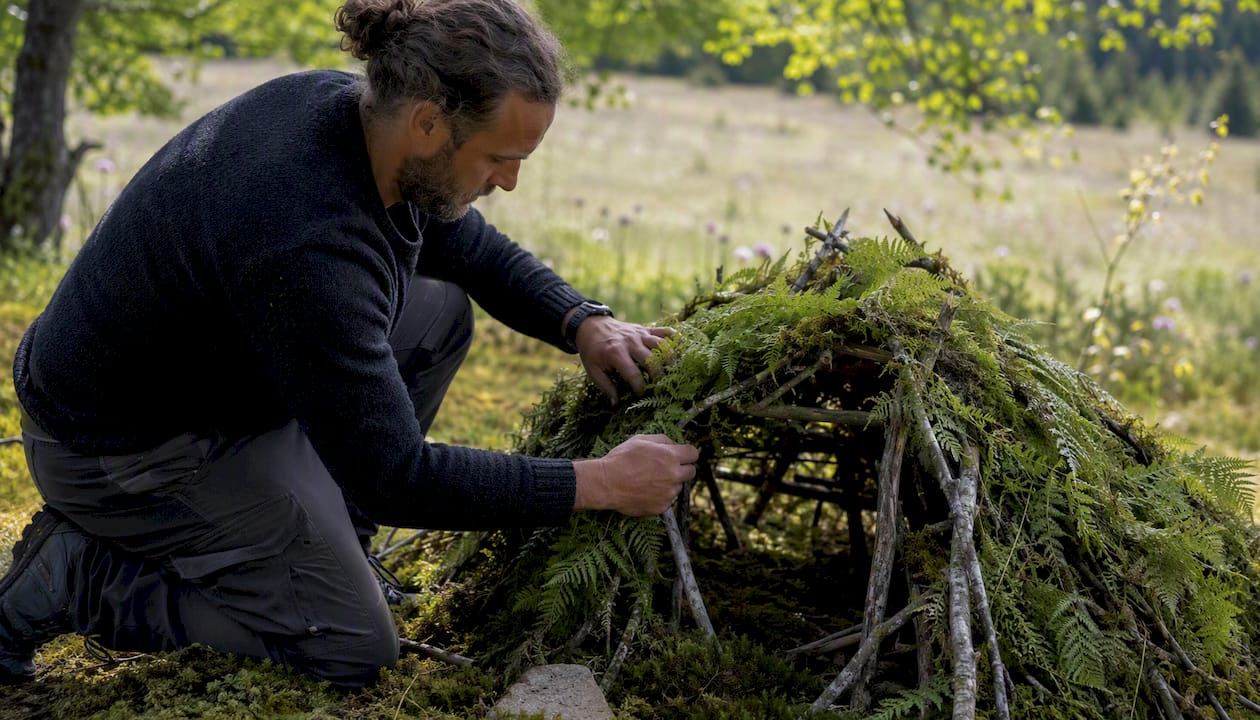
Pro Tip: Find a leeward microclimate before you start building. The downwind side of a ridge, a dense evergreen thicket, or a low depression sheltered from the prevailing wind can cut your effective wind exposure by half — and that means your shelter works twice as hard with half the material.
Common types of natural shelters and when each fits your situation
Each shelter type has a specific niche. Picking the wrong one wastes energy you can’t afford to spend.
Shelter Type | Best Conditions | Key Pro | Primary Risk | Time to Build | Label |
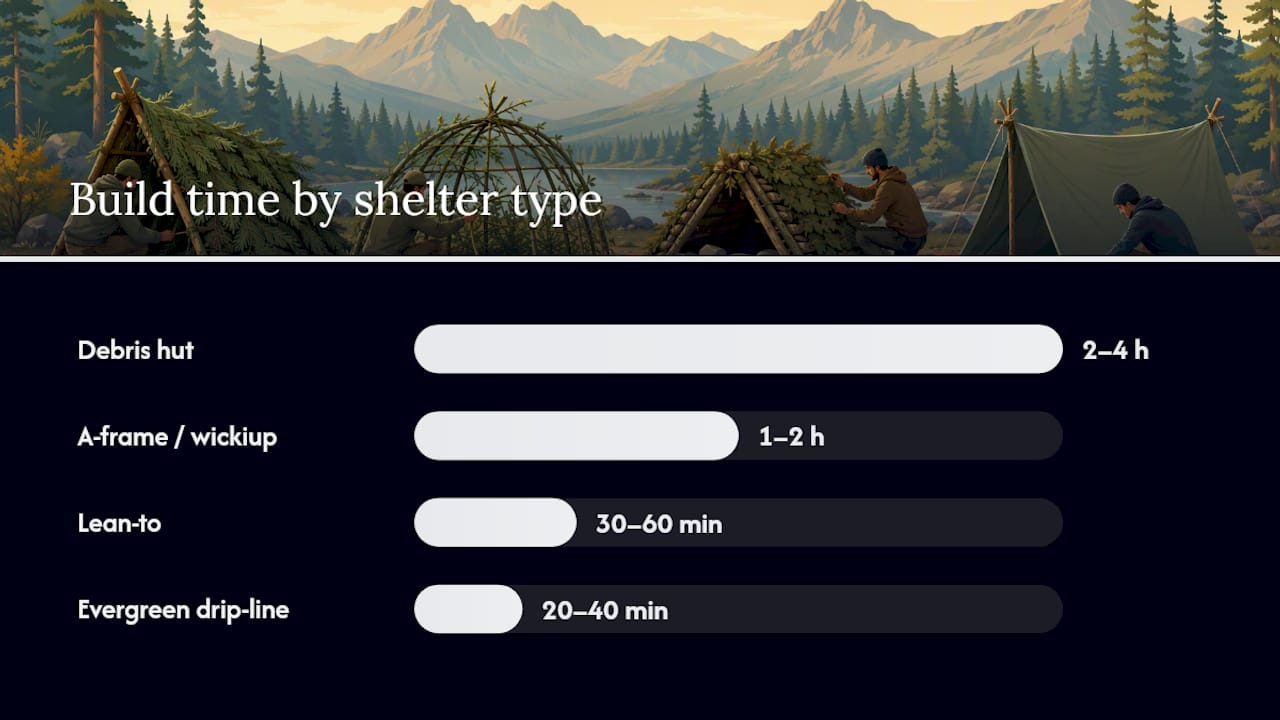
Lean-to | Mild temps, light rain | Fast setup | Wind from open side | 30–60 min | Fast |
Debris hut | Cold nights, temperate forest | Best gear-free insulation | Time and energy cost | 2–4 hours | Insulating |
A-frame / wickiup | Rain, moderate cold | Enclosed, stable | Requires cordage or skill | 1–2 hours | Balanced |
Snow cave | Deep winter, snow depth 5+ ft | Interior stabilizes near 32°F | Collapse, CO₂ buildup | 2–4 hours | Risky/Warm |
Cave / rock overhang | Any season | Stable temp, zero build time | Wildlife, flooding, poor air | Minutes | Risky |
Downed log / rootball | Forest, quick cover | Immediate windbreak | Unstable, insects | 30 minutes | Fast |
Evergreen drip-line | Rain, year-round | Natural waterproofing | Limited floor space | 20–40 min | Fast |
Ramada / shade structure | Desert heat | Blocks solar radiation | No insulation | 30–60 min | Specialized |
A debris hut built correctly can maintain a survivable internal temperature down to about 20°F (–7°C) using only your body heat — no fire required. That’s the most impressive thermal performance of any gear-free shelter in temperate forests. Snow caves are the winter equivalent: their interiors stabilize near freezing, which can be significantly warmer than the air outside during a hard freeze.
Caves and rock overhangs look attractive because they require no construction, but Outdoor Life flags the hazards clearly: animal occupancy, poor air deeper inside, collapse risk, and tidal flooding in sea caves. Never walk into a cave without inspecting it first. For desert environments, a ramada (a simple overhead shade structure using branches and broad leaves) can drop your perceived temperature significantly — relevant guidance for hot-weather survival is covered in Thrillofit’s desert survival basics guide.
For a broader look at primitive shelter types and the materials that work best in each region, Thrillofit’s primer is a useful starting point before you head into the field.
How to build the four most practical natural shelters
Build in this order of priority: fastest first, most insulating when you have time.
Quick lean-to (30–60 minutes)
Materials: One sturdy ridge pole (8–10 ft), two upright supports or trees 6–8 ft apart, branches for rafters, leaves/bark/pine boughs for thatching, cordage if available.
Lash or prop your ridge pole horizontally between two trees or forked uprights at shoulder height.
Lean rafter branches against the ridge at a 45-degree angle, spaced 6–8 inches apart.
Layer thatching from the bottom up, overlapping like shingles. Aim for 6–8 inches of depth.
Add a ground layer of dry leaves or pine boughs at least 4 inches thick to block conduction.
Orient the open face away from the wind. Check by wetting your finger and holding it up.
Safety check: Look up. Dead limbs directly overhead are a kill hazard in any wind. Move the site if you see them. Keep any fire at least 10 feet from the open face, and never build a fire inside a lean-to.
Pro Tip: If you have a tarp, drape it over the rafter frame before adding natural thatching. The tarp handles waterproofing; the debris handles insulation. Together they outperform either alone.
Debris hut (2–4 hours)
This is the shelter to build when you have time and the temperature is dropping. Yost Survival Skills describes insulation as the key variable — and a debris hut is essentially a sleeping-bag made of forest floor material.
Materials: One long ridge pole (10–12 ft), two forked sticks for the tripod end, ribbing branches, and as much dry leaf litter, pine needles, and bark as you can gather.
Prop the ridge pole at a 30-degree angle, supported by a forked stick at the high end and the ground at the low end. The interior should be just wide enough for your shoulders.
Lean ribbing branches along both sides of the ridge to form a tunnel shape.
Pile debris over the frame. You need at least 2 feet of loose material on all sides — more in cold weather.
Fill the interior with dry leaves to sleep in, not on top of.
Block the entrance with a large bundle of leaves or a pack.
Energy note: Gathering enough debris is the hard part. Budget 60–90 minutes just for material collection. If you’re already cold or wet, prioritize a faster lean-to first, then upgrade to a debris hut once you’re stable.
If the shelter leaks, add more debris to the roof and pack it tighter at the base.
If you’re still cold inside, add more insulation to the floor and reduce interior volume.
If the entrance lets in wind, stuff it more fully with leaves or your pack.
A-frame / wickiup (1–2 hours)
An A-frame is a debris hut with two ridge poles forming an inverted V, giving more headroom and a more stable structure. Lash the tops together with cordage or use a natural fork. Rib branches lean against both sides. Thatch from the bottom up. The wickiup variant uses a circular base with poles meeting at a central peak — better for groups, slower to build.
Snow cave (2–4 hours, winter only)
A snow cave interior stabilizes near 32°F (0°C) and can be significantly warmer than extreme outside temperatures, making it one of the most effective winter shelters available. But it carries real risks.
Find a slope with at least 5 feet of consolidated snow. Avoid avalanche paths.
Dig horizontally into the slope, then curve upward to create a sleeping platform above the entrance. Cold air sinks; the raised platform stays warmer.
Poke a ventilation hole through the roof with a ski pole or stick before you seal the entrance. Mark it outside with a pole or branch.
Keep the entrance small and plug it with a pack or snow block.
Check the ventilation hole every hour if burning a candle inside. CO₂ buildup is silent and lethal.
Safety callout: Tap the ceiling before sleeping. If it sounds hollow or chunks fall, the roof is too thin. Minimum ceiling thickness is 12 inches. Never build a snow cave under a cornice or on a slope above 35 degrees.
For a deeper walkthrough of shelter construction methods, Thrillofit’s full guide covers additional techniques and field photos.
How to pick the right site: a 60-second decision checklist
Site selection matters more than shelter design. A perfect debris hut in a flood zone is a death trap.
Run through this checklist before you drive a single stake or gather a single branch:
Pass criteria (all must be yes):
Ground is flat or gently sloped for drainage, not a low bowl that collects water.
The site is on the leeward side of a natural windbreak (ridge, tree line, rock face).
No dead limbs, loose rocks, or unstable overhangs directly overhead.
No obvious animal signs: fresh tracks, scat, bedding, or claw marks on nearby trees.
At least 200 feet from a water source (close enough to reach, far enough to avoid flood and insects).
Soil is stable — no undercut banks, no soft ground that could shift under weight.
Abort the site immediately if you see:
A flood line (debris, mud stains, or bent vegetation at a consistent height on trees).
Fresh animal bedding or scat inside or directly adjacent to your chosen spot.
An active bee, wasp, or hornet nest within 30 feet.
An overhang that sounds hollow when tapped or shows visible cracks.
High-tide marks in a sea cave or coastal rock shelter.
Outdoor Life specifically flags leeward positions and evergreen thickets as the two most reliable natural microclimate choices across seasons. Practice identifying them before you need them — run a site-selection drill on your next day hike and time how long it takes you to find three viable spots. Thrillofit’s step-by-step shelter building guide includes timed drills you can use to build that habit.
When natural shelters become dangerous and what to avoid
Natural shelters fail in predictable ways. Knowing the failure modes in advance is what keeps a bad night from becoming a fatal one.
Primary hazards:
Lightning under lone trees. A single tall tree on open ground is a lightning rod. Never shelter under it. Move to a low, leeward position in a stand of shorter trees or a depression.
Falling limbs (widow-makers). Dead branches overhead are the most common campsite injury cause. Look up before you look around.
Cave wildlife. Bears, mountain lions, rattlesnakes, and bats all use caves. Inspect for tracks, scat, fresh bedding, and sounds before entering. A cave that smells strongly of ammonia has been occupied recently.
Flooding in low ground. Flash floods move faster than you can run. Never shelter in a dry wash, ravine bottom, or any depression that shows a flood line.
Snow cave collapse. Thin roofs and warm spells are the two triggers. Minimum 12-inch ceiling, and check it after any temperature rise.
CO₂ buildup in enclosed spaces. Any fire or candle in a snow cave or sealed cave consumes oxygen. Keep ventilation open and watch for headache or drowsiness — both are early warning signs.
Quick field tests before committing to a site:
Tap rock overhangs with a stick. A hollow sound means unstable.
Check the high-tide line in any coastal cave before entering.
Listen for 60 seconds at a cave entrance before going in.
Sniff for poor air (sulfur, ammonia, or a stale, heavy smell) at low cave openings.
An experimental field study found that sheltered animals were protected from predators while exposed ones saw their numbers drop by about two-thirds — which tells you something about how deeply shelter is wired into survival biology. The same instinct that drives animals to seek cover applies to you, but you need to verify the cover is safe before you use it.
Fire safety around natural shelters:
Keep fires at least 10 feet from any thatched or debris wall.
Clear a 3-foot bare-ground perimeter around the fire.
Never build a fire directly inside a lean-to or debris hut.
Extinguish completely before sleeping — natural shelters are highly flammable.
For emergency relocation guidance and signaling options if a shelter fails, Thrillofit’s wilderness self-rescue guide covers the next steps.
Leave No Trace: using natural materials without wrecking the habitat
Building a natural shelter doesn’t have to damage the ecosystem you’re sheltering in. The key is using what’s already dead and down, not what’s alive and standing.
Xerces Society guidance makes clear that leaf litter, deadwood, and brush piles are critical habitat features for pollinators and beneficial insects. When you strip a forest floor of its debris layer, you’re not just gathering insulation — you’re removing nesting and overwintering habitat. The practical implication: use existing debris concentrations rather than spreading your collection across a wide area, and prefer improving a natural debris pile over building a new permanent one from scratch.
Do:
Use already-dead and downed wood, not living branches.
Gather leaf litter from multiple small areas rather than one large bare patch.
Dismantle your shelter when you leave and scatter materials back across the site.
Favor rock overhangs and natural depressions that require no construction at all.
Don’t:
Cut live trees or strip bark from living trunks.
Dig into soil more than necessary — root systems and soil structure take years to recover.
Build permanent structures in designated wilderness areas or national parks.
Leave large brush piles that weren’t there before — they alter the habitat for years.
In designated wilderness areas under the Wilderness Act, and in many national parks, building permanent structures is prohibited. Temporary, low-impact shelters built from dead and downed material are generally acceptable in a genuine survival situation, but the standard is always: leave the site as close to its original state as possible when you go.
Pro Tip: Design your shelter to be dismantled in under 10 minutes. If you build with that constraint in mind from the start, you’ll naturally avoid over-engineering and over-harvesting. Reversible shelters are also faster to build — a useful side effect.
Thrillofit field-ready checklist and two practice drills
Your natural shelter kit
You don’t need much. The goal is to supplement what the land provides, not replace it.
Fixed-blade knife or folding saw for cutting cordage and trimming branches
50 feet of paracord (550 lb rated) for lashing ridge poles and A-frames
Emergency bivvy or reflective blanket as a vapor barrier inside a debris hut
Lightweight tarp (8x10 ft) to combine with natural thatching for waterproofing
Sleeping pad or closed-cell foam section to block ground conduction
Headlamp with spare batteries — you may be building in the dark
Small handsaw if legal and available in your jurisdiction
For a broader look at reducing pack weight while keeping your options open, Thrillofit’s multi-use camp gear guide covers gear that doubles as shelter material.
Drill 1: The 20-minute lean-to
Goal: A functional lean-to that blocks wind and provides overhead cover, built in 20 minutes or less.
Success criteria: Ridge pole secured, at least 6 inches of thatching on the roof, ground insulation layer in place, open face oriented away from wind.
Run this drill in your backyard or on a day hike. Time yourself. The first attempt usually takes 35–40 minutes. After three or four runs, most people hit 20 minutes consistently.
Drill 2: The 60–90-minute debris hut
Goal: A fully enclosed debris hut with at least 18 inches of debris on the roof and a stuffed entrance, built within 90 minutes.
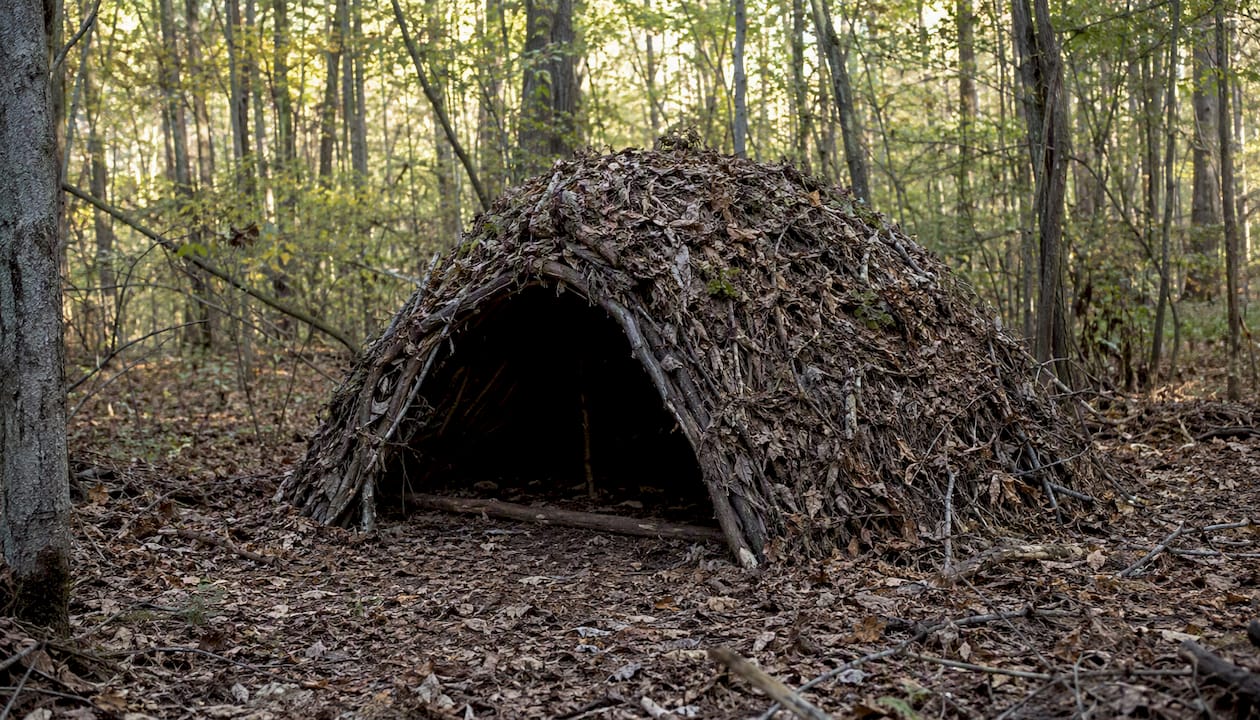
Success criteria: Interior is noticeably warmer than outside air after 10 minutes inside with the entrance blocked. No visible daylight through the walls. Ground layer is at least 4 inches of dry material.
Practical training with timed drills reduces build time and improves shelter quality — the first debris hut most people build takes twice as long as the second one. Log your times and note what slowed you down. Material gathering is almost always the bottleneck.
Pro Tip: During the site-selection phase of each drill, practice finding a leeward microclimate first. Walk the area for 3–5 minutes, wet your finger, and identify the wind direction. Then pick the most sheltered spot within 100 feet. Do this every time, and it becomes automatic.
Pairing shelter skills with navigation and first aid rounds out your field readiness. Thrillofit’s coverage of wilderness self-reliance connects those skills into a coherent framework.
The case for practicing before you need it
There’s a version of this skill that lives entirely in your head — you’ve read the steps, you understand the theory, and you feel reasonably confident. Then you’re actually cold, wet, and losing light, and the gap between knowing and doing becomes very obvious very fast.
The two drills above exist to close that gap. A lean-to you’ve built three times in daylight takes 20 minutes in the dark. A debris hut you’ve never built takes four hours and still leaks. The difference isn’t talent — it’s repetition in low-stakes conditions.
Natural shelters also reward observation. The survivalist who notices the dense spruce thicket on the leeward side of a ridge during a morning hike has already solved half the shelter problem before the emergency starts. That kind of situational awareness only develops through practice. Combine your shelter drills with basic navigation, signaling, and first-aid training, and you’re building a system, not just a skill.
Sources
Emergency Shelter: 6 Types You Can Build With What’s Around You - Learn To Prep The Smart Way
Nesting & Overwintering Habitat for Pollinators & Other Beneficial Insects
Shelter-use study showing protective effect of shelters (PMC article)
Survival Shelters | Yost Survival Skills | Bushcraft and Outdoor Skills
Recommended
Comments