

How to Start a Fire Safely: Beginner's Guide
- Wesley Coldwell
- 11 minutes ago
- 8 min read

TL;DR:
Safe fire-starting involves proper site selection, material preparation, and active management to prevent uncontrolled spread. It requires staging fuel correctly, supervising the fire continuously, and fully extinguishing it with water before leaving. Practicing these skills beforehand ensures safety and reliability during outdoor emergencies.
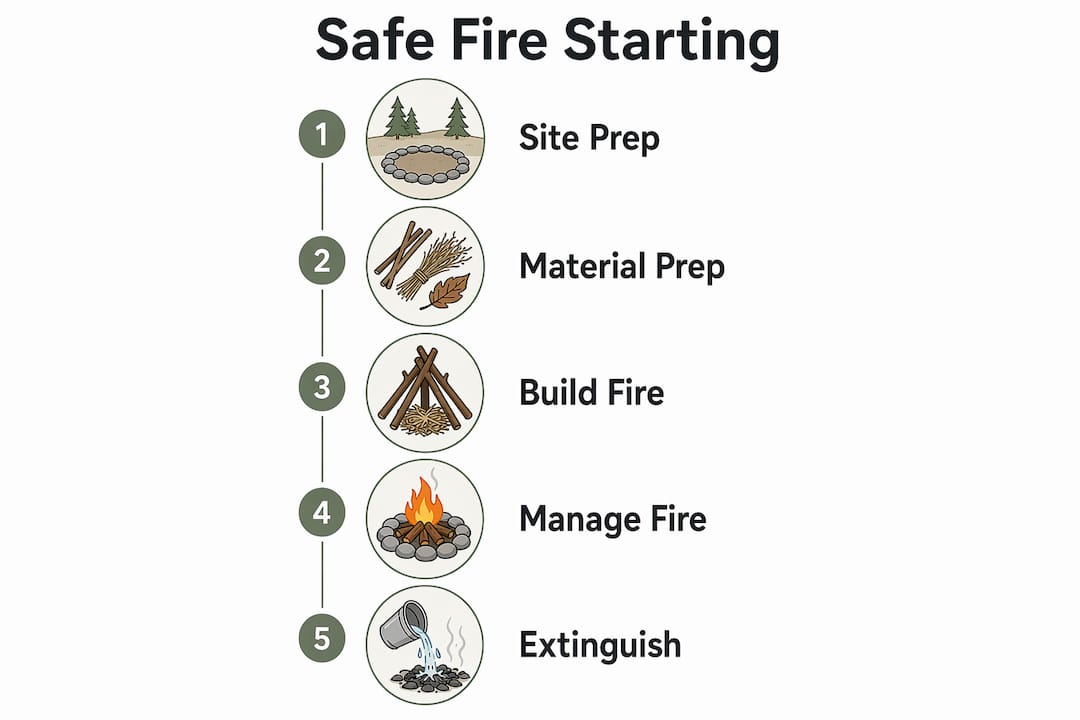
Safe fire-starting is the practice of combining proper site selection, material preparation, and disciplined fire management to produce a controlled flame with zero unintended spread. Knowing how to start a fire safely is one of the most practical skills any camper or outdoor enthusiast can develop. A poorly placed or poorly managed fire can escape within minutes, turning a warm evening into a genuine emergency. This guide covers every stage of the process, from choosing your spot to cooling the last ember, so you leave the woods exactly as you found them.
What are the essential safety considerations before starting a fire outdoors?
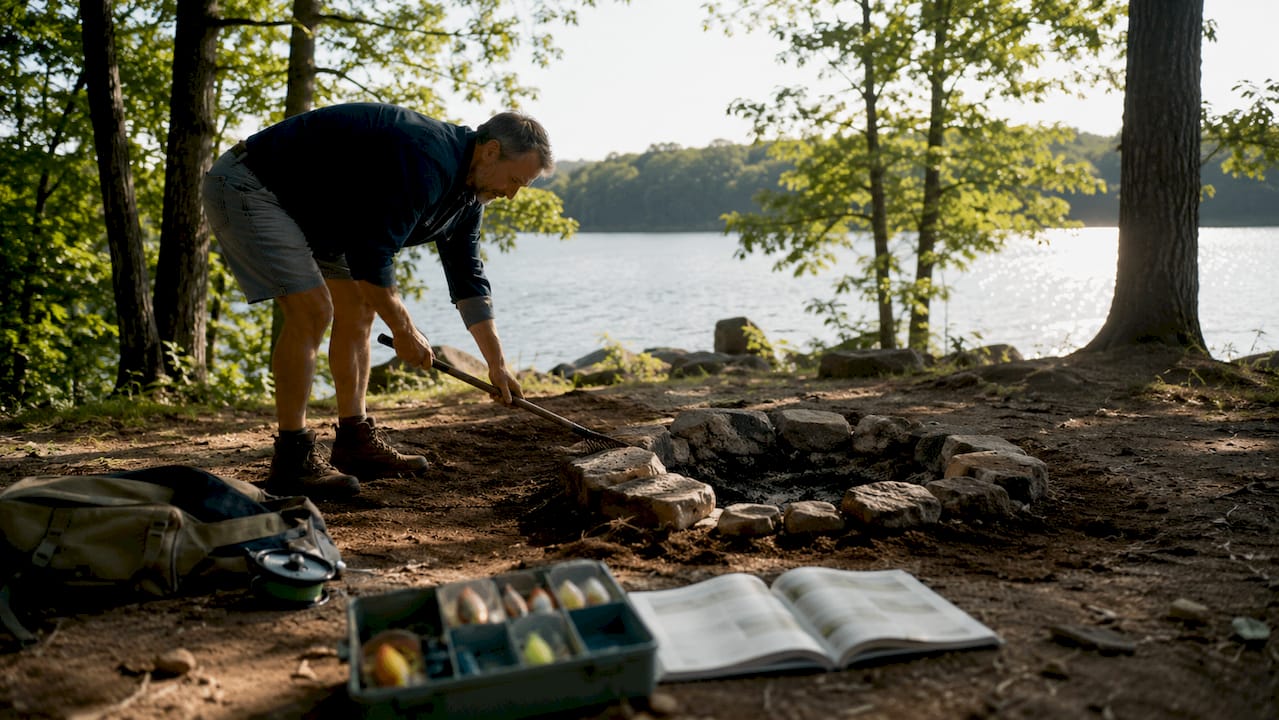
Every safe fire begins before the first spark. Site selection and clearance are the two factors that determine whether your fire stays under control or becomes a hazard.
Outdoor fire safety guidelines specify a minimum 15-foot distance from tents, gear, and low-hanging branches. That distance gives you a buffer if the fire flares unexpectedly. You also need to clear a 10-foot radius of dry leaves, pine needles, and loose debris around your fire site. Flammable ground cover is the fastest path from a campfire to a wildfire.
Before you gather a single stick, check local fire regulations. Many regions enforce fire bans during dry seasons, and violating them carries serious fines. Your state forestry agency or the local ranger station will have current restrictions. A quick phone call or website check takes two minutes and can save you from a costly mistake.
Key pre-fire safety steps:
Use an existing fire ring or fire pit whenever one is available.
If no ring exists, build one with rocks or clear a patch of bare mineral soil.
Keep a full bucket of water and a shovel within arm’s reach before ignition.
Position children and pets at least 10 feet from the fire at all times.
Avoid sites under low tree canopies or near dry grass fields.
Pro Tip: Check the wind direction before you light anything. Position yourself upwind of the fire so sparks blow away from your body, gear, and tent.
How to prepare the right materials to build a fire safely?
Material preparation is where most beginners lose the battle before it starts. A fire needs three distinct fuel types, each serving a specific role in the ignition sequence.
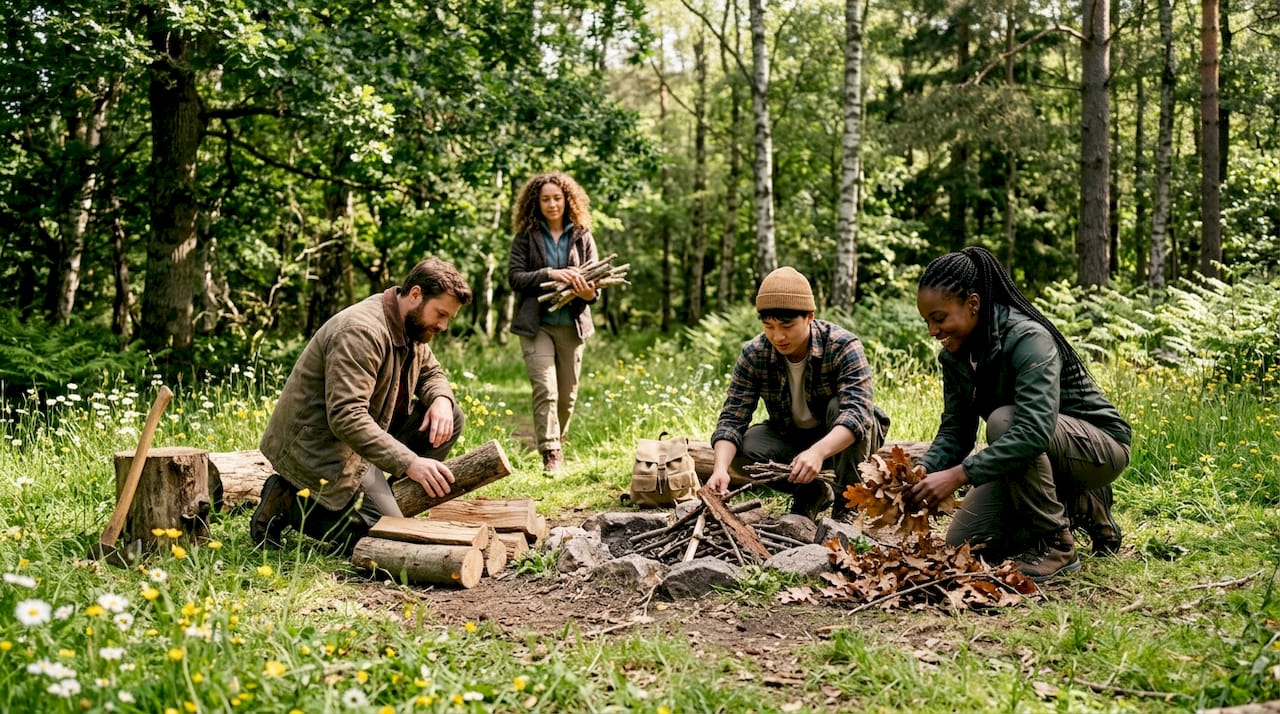
Tinder is the finest, driest material you have. Dry grass, birch bark shavings, cattail fluff, and cedar bark all work well. Tinder ignites at low temperatures and transfers heat to the next fuel layer. Incorrect tinder prep, such as packing it too tightly instead of fluffing it into a loose nest, causes fires to fail even when the ignition source works perfectly. Fluff your tinder into a bird’s nest shape to maximize airflow.
Kindling bridges the gap between tinder and fuel wood. Collect sticks ranging from pencil thickness up to finger thickness. Gather more than you think you need. Kindling burns fast, and running out mid-build forces you to smother a fragile young flame while you scramble for more.
Fuel wood is thumb to wrist thickness. Hardwoods like oak, hickory, and maple burn longer and hotter than softwoods. Avoid green or freshly cut wood. It contains too much moisture to burn cleanly and produces excessive smoke.
The snap test tells you whether wood is dry enough. Dry wood snaps sharply. Damp wood bends or tears. In wet conditions, split damp sticks to expose the dry core inside, and build your fire on a raised platform of dry sticks to prevent ground moisture from stealing heat.
Pro Tip: Store a small amount of commercial fire-starting tinder, like cotton balls coated in petroleum jelly, in a waterproof container in your pack. They ignite in wet conditions when natural tinder fails.
What are the step-by-step methods to start and build a fire safely?
Building a fire follows a clear sequence. Skipping steps is the primary reason fires fail, not the ignition tool. Failing to stage fuel in the correct order, from tinder to kindling to fuel wood, is the leading cause of fire failure in the field.
The ignition sequence
Place your tinder nest in the center of your cleared fire site or fire ring.
Arrange kindling over the tinder in your chosen structure (see below).
Light the tinder at the base, using a match, lighter, or friction method.
Blow gently and steadily at the base of the flame to feed oxygen.
Add pencil-thin kindling first, then finger-thick sticks as the flame grows.
Once kindling burns confidently, add your first pieces of fuel wood.
Keep fuel additions gradual. Adding large logs too soon smothers the flame.
Fire structures compared
Structure | Best for | How it works |
Teepee | Quick ignition, cooking | Kindling leans inward over tinder; collapses inward as it burns |
Log cabin | Long, steady burn | Stacked square frame around tinder; burns from inside out |
Lean-to | Windy conditions | Sticks lean against a large log on the windward side |
The teepee is the best starting point for beginners. It concentrates heat upward and collapses neatly into a coal bed for cooking.
Friction-based ignition
Friction fire is a backup skill worth knowing. Friction-based ignition requires wood dust to reach 800°F (425°C) through 30–60 seconds of sustained, firm pressure. The bow drill and hand drill are the two most common methods. Both demand dry wood, correct technique, and patience. Practice this at home before you need it in the field.
Pro Tip: Keep your fire small. A fire the size of a basketball produces enough heat for cooking and warmth. A larger fire is harder to control and wastes fuel.
How to manage the fire safely during its burn and extinguish it properly?
Active supervision is the single most critical fire safety rule. Unattended fires are the leading cause of fire escapes and wildfires. The NFPA is direct on this point: a fire requires competent, active management at all times. If you need to leave the site, even briefly, extinguish the fire completely before you go.
During the burn, follow these practices:
Add fuel wood in small amounts. Large additions can cause sudden flare-ups.
Keep your water bucket and shovel within reach throughout the entire session.
Watch for embers drifting on the wind, especially on breezy evenings.
Never burn trash, plastic, or treated wood. They produce toxic smoke and unpredictable flames.
“A fire requires competent, active management at all times to remain safe and prevent uncontrolled spread.” — NFPA Wildfire Prevention Guidelines
Extinguishing the fire correctly
Water is the only reliable extinguishing agent. Dirt and sand retain heat for over 8 hours beneath the surface, creating a burn hazard long after the fire appears out. Water cools embers below 50°F within 10 minutes when applied correctly. That matters because a site that looks cold can still burn you or reignite.
Pour water slowly over all embers and ash. Stir the ash with your shovel. Pour again. Repeat until no hissing sounds remain and the ash feels cool to the touch. The site must be cold enough to hold your hand against it before you walk away. Follow leave-no-trace principles: scatter cooled ash, restore the site to its natural appearance, and carry out all trash.
Pro Tip: Bring at least two liters of water dedicated solely to fire extinguishing. Do not rely on a nearby stream, which may be farther away than you expect when you need it fast.
What are the common mistakes when starting a fire, and how do you fix them?
Most fire failures trace back to a handful of repeatable errors. Recognizing them in advance saves frustration and keeps you safe.
Adding large fuel too soon. A young flame cannot sustain heavy wood. It dies under the weight and heat demand. Always build through the full tinder-kindling-fuel sequence.
Using damp or green wood. Wet wood produces smoke, not flame. Use the snap test before collecting any material.
Compacting tinder instead of fluffing it. Packed tinder blocks airflow and prevents the flame from spreading. Always arrange tinder loosely.
Skipping site clearance. Leaving dry leaves or grass within the 10-foot radius is how campfires become wildfires.
Leaving embers without full extinguishing. Hot ash buried under cool surface ash is invisible and dangerous. Always use water and stir thoroughly.
Practicing fire-starting in controlled, easy conditions before relying on it in an emergency builds the muscle memory and material judgment you need when conditions are difficult. A backyard or a picnic area with a fire ring is the right place to learn, not a remote wilderness site in the rain.
Pro Tip: If your fire keeps dying, the problem is almost always the tinder or kindling stage, not the lighter. Rebuild your tinder nest from scratch before trying again.
Key takeaways
Safe fire-starting requires site preparation, correctly staged fuel, active supervision, and thorough water extinguishing before you leave any campsite.
Point | Details |
Site clearance first | Keep fire 15 feet from tents and clear a 10-foot debris-free radius before igniting. |
Stage your fuel correctly | Build through tinder, kindling, then fuel wood in sequence to avoid smothering the flame. |
Never leave fire unattended | Active supervision at all times is the NFPA’s primary fire safety rule. |
Use water to extinguish | Pour, stir, and repeat until the site is cold to the touch. Never rely on dirt or sand. |
Practice before you need it | Build fire-starting skills at home so you perform reliably under pressure outdoors. |
Fire is a skill, not a given
I’ve watched experienced hikers struggle to light a fire in the rain because they never practiced outside of ideal conditions. That gap between knowing the theory and executing under pressure is real, and it closes only through repetition.
The part most guides skip is this: safety starts well before you strike a match. The campers who have accidents are rarely careless people. They’re people who skipped the site check, grabbed whatever wood was nearby, or assumed they’d remember the extinguishing steps when the time came. Fire does not forgive assumptions.
My honest recommendation is to practice your fire-starting skills at home at least three times before your first backcountry trip. Try different tinder materials. Try a friction method once, even if you plan to carry a lighter. Build the teepee, then the log cabin. Get a feel for what dry wood sounds like when it snaps versus what damp wood feels like when it bends. That tactile knowledge is what saves you when conditions are bad and your hands are cold.
Respect for fire is not fear of it. It’s understanding that fire is a tool that demands your full attention every second it burns. The campers who build the best fires are the ones who also know exactly how to put them out.
— S
Thrillofit’s resources for safer outdoor adventures
Thrillofit covers the full range of outdoor safety skills, from campsite setup to wilderness survival, so you can head into the backcountry with real confidence.

Whether you’re planning your first camping trip or sharpening skills you already have, Thrillofit’s library of practical guides covers fire safety, gear selection, and emergency preparedness in plain language. The camping hacks section is a strong starting point for building a complete outdoor skill set. Every article is written for people who want to spend more time outside and less time dealing with preventable problems.
FAQ
What is the safest distance for a campfire from a tent?
Place your fire at least 15 feet from tents, gear, and low-hanging branches. Clear a 10-foot radius of flammable debris around the fire site before igniting.
Why does my campfire keep going out?
The most common cause is incorrect fuel staging. Rebuild your tinder nest loosely, add pencil-thin kindling first, and resist adding large fuel wood until the flame burns steadily on its own.
Can I use dirt to put out a campfire?
Dirt and sand are not reliable extinguishing agents. They trap heat beneath the surface for over 8 hours. Use water, pour until hissing stops, stir the ash, and repeat until the site is cold to the touch.
How do I start a fire in wet conditions?
Split damp sticks to expose the dry core inside and build your fire on a raised platform of dry sticks. Carry waterproof tinder, such as petroleum jelly-coated cotton balls, as a reliable backup ignition source.
How long does friction-based fire starting take?
Friction fire requires sustained pressure for 30–60 seconds to generate wood dust hot enough to form a coal, reaching approximately 800°F (425°C). Practice this method at home before attempting it in a survival situation.
Recommended
Comments