

Trail Marking: A Practical Guide for Hikers and Stewards
- Wesley Coldwell
- 6 minutes ago
- 12 min read

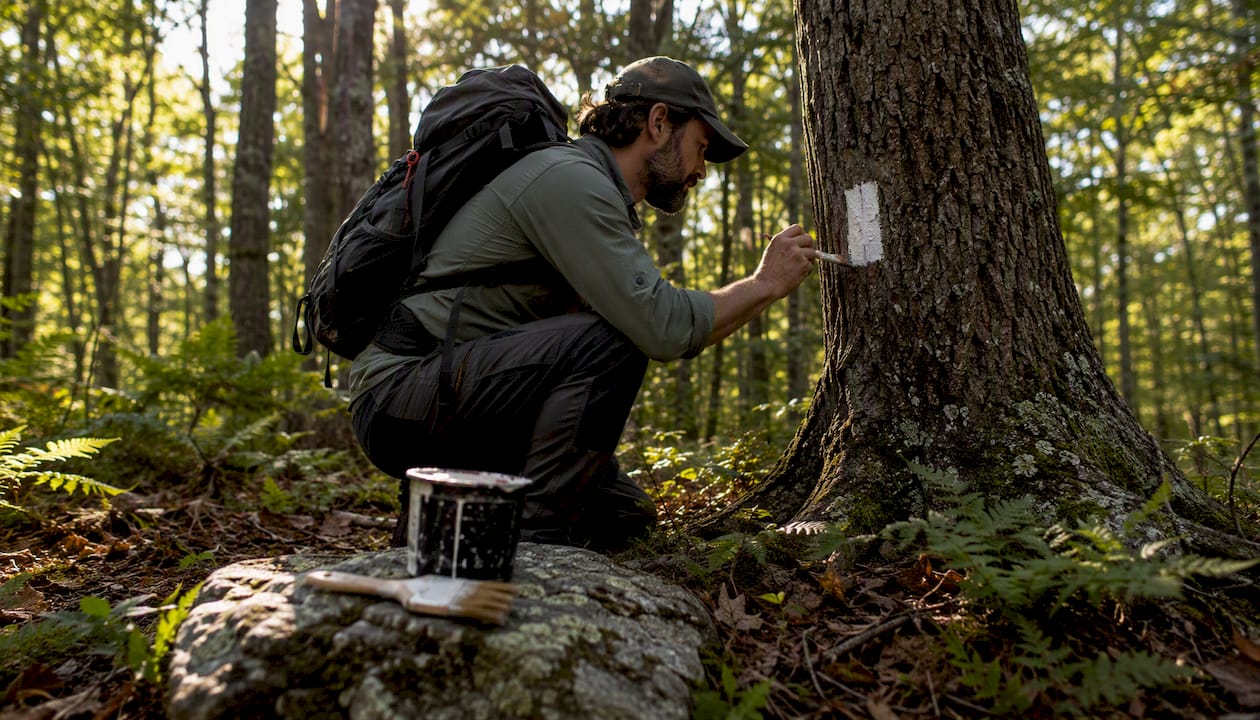
Trail marking is the practice of placing signs, blazes, cairns, or other visual cues along a route so hikers can confirm they’re on the right path, especially where the tread disappears into leaf litter, snow, or rock. It’s the difference between a trail that reads clearly in fog and one that scatters you across a hillside guessing at deer paths.
Three rules govern good marking, and they show up in every land-management standard worth following:
Purpose first. A marker only earns its spot on a tree or post if the route would otherwise be genuinely unclear.
Less is more. Sparse, well-placed marks beat a trail plastered with paint every fifty feet.
Visibility matters more than volume. One marker seen from both directions at eye level does more work than three hidden in brush.
The USDA Forest Service ties the amount of signing directly to how challenging a trail is meant to be, and that single principle explains almost every marking decision you’ll make in the field.
Key Takeaways
Trail marking works because it gives hikers just enough confirmation to stay on route without cluttering the landscape they came outside to experience.
Point | Details |
Mark only decision points | Place markers where the route is genuinely unclear, not on every available tree. |
Use the three-part junction rule | Add an approach marker, a direction indicator, and a confirming mark after every turn. |
Match materials to terrain | Use paint in forest, cairns in alpine terrain, and posts in open meadows. |
Keep blazes at 2 by 6 inches | Standard sizing keeps a trail’s markings consistent across crews and years. |
Never touch cairns you didn’t build | Report suspicious or misleading cairns to the managing organization instead. |
Follow the land manager’s standard | Check with USDA, NPS, ATC, or American Trails guidance before starting a project. |
Table of Contents
What is trail marking and why does it exist?
Trail marking exists because human eyes are bad at spotting a faint path in bad light. A route that’s obvious in June sun can vanish under October leaf fall or a dusting of March snow, and that’s exactly when hikers get disoriented.
Certain conditions make marking non-negotiable rather than optional decoration:
Dense fog or heavy tree cover that erases sightlines beyond a few yards.
Snow cover that buries the tread entirely for months at a time.
Multiple informal paths, game trails, or old logging roads crossing the intended route.
Rocky, alpine, or scree terrain where there’s no visible tread to follow at all.
That said, marking isn’t free. Every blaze, sign, and cairn is a small intrusion on the landscape, and land managers have coined a term for the failure mode: sign pollution. Overmark a trail and you cheapen the experience, cluttering a wilderness setting with visual noise that undercuts the reason people came out there in the first place. American Trails and the Forest Service both frame this as a trade-off, not a checklist: more challenging, backcountry-style routes typically carry fewer markers, while easier, high-traffic trails near trailheads get more signage and reassurance.
Pro Tip: Before placing a single mark, walk the route once with fresh eyes and flag only the spots where you personally hesitated or second-guessed the path. Those hesitation points are your real decision points, not every fork or bend.
Common types of trail markers and where each works best
Trail crews reach for different tools depending on terrain, tree cover, and how permanent the route is meant to be. American Trails lists paint, carvings, affixed markers, posts, flagging, cairns, and even carved crosses as legitimate options, and each has a natural home.
Marker type | Best used in | Visibility | Durability | Environmental impact |
Paint blazes | Forested trails with trees along the route | High when maintained | 5 to 10 years with quality paint | Low, minor bark impact |
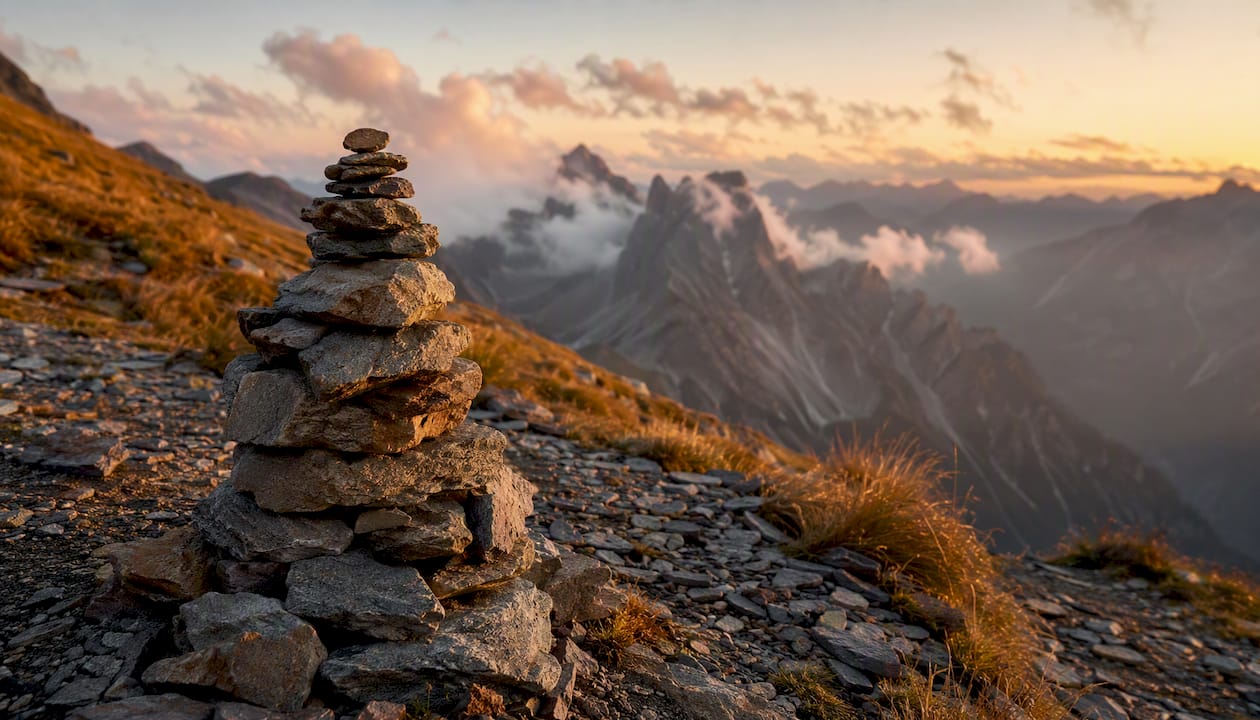
Cairns | Alpine, desert, or treeless terrain | High in open sightlines | Variable, easily disturbed | Low if left undisturbed |
Marker posts | Meadows, open fields, trail junctions | Moderate to high | Long, but posts can rot or snap | Moderate, requires installation |
Affixed markers (discs, tags) | Multi-use trails, shared corridors | High, color coded | Long if screws or nails hold | Moderate, requires hardware |
Flagging tape | Temporary routes, new trail scouting | High short term | Weeks to months only | Low if removed promptly |
Signs | Trailheads, major junctions, regulatory info | Very high | Long with weatherproofing | Higher, requires posts and hardware |
Paint remains the workhorse in wooded settings because it’s cheap, fast to apply, and easy to touch up during annual maintenance. Cairns fill the gap where there’s nothing to paint. Above treeline, a stack of rocks is often the only marker option, which is exactly why alpine hikers need to trust them and why disturbing them causes real problems.
Flagging tape deserves a special note: it’s meant to be temporary. Crews use it while scouting a new route or marking a trail for upcoming construction, and it should come down once permanent blazes go up. Left in place for years, it fades, tangles in brush, and confuses hikers who assume every ribbon means something official.
What do different blaze colors and patterns actually mean?
A single blaze, one painted rectangle, means you’re on the correct route and can keep walking without breaking stride. A double blaze, two rectangles stacked vertically, is your cue to slow down: the trail is about to turn, split, or otherwise change direction. Maintainers place these either inline (stacked directly on top of each other) or offset, where the top blaze shifts slightly left or right to indicate which way the turn goes.
The Appalachian Trail Conservancy trains crews to place blazes at roughly eye level and space them so the next one is visible before the last one disappears from view. That’s the whole system for one of the longest marked footpaths in the country, and it works precisely because it’s kept simple.
Color conventions add another layer, though they vary by region and land manager:
White blazes commonly mark foot-only long-distance trails.
Blue blazes often indicate side trails or connector routes to water, campsites, or overlooks.
Yellow or orange sometimes signals shared-use trails open to bikes or horses.
Ski areas frequently use their own color-coded system tied to difficulty rather than route identification.
None of these are universal. Always check the trailhead kiosk or local land manager’s key before assuming a color means the same thing it did on your last hike somewhere else.
Cairns come with a specific warning. Research on alpine navigation hazards shows that hikers building their own “helpful” cairns, or knocking existing ones apart, create some of the most dangerous route-finding hazards in exposed terrain. A cairn that looks official but was stacked by a well-meaning day hiker can send someone toward a cliff edge instead of the trail. Leave cairns exactly as you find them, and report any that look tampered with to the managing organization instead of fixing them yourself.
Where should trail markers be placed?
Spacing depends almost entirely on how easy the route is to lose. In dense vegetation or forest with heavy undergrowth, blazes generally need to sit closer together, often every 100 to 150 feet, so the next one is always in sight. In open terrain with clear sightlines, that gap can stretch to 300 feet or more without anyone losing confidence in the route.
Junctions call for a specific three-part sequence, and guidance from Pennsylvania’s state park system lays it out clearly:
Place an approach marker before the junction so hikers know a decision point is coming.
Place a direction indicator right at the junction itself, showing which way the trail actually goes.
Place a confirming marker 10 to 50 feet along the correct path after the turn, so hikers know they chose right.
That third step is the one most amateur marking efforts skip, and it’s the one that matters most. Without it, a hiker who takes the correct turn has no feedback that they made the right call, and plenty will backtrack out of doubt, wasting time and sometimes wandering onto the wrong path entirely.
Height and visibility rules stay consistent across almost every standard: blazes go at roughly eye level, and a well-placed marker should be visible from both directions of travel, not just to someone walking the route the way the crew walked it during installation.
Pro Tip: Stand at each proposed marker location and look back the way you came. If you can’t spot the previous marker from where you’re standing, add one in between rather than assuming hikers will just keep faith and continue forward.
Which materials and tools actually hold up in the field?
Durability and visibility drive almost every material choice trail crews make, and the Appalachian Trail Conservancy’s field guide is refreshingly specific about what works.
Material or tool | Purpose | Why it’s chosen |
Oil-based boundary paint (e.g., Nelson Blue) | Painting blazes on bark | Adheres well and resists weathering for years |
Notched paintbrush handle | Sizing blazes consistently | Guarantees uniform 2 inch by 6 inch dimensions every time |
Wire brush or hatchet | Surface prep before painting | Removes moss, lichen, and loose bark for better adhesion |
Marker discs or metal tags | Affixed markers on posts or trees | Long-lasting, weather resistant, easy to color code |
Reflective tape | Winter or low-light routes | Improves visibility for headlamps and dawn or dusk travel |
Wooden or composite posts | Open terrain lacking trees | Provide a stable surface where paint has nothing to adhere to |
Staple gun | Attaching tags or plastic markers | Fast application with minimal tree damage compared to nails |

A vertical rectangle blaze with approximate 2 inch by 6 inch dimensions is commonly used as a field standard, and crews often notch a paintbrush handle to that size, or use a folded dollar bill for a quick size reference, to keep blazes visually consistent across a trail. Surface prep matters more than most volunteers expect: a quick pass with a wire brush or hatchet to knock off moss and loose bark makes a painted blaze last years longer than one slapped onto rough surface without cleaning it first.
Low-impact installation is worth taking seriously. Avoid driving multiple nails into the same tree over the years; if a marker needs replacing, remove the old hardware rather than stacking new nails next to it. Where nailing feels excessive for a temporary or lightly used route, flagging tape or a painted symbol on a rock does the job with a fraction of the long-term impact. Anyone building a broader outdoor navigation system, combining trail markers with map skills, will find the step-by-step map reading guide useful for cross-checking blazes against terrain features.
How do you mark a trail from start to finish?
Marking a trail well is less about paint and more about planning. Skip the planning phase and you’ll end up repainting the same stretch three times.
Get permission first. Contact the land manager, whether that’s a state park, national forest district, or a conservancy like the ATC, before touching a tree or moving a rock.
Walk and map the full route before marking anything, noting every spot where the path becomes unclear.
Identify true decision points, junctions, unclear tread, and places where an unmarked side path could pull someone off course.
Choose the marker type that fits the terrain: paint for forest, cairns for open rock, posts for meadows.
Clean the surface at each blaze location with a wire brush or hatchet before applying paint.
Measure each blaze to a consistent 2 inch by 6 inch rectangle using a notched brush handle or similar guide.
Apply the three-part junction sequence at every intersection: approach marker, direction indicator, confirming marker.
Photograph and log each marker’s location, ideally with GPS coordinates, so future maintenance crews know exactly what to check.
That last step gets skipped constantly, and it’s the one that saves the most time later. A simple spreadsheet or a shared map with pinned photos turns a one-person marking effort into something the next volunteer crew can maintain without rewalking the entire trail from scratch. Readers building out a full field system might pair this checklist with the outdoor navigation workflow guide for tracking waypoints alongside physical markers.
Pro Tip: Carry a pre-cut cardboard template sized to 2 by 6 inches instead of eyeballing every blaze. It takes ten seconds to trace and keeps every mark on the trail looking like it came from the same crew, even if five different volunteers painted it over five different weekends.
How often should markers be inspected and maintained?
Maintenance cadence should track trail difficulty and exposure. High-traffic, low-challenge trails near trailheads generally need annual checks since paint fades faster in high-sun exposure and heavy foot traffic knocks affixed markers loose. Remote or high-elevation routes can go two to three years between inspections, but should get a look immediately after major storms, since fallen trees and rockslides are notorious for taking blazed trees down with them.
Ethics matter as much as scheduling here. A short checklist worth keeping in mind:
Mark only where the route genuinely needs it, not out of habit or because a blank tree looked available.
Never build a new cairn or dismantle an existing one, even one that looks wrong. Report it instead.
Follow the specific land manager’s color and spacing standards rather than defaulting to what you’ve seen elsewhere.
Remove outdated or duplicate markers when refreshing a section instead of just adding new ones on top.
The Forest Service’s own signing standards put it plainly: the goal is confirmation, not decoration, and every unnecessary mark chips away at the wilderness quality that drew people to the trail in the first place.
Sign pollution doesn’t just clutter a view. It trains hikers to distrust markers altogether, because once a trail is overmarked, nobody can tell which blaze actually matters and which one was leftover from a crew that never came back to clean up.
What are the most common trail marking mistakes?
Most marking problems trace back to inconsistency rather than laziness. A crew paints half a trail in blue and half in white after a leadership change, or a well-meaning hiker tapes flagging to a tree that was never meant to be permanent.
Overmarking a simple stretch. Fix by removing redundant blazes and leaving only the ones at genuine decision points.
Mixed or wrong colors from inconsistent crews. Repaint the affected section with the correct standard color and log the change.
Misleading or user-built cairns. Report the location to the managing agency rather than dismantling it yourself, since removal without documentation can confuse the next crew too.
Markers placed too high or too low to be seen easily. Reposition at eye level and check visibility from both directions of travel.
Leftover flagging tape from old projects. Remove it once the permanent marking system is in place.
Deciding whether to fix a problem yourself or escalate it comes down to scope. A single faded blaze is a quick repaint. A whole junction with contradictory signage, or a cairn field that looks tampered with in alpine terrain, needs a report to the trail’s managing organization before anyone touches it.
Before reporting, gather:
Photos of the problematic marker or junction from multiple angles.
GPS coordinates or a clear description of nearby landmarks.
The direction of travel where confusion occurred, since a mark that’s fine northbound can still fail southbound hikers.
Where can you find official trail marking standards?
Four organizations anchor almost every marking standard used across the United States, and each publishes material worth bookmarking before you touch a paintbrush.
USDA Forest Service publishes its Trail Construction and Maintenance Notebook, which sets the baseline principle that marking intensity should match a trail’s intended challenge level.
National Park Service maintains its own signage and wayfinding standards across individual parks, often tailored to local terrain and visitor volume.
Appalachian Trail Conservancy offers a detailed student guide covering blaze sizing, spacing, and surface prep, built from decades of maintaining one of the country’s most heavily used long trails.
American Trails runs an FAQ and resource library breaking down when and where to use each marker type, aimed at both hikers and volunteer crews.
If your project involves an existing trail, check whether the land manager already has a written standard before improvising your own. Most established trail systems do, and following it keeps a trail’s signage consistent even when maintenance passes to a new volunteer years down the line.
A steward’s take on marking responsibly
Marking a trail is an act of restraint disguised as a task list. The easiest mistake to make in the field isn’t picking the wrong color or misjudging spacing, it’s reaching for the paintbrush too often because a blank tree feels like an invitation. It isn’t. The best-marked trails I’ve studied share one trait: you barely notice the markers until you actually need one, and then it’s right where your eye expects it.
Thrillofit’s approach to outdoor guidance leans on that same principle across every skill we cover, from reading a map to reading the woods themselves. Trail marking done well doesn’t announce itself. It just quietly keeps people safe, which is the entire point of doing it at all.
Frequently Asked Questions
What is trail marking in simple terms? Trail marking is placing signs, painted blazes, cairns, or posts along a route so hikers can confirm they’re following the correct path, particularly where the trail surface itself is hard to see.
What does a double blaze mean on a hiking trail? A double blaze signals an upcoming change in direction, like a turn or intersection, while a single blaze simply confirms you’re still on the right route.
Why shouldn’t I build my own cairn on a trail? A homemade cairn can look official to the next hiker and send them off the actual route, especially in alpine terrain where cairns are the only marker available.
How far apart should trail markers be placed? Spacing depends on terrain: dense forest often needs blazes every 100 to 150 feet, while open terrain with clear sightlines can space them 300 feet apart or more.
Who sets the official standards for trail marking? The USDA Forest Service, National Park Service, Appalachian Trail Conservancy, and American Trails each publish guidance that most land managers reference when building a marking plan.
Sources
For readers who want to go deeper on standards or build out broader navigation skills, these sources and guides cover the ground this article only had room to summarize.
Recommended
Comments