

Fix 4 Things to Improve Wildlife Photography: A Field First Checklist
- Wesley Coldwell
- 11 minutes ago
- 17 min read

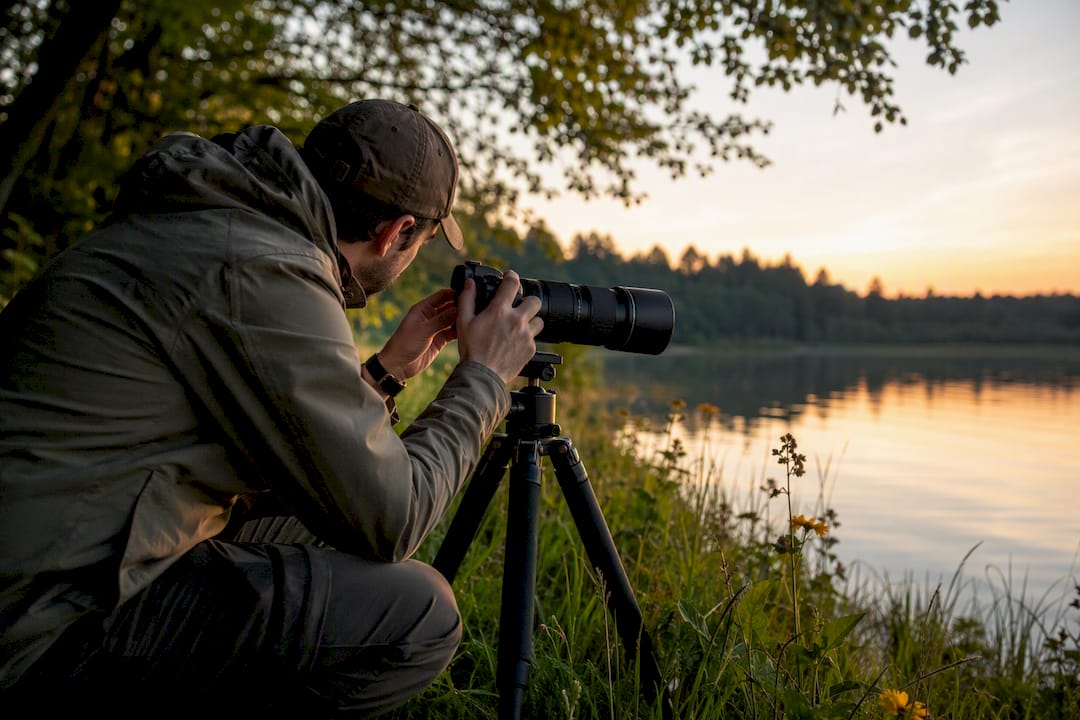
The fastest way to improve your wildlife photos is to fix four things at once: plan your shoot around light and animal behavior, carry enough telephoto reach to keep your distance, set shutter speed first and let Auto ISO handle exposure, and never push an animal past its comfort zone to get the shot. This guide walks through planning, gear, camera settings, composition, ethics, and the practice habits that turn occasional lucky frames into a consistent body of work.
TL;DR:
Carry a long lens of at least 300mm for mammals and 500mm or more for birds to maintain distance and reduce stress on animals.
Use a combination of fast shutter speeds, Auto ISO with a set shutter-speed floor, and appropriate aperture to ensure sharp images despite unpredictable wildlife movement.
Practice reading animal behavior and vocalizations to anticipate movements, minimizing disturbance and capturing dynamic action.
Respect ethical guidelines by maintaining a safe distance, avoiding habitat disruption, and using blinds or vehicles to stay unobtrusive.
Focus on skill-building through field observation, patience, and training, rather than relying solely on high-end gear or focal length.
Table of Contents
Wildlife Photography Tips Start With Research, Not the Camera
The photographers who consistently come home with strong images spend more time studying behavior than fiddling with menus. Professional shooters routinely say that research into a species’ habits and habitat matters as much as technical skill, and that holds true whether you’re chasing songbirds in a city park or elk during the fall rut in wildlife photography.
Start with timing. Most species have narrow windows when they’re active and visible: dawn and dusk feeding for deer, specific tidal windows for shorebirds, a two-week migration push for warblers, a few weeks of breeding display for grouse or sage hens. Miss the window and you’re photographing empty habitat.
Build a scouting routine before you ever raise the camera. A few habits separate photographers who get consistent results from those relying on luck:
Check eBird and iNaturalist for recent, location-tagged sightings of your target species before you drive anywhere.
Walk the location once without a camera to map vantage points, approach routes, and escape paths for both you and the animal.
Note sun direction and likely background clutter at the times of day you’ll actually shoot.
Call a local ranger station or guide service. They know which trails are closed for nesting season and which overlooks are legal to shoot from.
Confirm permission requirements for the specific park, refuge, or private land before you go, since rules vary widely by jurisdiction.
Study satellite and contour maps to identify pinch points like water crossings, ridgelines, or field edges where animals naturally funnel.
The U.S. Forest Service’s own guidance backs this up directly, recommending that photographers scout locations, check sun angles and backgrounds, and plan for safety before ever stepping into the field for wildlife photography.
Keep a simple scouting note for each location: species seen, time of day, wind direction, light quality, and any hazards. After three or four visits, that note becomes a personal almanac more useful than any app, and it turns each trip into hypothesis testing rather than guesswork.
Which Gear Actually Matters for Wildlife Photography
Reach is the single most important gear decision you’ll make, because it’s also an ethics decision. A longer lens lets you fill the frame without walking closer, which keeps stress off the animal and keeps you safer. This is the real argument for telephoto glass: not vanity reach, but working distance.
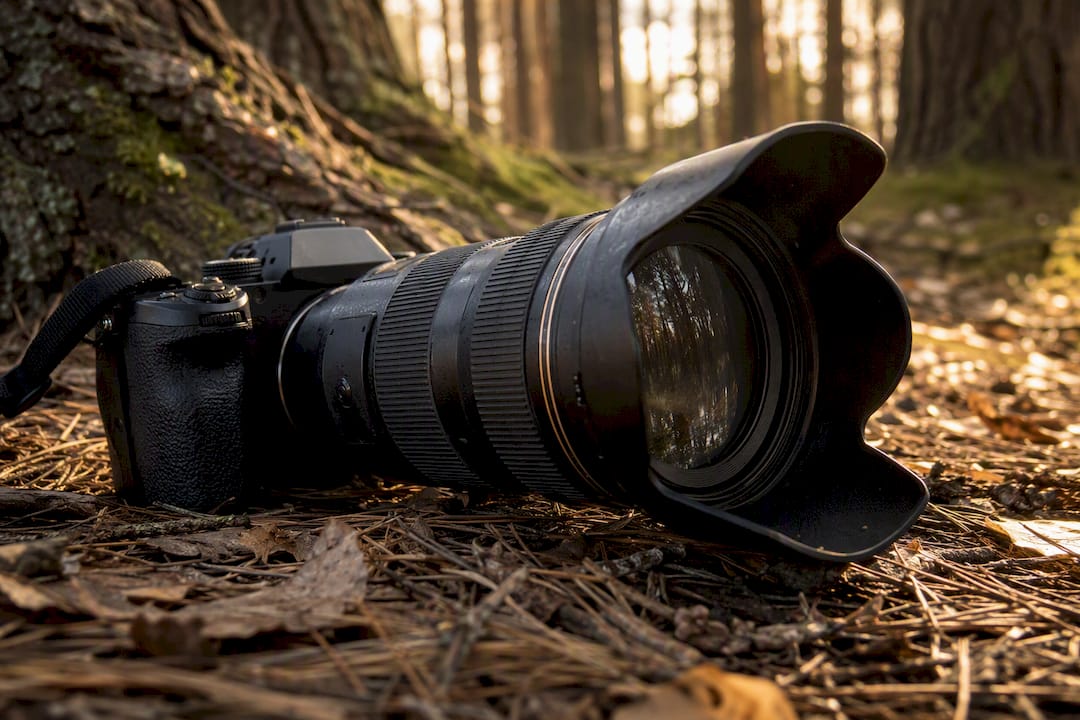
For most mammal photography, a 300mm to 400mm equivalent handles deer, elk, and similar-sized animals at reasonable distances. Bird photographers usually want 500mm to 600mm or more, since most birds simply won’t tolerate close approach. Small creatures like insects and amphibians flip the equation entirely: a dedicated macro lens in the 90mm to 105mm range, paired with patience, beats any telephoto.
Lens speed versus reach is a real trade-off, not a marketing detail. A fast f/2.8 super-telephoto gathers more light and isolates subjects beautifully, but it costs several times more and weighs noticeably more than an f/5.6 or f/6.3 equivalent. Most enthusiasts get better results buying the longer, slower lens and learning to work with available light than stretching budget for a stop or two of speed.
In-body or optical stabilization (IBIS/VR/IS) buys you two to four stops of handholding room, which matters enormously at 500mm and beyond.
A bean bag draped over a car window or fence post is the fastest, cheapest way to stabilize a long lens from a vehicle.
A monopod works better than a tripod when you’re moving frequently but still need vertical support.
A gimbal head on a tripod is worth the investment once you’re regularly shooting lenses over 400mm for extended sessions.
Weatherproofing matters more than most beginners expect. A simple rain sleeve and silica packets in your bag protect gear on multi-hour sits.
For long hikes where every pound counts, a compact superzoom bridge camera or a mirrorless body with a lighter 100-400mm class lens will get you 80% of the shot with half the weight. Thrillofit’s gear picks round up field-tested options across those weight and budget tiers.
Pro Tip: Buy the lens hood and actually use it. Beyond flare control, it’s the first line of physical protection when you’re bushwhacking through branches to reach a blind.
Wildlife Photography Camera Settings That Actually Work
Shutter speed comes first, always. Wildlife moves unpredictably, and a technically sharp exposure with a blurred subject is a wasted frame. Set your shutter speed based on what the subject is doing, not on some fixed number you memorized once.
Here’s a practical shutter-speed cheat sheet by subject and action:
Stationary or slow-grazing mammals: 1/500s is a safe floor that freezes minor movement without forcing your ISO too high.
Walking mammals or perched birds: 1/800s to 1/1000s handles head turns and wing flutters cleanly.
Running mammals or birds taking off: 1/1600s to 1/2000s.
Birds in flight: 1/2000s or faster is the standard recommendation, since wingtip speed at the edges of a flap outpaces the body’s motion.
Hummingbirds: 1/3200s or faster to freeze wingbeats that can exceed 50 per second, or intentionally drop to 1/60s to 1/125s if you want motion-blurred wings as a creative choice.
Aperture governs depth of field and background separation, and the right choice depends on what you’re trying to isolate. Wide open at f/2.8 to f/4 melts backgrounds into soft color and pulls maximum attention to the eye, which works beautifully for portrait-style single-subject shots. Stop down to f/5.6 or f/8 when you need more of the animal in focus, such as a full-body shot of an animal angled toward the camera, or when photographing groups where you need multiple animals sharp simultaneously. Most modern telephoto zooms are optically softest wide open and sharpest one to two stops down, so f/5.6 to f/8 is often the sharpest practical range on a 100-400mm or similar lens.
Auto ISO is the tool that ties shutter speed and aperture together without forcing you to babysit exposure every time the light shifts, which happens constantly under moving cloud cover or dappled forest canopy. The most practical strategy is manual mode with Auto ISO enabled, letting the camera float ISO while you lock in your chosen shutter speed and aperture, an approach confirmed by field guides built specifically around modern wildlife camera settings.
Configure a minimum shutter-speed floor in your Auto ISO settings so the camera never drops below your motion-freezing threshold, even in dim light. Set a sensible ISO ceiling based on your camera’s generation: older APS-C bodies from five-plus years ago often show unacceptable noise above ISO 3200 to 6400, while current-generation full-frame sensors can push cleanly to ISO 12800 or higher. Know your own camera’s noise tolerance through testing at home before you rely on it in the field.
Auto ISO with a minimum shutter-speed floor is widely regarded among wildlife shooters as the most practical exposure strategy for handling fast-changing light, since it removes one variable from a scenario where the animal, not the photographer, dictates the pace.
For metering, evaluative or matrix metering handles most situations well, but switch to spot or center-weighted metering when your subject is much brighter or darker than its surroundings, such as a white egret against dark water or a dark bear against snow.
Autofocus and Back-Button Focus for Moving Subjects
Modern autofocus systems with animal or eye detection have changed wildlife photography more than almost any other single technology in the last decade. When your camera offers subject-detection AF for animals, use it as your default for anything with a visible eye, since it locks onto and tracks the eye through minor obstructions far more reliably than a human can react.
Switch away from subject detection when the animal is heavily obscured by grass, branches, or a fence, since detection systems can lock onto the wrong point or hunt. In those cases, single-point or a small zone AF gives you direct control over exactly where focus lands.
Set AF-C (continuous autofocus) as your default mode for anything that might move, which is nearly everything alive.
Move focus activation to a dedicated back-button and separate it from the shutter button, so you can release focus tracking to reframe without losing your lock.
Raise AF-tracking sensitivity for erratic subjects like small birds and lower it slightly for predictable, steady walking subjects to avoid the system jumping to background clutter.
Reserve your camera’s highest burst rate for short, high-value windows like a takeoff or a strike, since 20 frames per second fills a memory card and your editing queue fast.
Back-button focus feels awkward for about a week and then becomes the single habit most wildlife photographers say they can’t shoot without, a preference echoed across field guides covering wildlife photography techniques for everything from birds in flight to insect close-ups.
Pro Tip: Practice back-button focus on your neighborhood squirrels or pigeons before your first real trip. You want the muscle memory automatic, not something you’re thinking about when a bobcat finally steps into the open.
Composition and Light: Making the Shot Tell a Story
Golden hour, the hour after sunrise and before sunset, gives you warm, directional light that models fur and feathers with real texture instead of flattening them. That same low angle also means animals are more likely to be active, since many species time their feeding around those cooler, calmer periods.
Overcast days deserve more respect than most photographers give them. Cloud cover acts as a giant diffuser, eliminating the harsh, contrast-crushing shadows that midday sun throws across a face or body, and colors often render more saturated and true under soft light than under a blazing noon sky.
Backlighting and rim light, where the sun sits behind or beside your subject, can produce dramatic glowing edges on fur or feathers, but you have to expose carefully or you’ll silhouette the animal into an unrecognizable shape. Metering slightly for the highlights while accepting some shadow loss usually preserves the effect without losing the subject entirely.
Composition rules that matter more than the classic rule of thirds:
Leave active space in the direction an animal is moving or looking. A bird flying into empty frame reads as flight; a bird crammed against the edge reads as a mistake.
Avoid dead space behind a stationary animal that isn’t doing anything. Tighten the crop instead.
Use aperture and distance together to separate your subject from a busy background, since a clean f/4 blur reads far more professional than a sharp, cluttered f/11 frame.
Frame with environmental context occasionally, not every shot. A wide shot showing habitat tells a different, valuable story than a tight portrait.
A striking number of otherwise technically excellent wildlife images fail simply because the subject stares directly out of a frame with no room to look into, an easy fix that costs nothing but awareness at the moment of shooting.
Wildlife Photography Ethics and Safety in the Field
“Do no harm” is the foundation every other rule sits on. That means never altering habitat to get a shot, never baiting or calling animals excessively, and never disturbing wildlife during breeding or migration windows when energy reserves are already stretched thin, a standard laid out clearly in ethical wildlife photography guidance from National Geographic.
Use a baseline ethical distance rule that suggests keeping a respectful distance from predators and other large wildlife, adjusting depending on species, regulations, and animal behavior. Treat it as a floor, not a fixed number. Adjust it upward based on the specific species, posted park regulations, and how the animal is actually behaving in the moment.
Observe first. Watch the animal’s baseline behavior for a few minutes before raising the camera, since letting it approach you on its own terms produces calmer, more authentic images and less stress overall.
Follow the One-Flush Rule. If an animal changes its behavior because of you, whether that’s a bird taking flight or a mammal raising its head and staring, you’ve already gotten too close. Back off immediately rather than pushing for one more frame.
Ask the Three Questions before every shot: Am I changing this animal’s behavior? Am I disturbing habitat to get this angle? Would I be comfortable if someone photographed my approach and posted it?
Prepare like it’s a wilderness trip, because it is. Tell someone your route and return time, download offline maps, carry a headlamp and basic first-aid supplies, and pack insect protection, all standard field-safety measures for wildlife photography outings.
Use low-impact positions. Shooting from a vehicle, a purpose-built blind, or a remote trail camera disturbs far less than walking toward an animal on foot, and it often produces calmer, more natural poses because the animal never registers you as a threat.
Thrillofit’s wildlife encounter guidelines go deeper into species-specific distance and behavior cues if you’re heading somewhere with predators or large ungulates.
Pro Tip: If you have to ask yourself whether you’re too close, you already are. Trust that instinct and back away before you rationalize it.
Stabilization and Support for Sharp Long-Lens Shots
Camera shake gets worse as focal length increases, which is why a 600mm lens punishes sloppy handholding technique far more harshly than a 50mm ever would. A useful rule of thumb ties minimum handheld shutter speed to focal length, so a 400mm lens wants at least 1/400s and a 600mm lens wants at least 1/600s before you even factor in subject motion.
Bean bags win for vehicle-based shooting. Drape one over a window ledge and you get instant, adjustable support with zero setup time.
Monopods win when you’re moving between spots frequently but still want more support than handholding alone.
Tripods with a gimbal head win for stationary, extended sits, especially with lenses over 500mm where the weight becomes genuinely tiring within twenty minutes.
Modern IBIS and optical stabilization can add two to four stops of usable shutter speed on top of good handholding form, which sometimes lets you skip a tripod entirely in decent light.
Cold and wet conditions add a second layer of concern that’s easy to overlook. Moving a cold camera straight into a warm vehicle or house invites condensation on and inside the lens, which can take hours to clear and occasionally causes lasting damage. Seal the camera in a bag before bringing it in from the cold and let it acclimate slowly, guidance echoed across field-tested wildlife photography tutorials. Carry spare batteries in an inside jacket pocket in freezing temperatures, since cold drains charge far faster than the stated rating suggests.
Post-Processing Basics for Wildlife Images
Editing wildlife photos rewards restraint more than any other genre. The goal is a natural-looking result that still reads as sharp and clean on a screen or in print, not a heavily processed look that draws attention to itself.
Work through RAW files in a consistent order: correct exposure first, recover blown highlights on bright fur or feathers, then apply targeted sharpening to the eye and face rather than the whole frame. Noise reduction should come after sharpening, using enough luminance smoothing to clean up shadow noise without erasing fine feather or fur detail, since aggressive noise reduction tends to leave a waxy, artificial texture.
Correct exposure and white balance before touching anything else.
Recover highlight detail in bright areas like white plumage or snow, since blown highlights can’t be recovered later.
Sharpen selectively, focusing on eyes and facial detail rather than applying a blanket sharpen across the frame.
Apply noise reduction last, and check the result at 100% zoom before deciding it’s enough.
Crop to tighten a composition when the story is the animal itself, but preserve environmental context when the habitat adds to the narrative.
Disclose any significant manipulation, cropping-out of distracting elements aside, or staged setups in your caption, since honesty about how an image was captured is part of ethical practice, not an optional extra.
A tight crop can rescue a distant sighting, but cropping too aggressively degrades resolution and can introduce noise that wasn’t visible in the full frame. Check your final export at real-world viewing size before deciding a crop went too far.
Practice Drills That Build Real Wildlife Photography Skills
Skill in this genre comes from repetition between real outings, not just from the outings themselves. A local park, zoo, or even a bird feeder in your yard is a legitimate practice ground for the mechanics you’ll need in the field.
Run five-minute observation sessions before ever lifting the camera, training yourself to read behavior cues before reacting to them.
Practice timed burst-and-tracking drills on moving subjects like dogs at a park or pigeons in flight to build muscle memory for AF tracking.
Keep a simple settings log after each session: what shutter speed, aperture, and ISO you used and how the results turned out.
Review your five best and five worst frames from every outing and write down specifically why each one succeeded or failed.
Schedule waits deliberately rather than treating them as wasted time. Sitting still for forty minutes near a den or nest site often produces the best material of the entire trip.
Rotate between subjects across seasons so you’re not always chasing the same species and burning out on repetitive results.
Patience tactics matter as much as technical drills. Respecting your own energy budget, and knowing when to call a session rather than push into fading light or fading focus, keeps you sharp for the next opportunity instead of forcing a mediocre one now.
Your Pre-Shoot and In-Field Checklist
Print this or save it to your phone for a fast reference before and during a shoot.
Before you leave:
Confirm permits or land-access permissions for your location.
Check sunrise/sunset times and cloud forecast.
Tell someone your route and expected return time.
Charge batteries, format cards, pack offline maps and a headlamp.
Camera quick-check:
Mode set to manual with Auto ISO enabled.
Auto ISO ceiling set for your camera’s noise tolerance.
Shutter-speed floor matched to expected subject motion.
AF-C engaged, back-button focus assigned, subject-detection on if available.
In the field:
Observe before shooting; watch for stress signals.
Never block an animal’s escape route or den entrance.
Reassess distance and animal behavior every five minutes.
Back off immediately at the first sign of the One-Flush Rule.
Reading Behavior Before It Happens
The photographers who consistently capture peak action aren’t reacting faster than everyone else. They’re anticipating, because they’ve learned to read the tells that precede movement. A bird crouching and shifting its weight forward is about to launch. A deer’s ears rotating and locking toward a direction means it’s heard something and is about to move or bolt. A predator’s slow, low-shouldered stalk looks completely different from casual walking, and once you’ve seen the difference a few times, you’ll spot it from far greater distances.
Field professionals who spend the most time in blinds consistently point out that anticipating an animal’s path, rather than chasing its current position, produces both better images and less disturbance, a pattern documented across wildlife photography fieldwork.
Vocalizations carry information too. Alarm calls from songbirds often signal an approaching predator well before you’d see it yourself, and a sudden silence across a previously noisy area can mean the same thing. Watch other animals in the frame, not just your primary subject; a flock of shorebirds all turning to face one direction usually means something’s coming.
Feeding behavior has its own rhythm. Most grazing and foraging animals lift their heads periodically to scan for threats, then return to feeding in a predictable cycle. Time your shutter for the head-up moment if you want alert, eye-contact shots, or for the head-down moment if you want natural, undisturbed behavior shots. Learning these cycles for your target species turns a waiting game into an informed bet.
Camouflage, Blinds, and Getting Closer Without Getting Closer
Getting a tighter shot doesn’t have to mean walking nearer to the animal. Camouflage and blinds let you close the visual gap while keeping your physical footprint exactly where it started, which is the entire point.
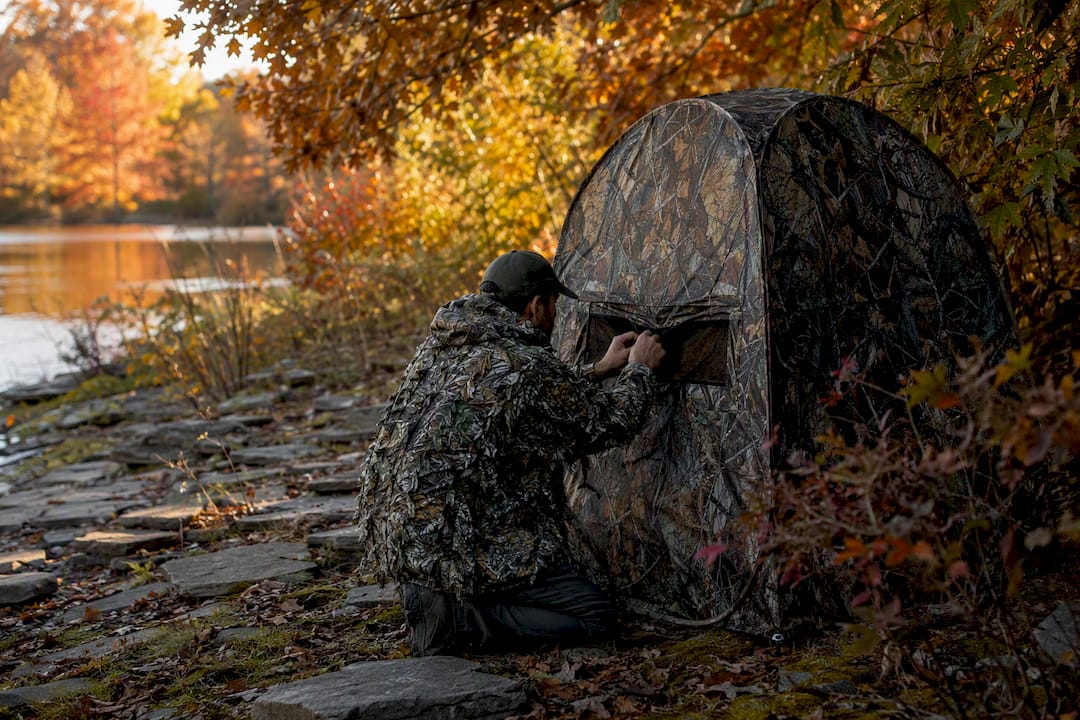
A simple camo poncho or a portable pop-up blind breaks your outline and dramatically reduces how quickly wary species notice you. Ground blinds work especially well near known feeding or watering sites where animals already have an established routine, since you’re not asking them to accept anything new, just to ignore a shape that wasn’t there yesterday.
Scent and movement matter as much as visual pattern. Staying downwind, moving slowly, and avoiding sudden gestures does more for a mammal’s comfort level than the pattern on your jacket ever will, since most mammals rely on smell and motion detection far more than fine visual detail.
Vehicles function as an effective mobile blind in many settings, since animals in areas with regular traffic often habituate to cars in a way they never would to a person on foot. Shooting from an open window with a bean bag support combines two advantages from earlier in this guide: stability and concealment in one setup.
Thrillofit’s guide on wilderness camouflage breaks down the specific visual signatures, like shape, shine, and shadow, that give away a hidden photographer even when the pattern itself looks convincing. Remote trail cameras take this concept to its logical end: zero human presence at all during capture, at the cost of giving up real-time compositional control.
Legal Rules and Permits Every Wildlife Photographer Should Know
Access rules for wildlife photography vary significantly by land type, and assuming a location is open because a trail looks unmarked is a common, avoidable mistake. National parks generally allow casual photography without a permit, but commercial shoots, drone use, and access to closed backcountry zones typically require separate authorization from the managing agency.
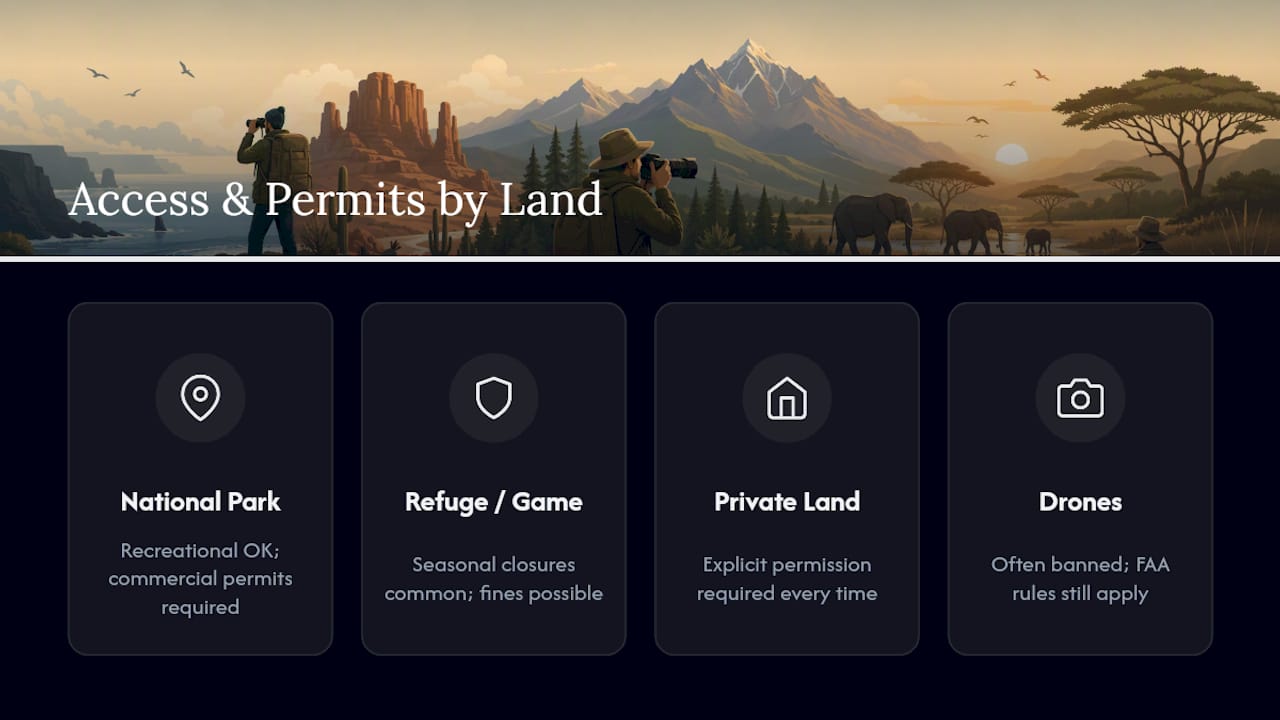
National wildlife refuges and state game lands often carry more restrictive seasonal closures than parks do, specifically to protect breeding and nesting periods, and violating those closures can carry real fines regardless of whether you knew the boundary existed. Always confirm current rules directly with the managing agency, whether that’s the National Park Service, U.S. Fish and Wildlife Service, or a state wildlife agency, rather than relying on a blog post or a previous visit’s memory.
Private land requires explicit permission every time, and “no trespassing” enforcement in wildlife-rich areas has gotten notably stricter in many states in recent years. Drone photography adds its own layer of regulation on top of general access rules, since many parks and refuges ban drones outright regardless of your purpose, and Federal Aviation Administration rules apply independently of any land-use permission you’ve secured.
If you plan to sell images commercially, some agencies require a separate commercial-use permit even when recreational photography is unrestricted, so check before you plan a shoot around a location you intend to monetize.
What Most Wildlife Photography Advice Gets Wrong
Most guides treat gear and camera settings as the whole story, then tack ethics onto the end as a courtesy paragraph. That ordering is backwards. The best wildlife photographers aren’t the ones with the sharpest 600mm lens; they’re the ones who’ve trained themselves to read an animal well enough that the animal never changes its behavior because of them. Everything else, the shutter speed cheat sheet, the Auto ISO ceiling, the gimbal head, is in service of that one skill.
There’s also a persistent myth that more reach solves every problem. It doesn’t. A 600mm lens on an impatient photographer who won’t sit still for twenty minutes produces worse images than a 300mm lens on someone willing to wait. Distance from an animal matters less than the animal’s perception of your intent, and that perception is built through stillness and predictability, not focal length.
Camouflage and blinds get overlooked because they’re less exciting to shop for than a new lens. But a $40 pop-up blind near a known feeding site will outperform a $10,000 lens rushed into position from a poor angle almost every time. Build the fieldcraft first. The gear amplifies skill; it doesn’t replace it.
— S
Keep Building Your Field Skills With Thrillofit
Wildlife photography and wilderness competence go hand in hand, and Thrillofit exists to help you build both without piecing advice together from a dozen unrelated sources. Where a camera store can sell you a lens, Thrillofit gives you the field context that makes that lens worth carrying: how to read a landscape, respect a boundary, and come home safely regardless of what you photographed.
If you’re heading somewhere with predators or large mammals, read the wildlife encounter guidelines before you go, not after something goes wrong. Curious about what animal left that print near your blind site? The wildlife tracks identification guide turns guesswork into a quick field skill. Visit Thrillofit to start building the wilderness knowledge that makes every future shoot safer and more productive.
Sources
Recommended
Comments